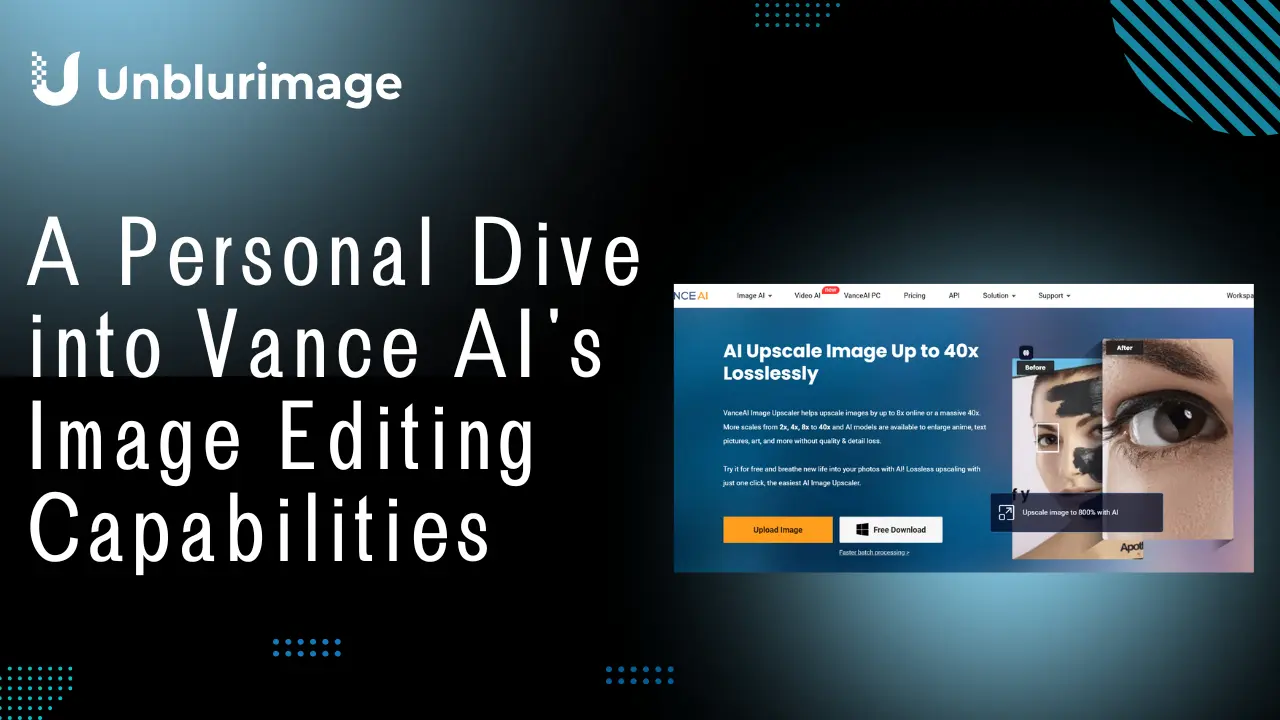

A Personal Dive into Vance AI's Image Editing Capabilities
In the ever-evolving world of digital photography, having a reliable photo editor is akin to having a trusty sidekick. Enter Vance AI Photo Editor—a tool that promises to elevate your images with minimal effort. But does it truly deliver? Let's embark on this journey together and find out.
First Impressions
Upon launching Vance AI Photo Editor, I'm greeted with a sleek, user-friendly interface. It's like walking into a well-organized art studio; everything is where you'd expect it to be, making the creative process feel intuitive and enjoyable.
Exploring the Features
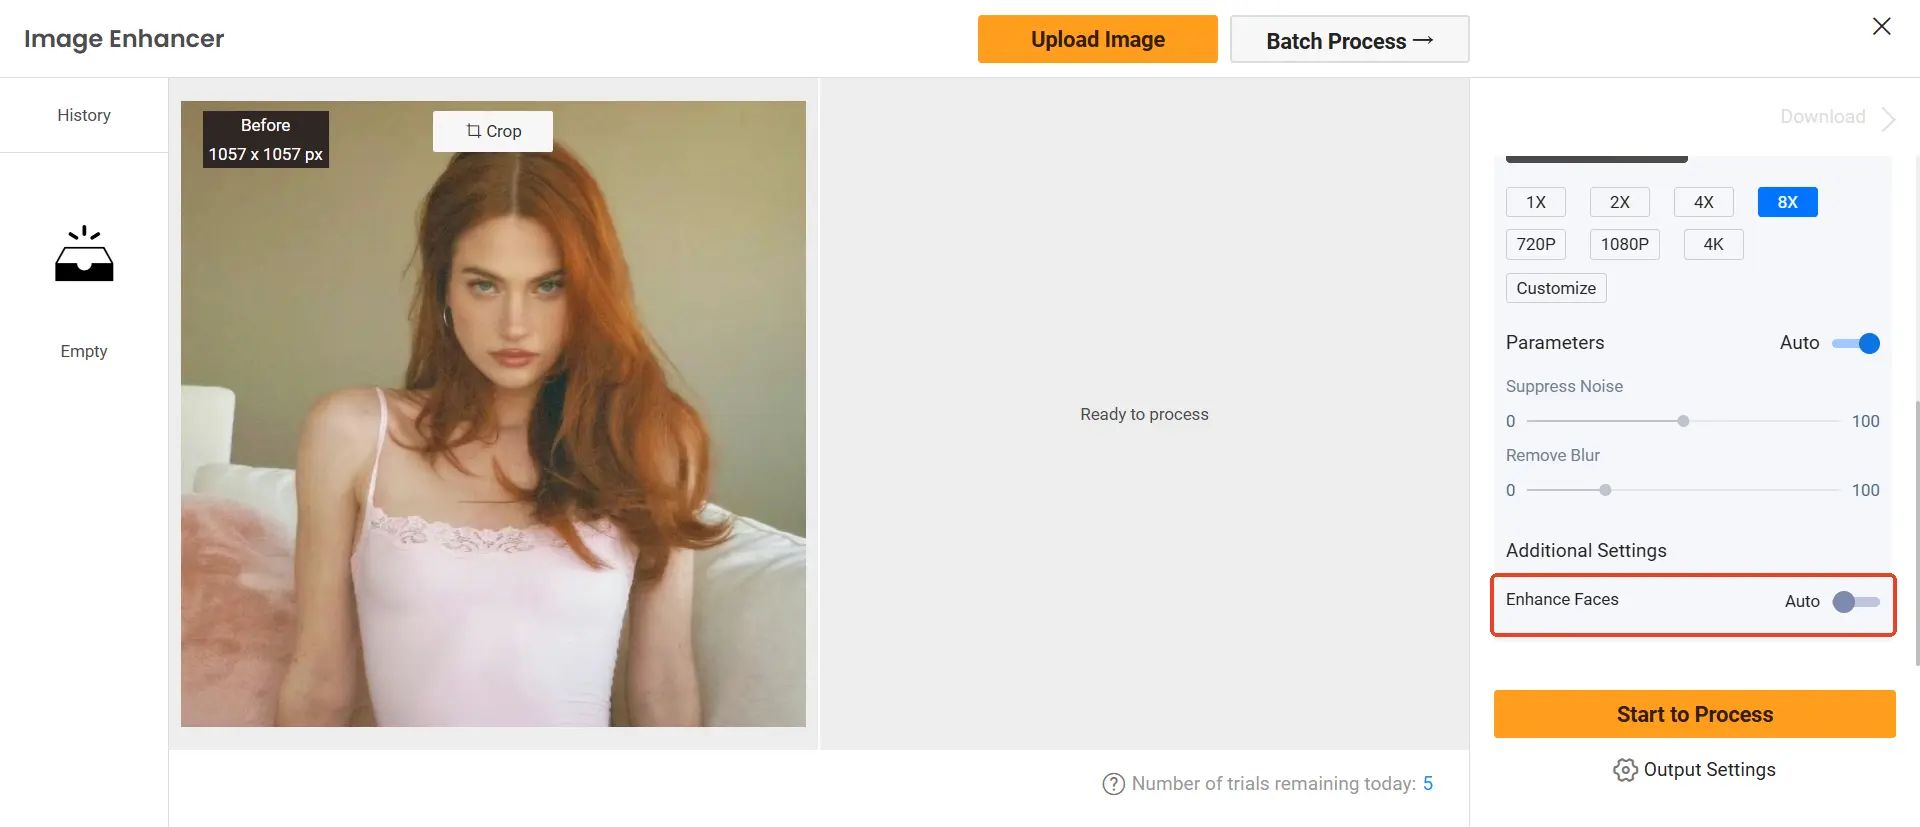
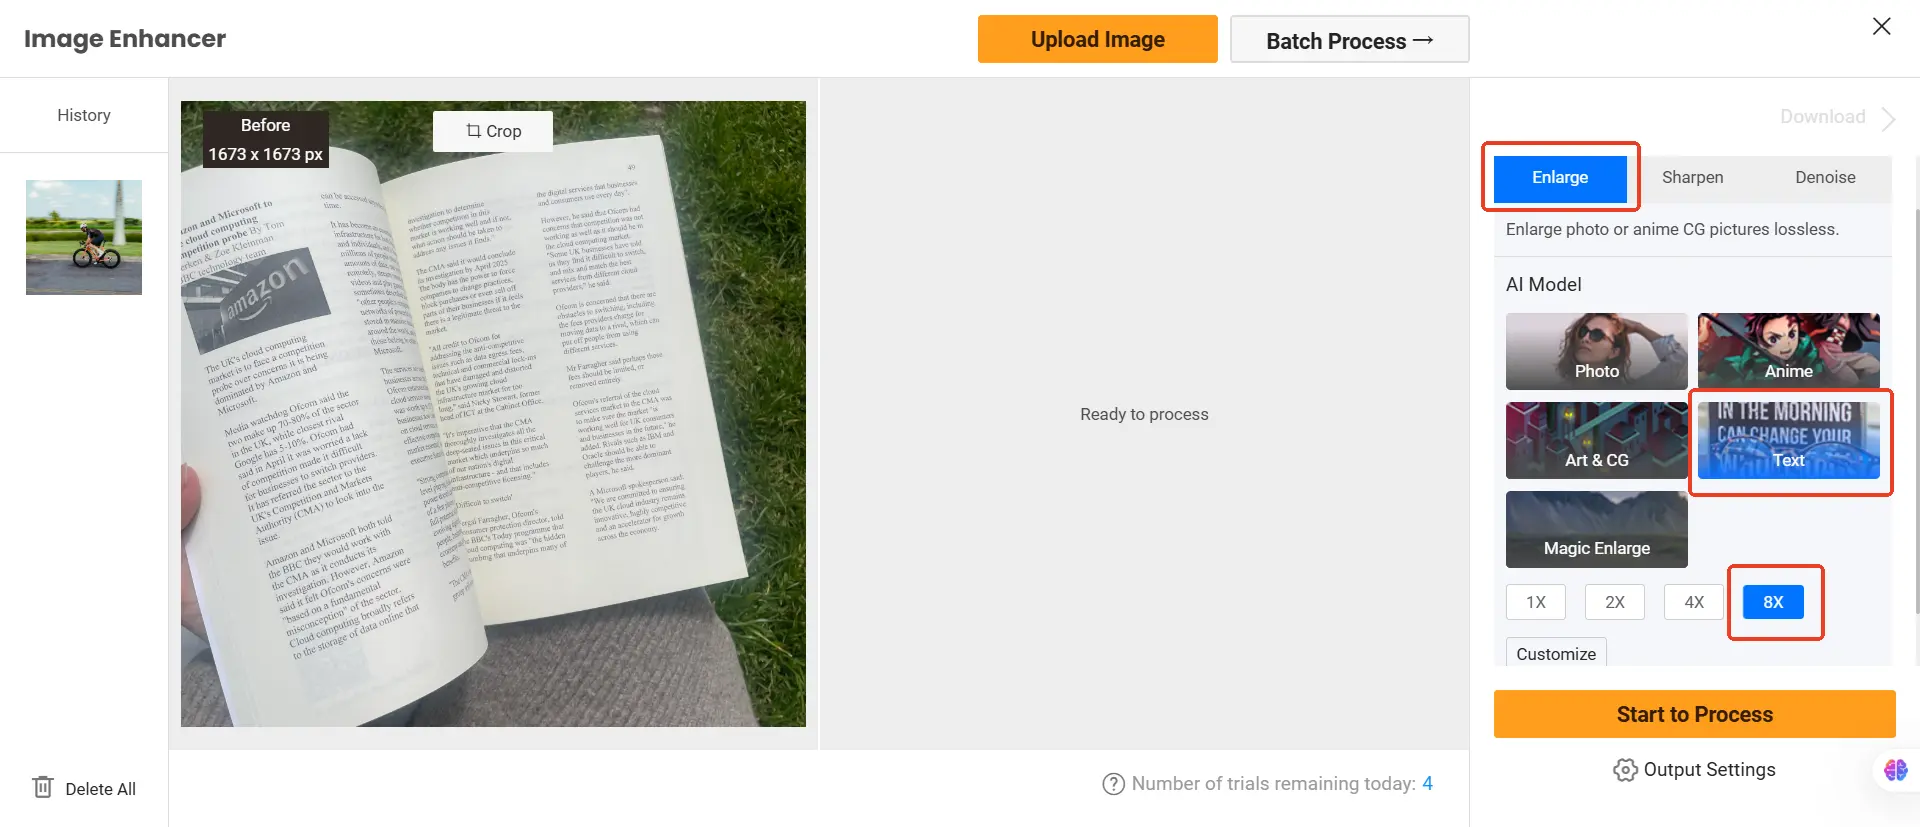
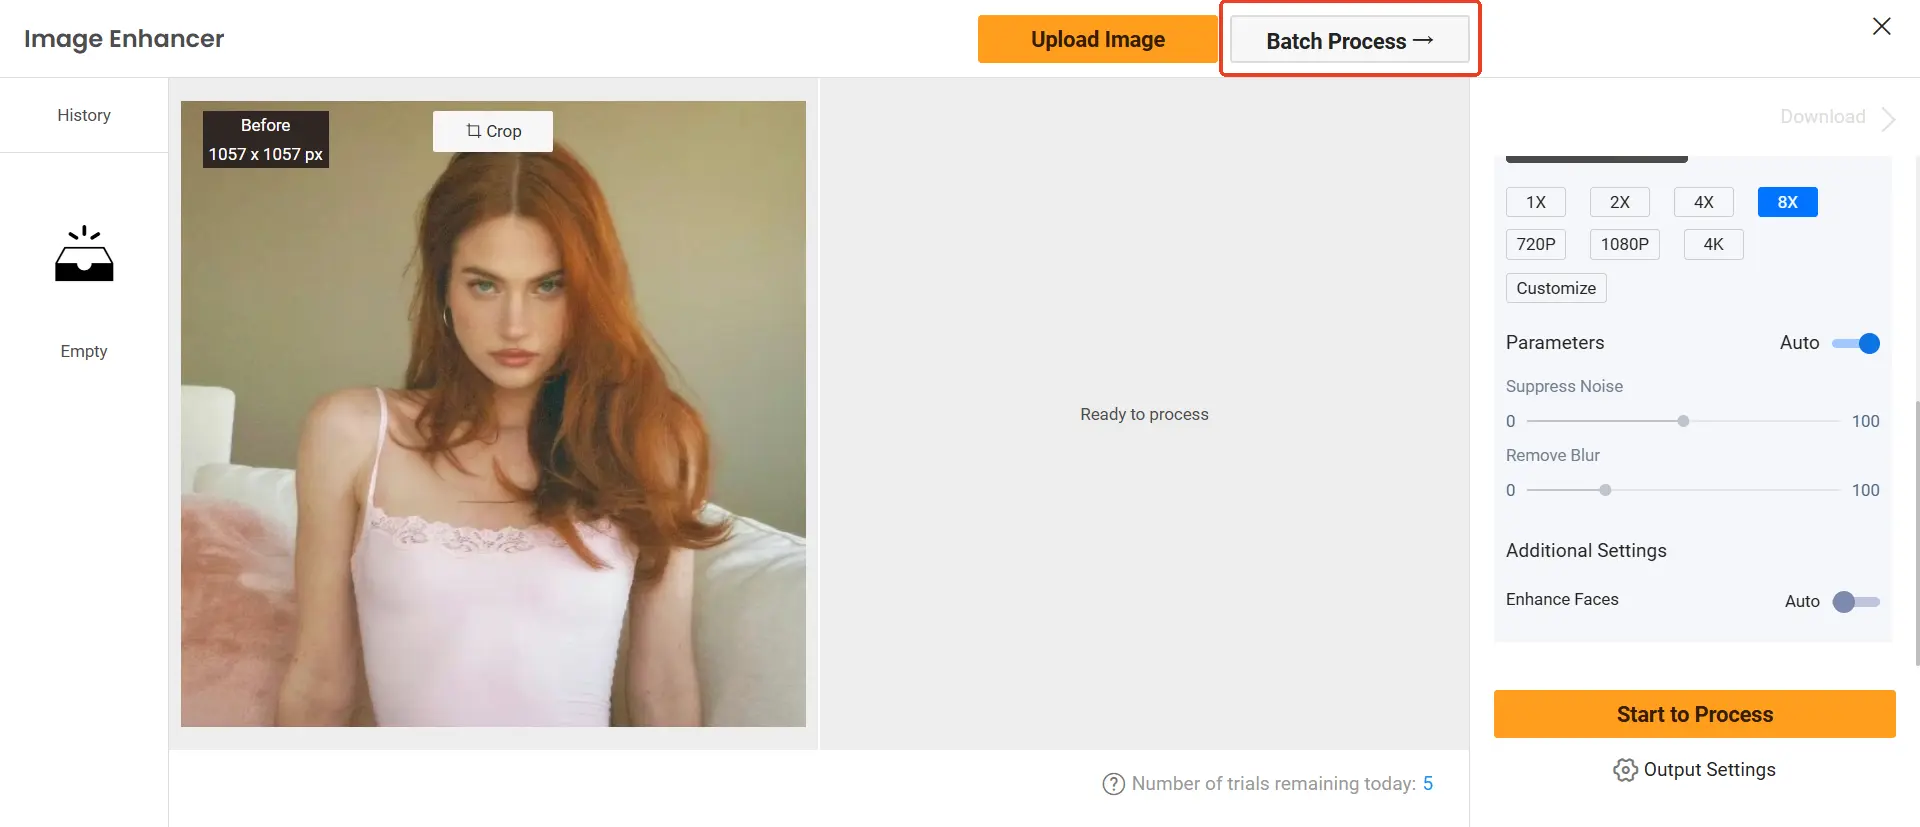
Vance AI offers three primary editing modes: Enlarge, Sharpen, and Denoise. Each mode is equipped with specialized AI models tailored to different editing needs.
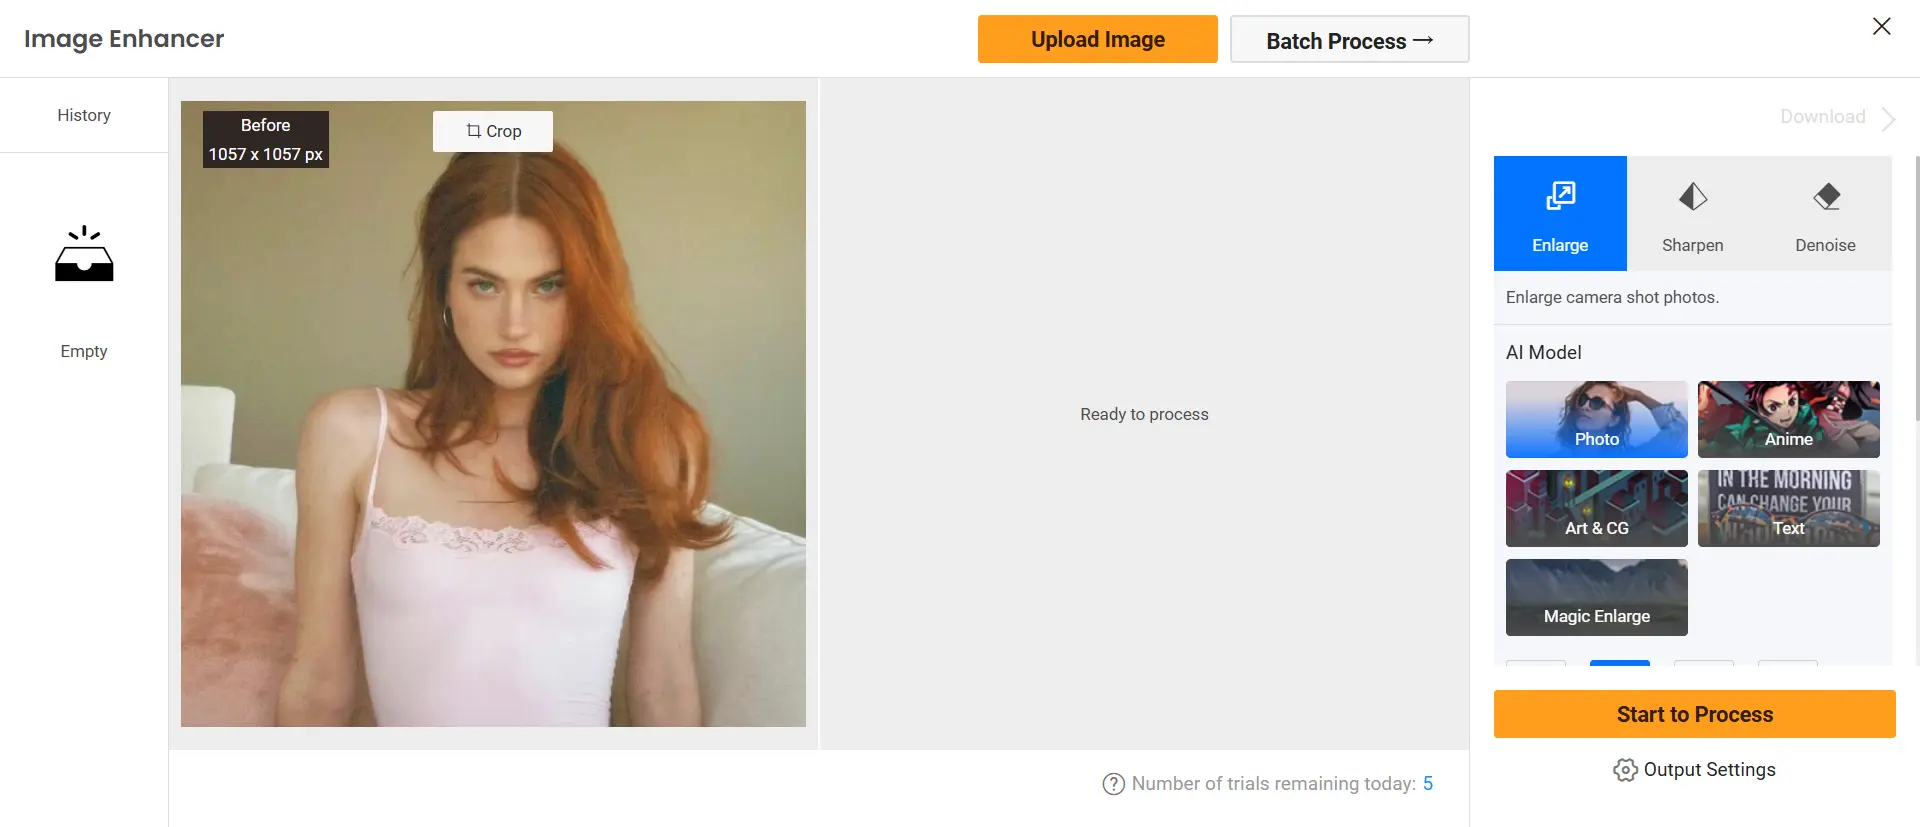
Enlarge Mode
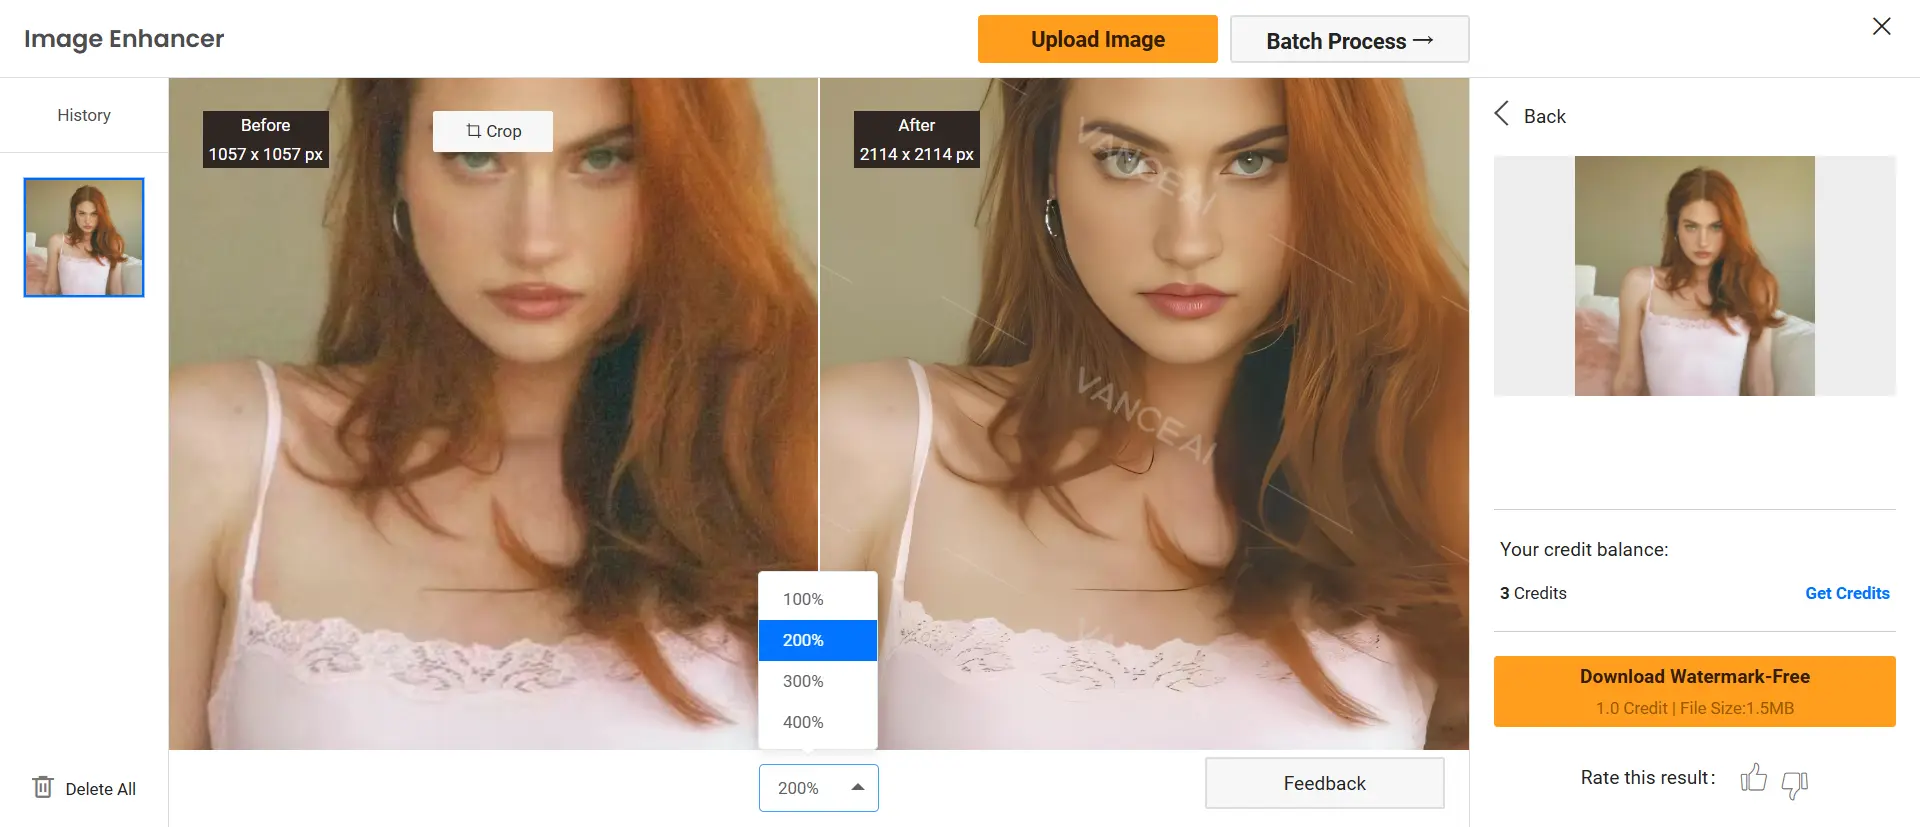
This feature is designed to upscale images without compromising quality. It's like having a magnifying glass that not only enlarges but also enhances the details.
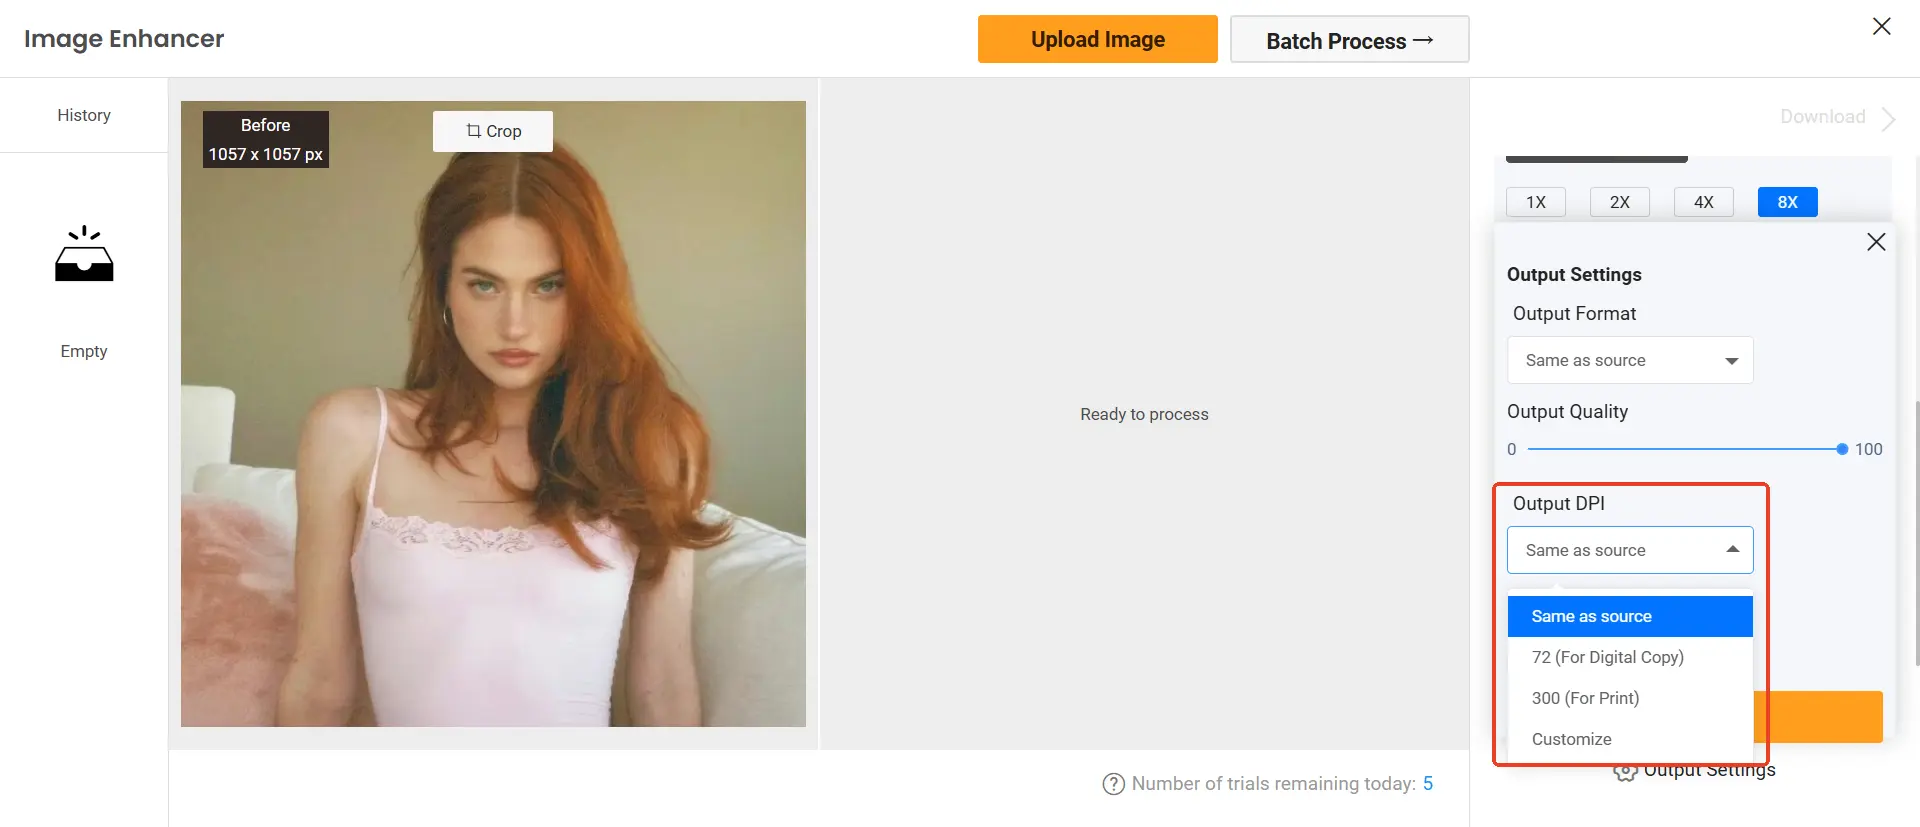
- Photo Model: Offers scaling options of 1x, 2x, 4x, and 8x.
You can also customize the output to specific resolutions like 720P, 1080P, or even 4K. What impressed me most was the option to define custom width and height (in pixels), making it incredibly versatile.
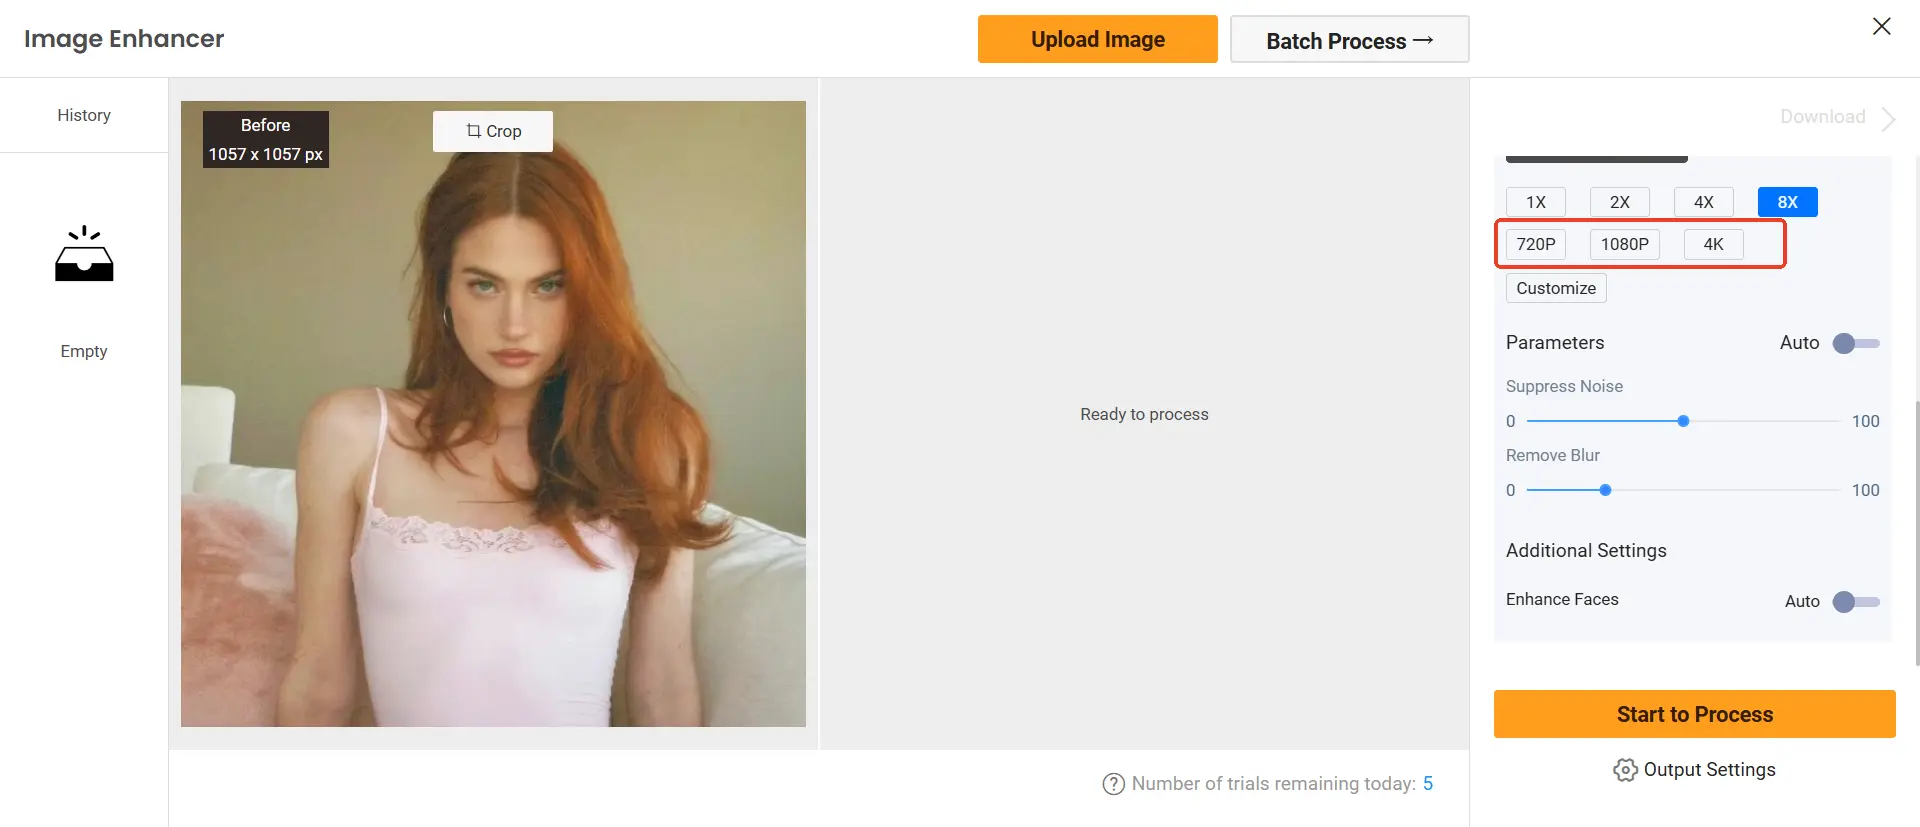

Of course, you can also use auto mode to let the AI analyze and process the image automatically.
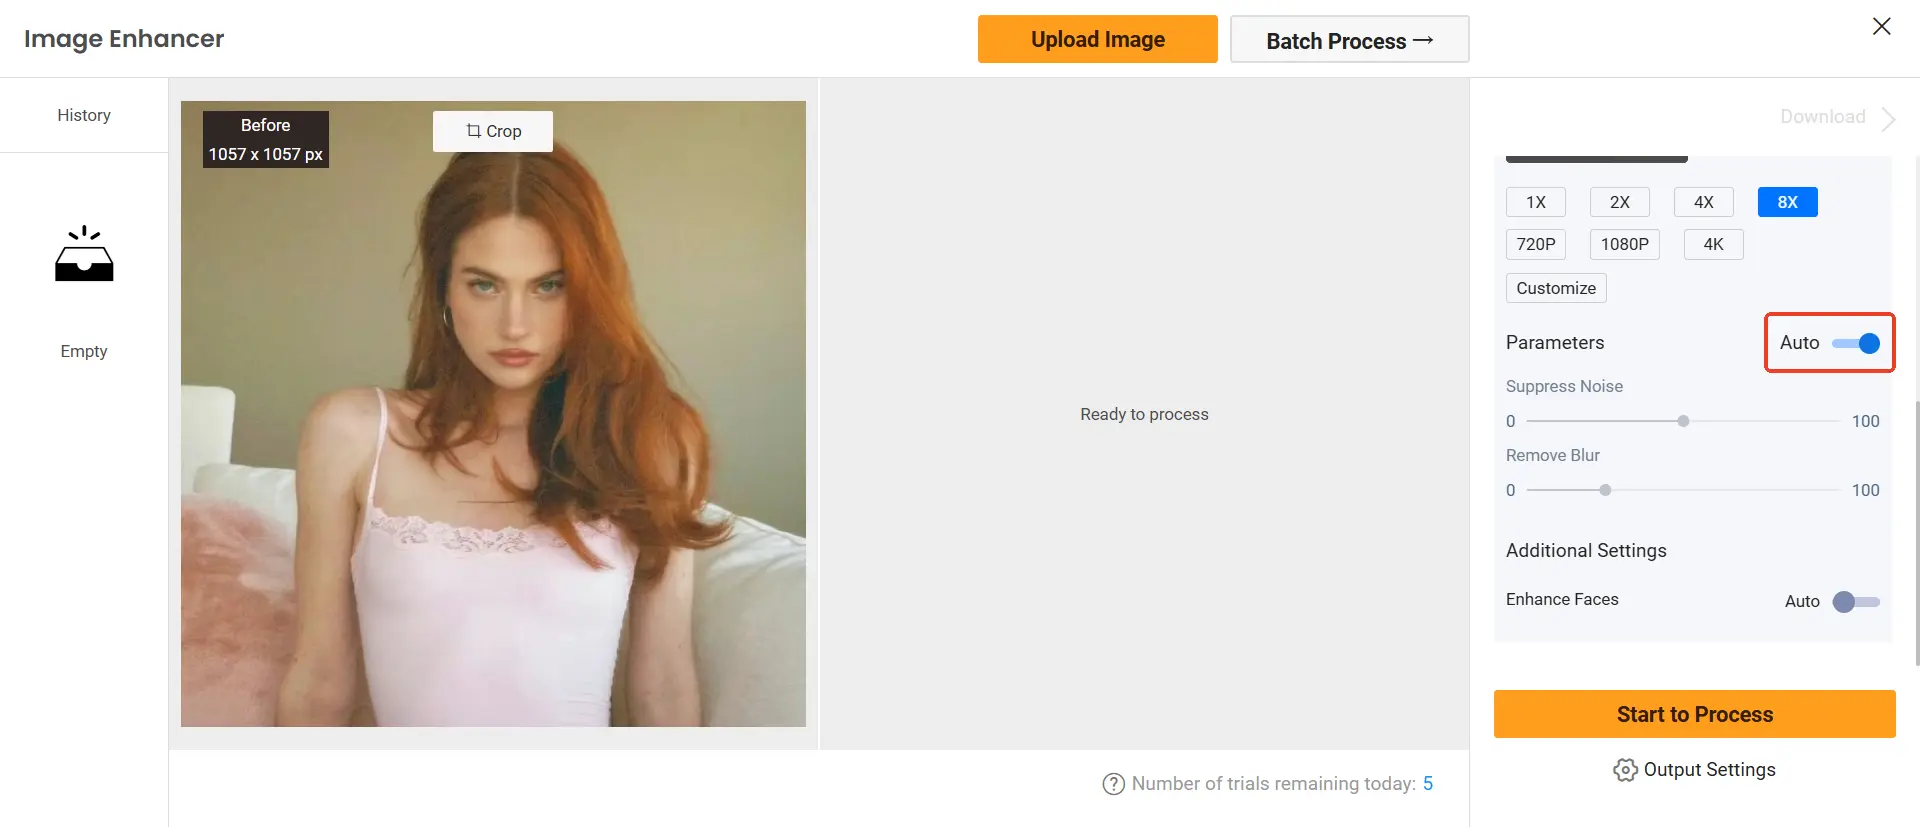
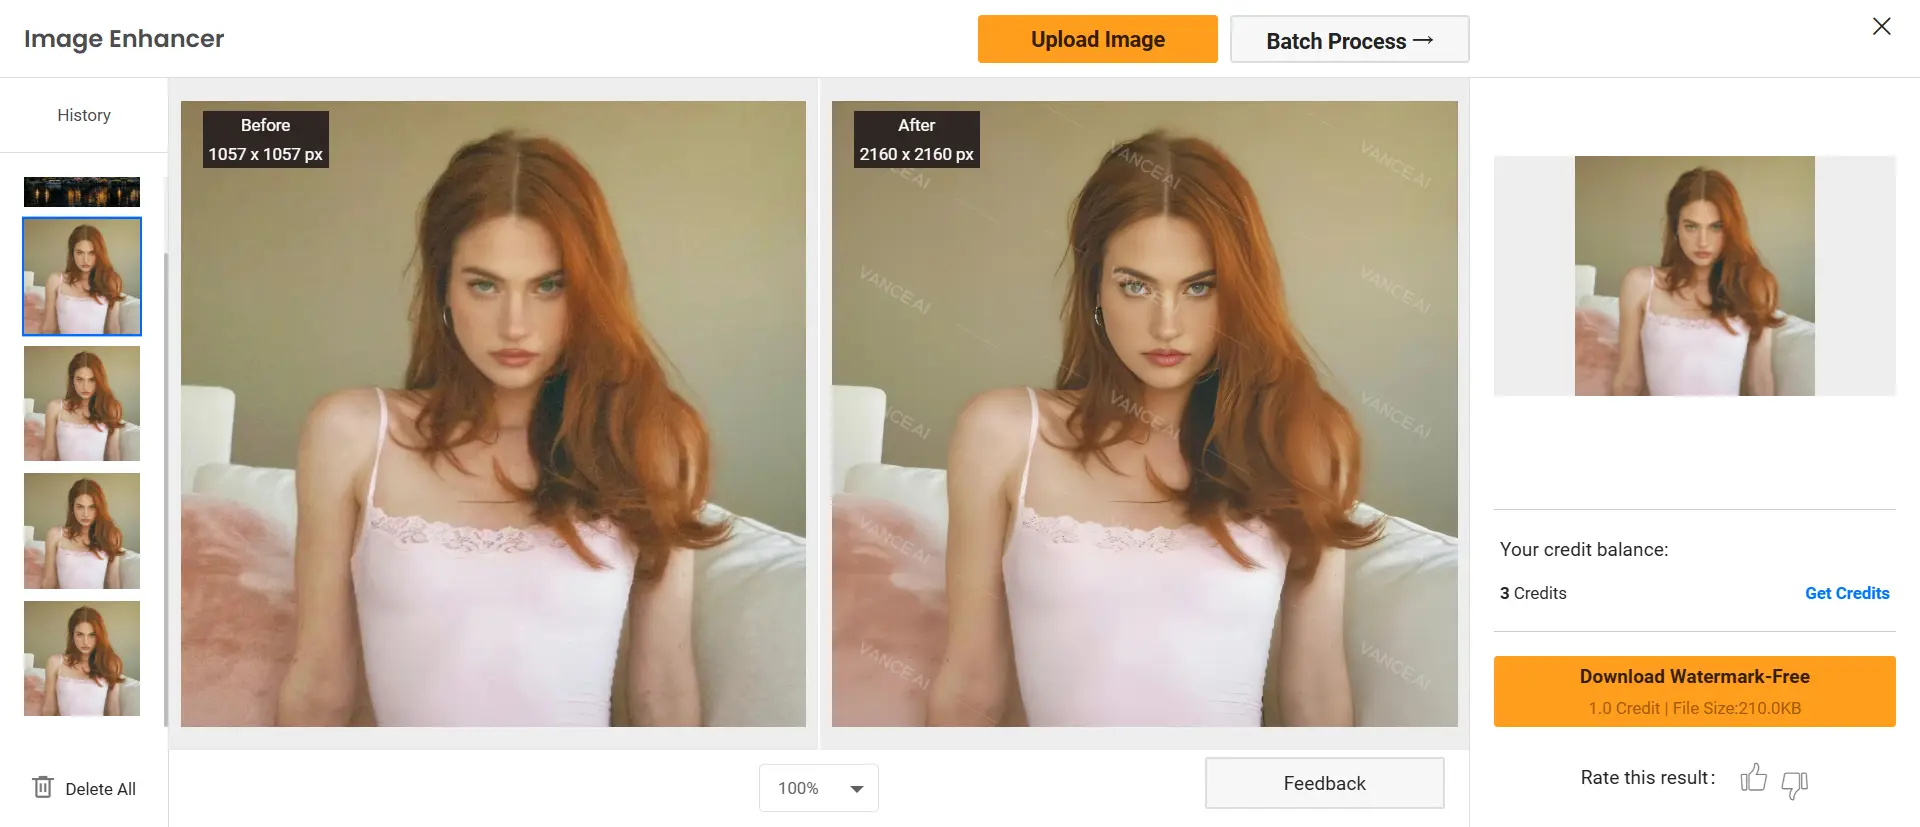
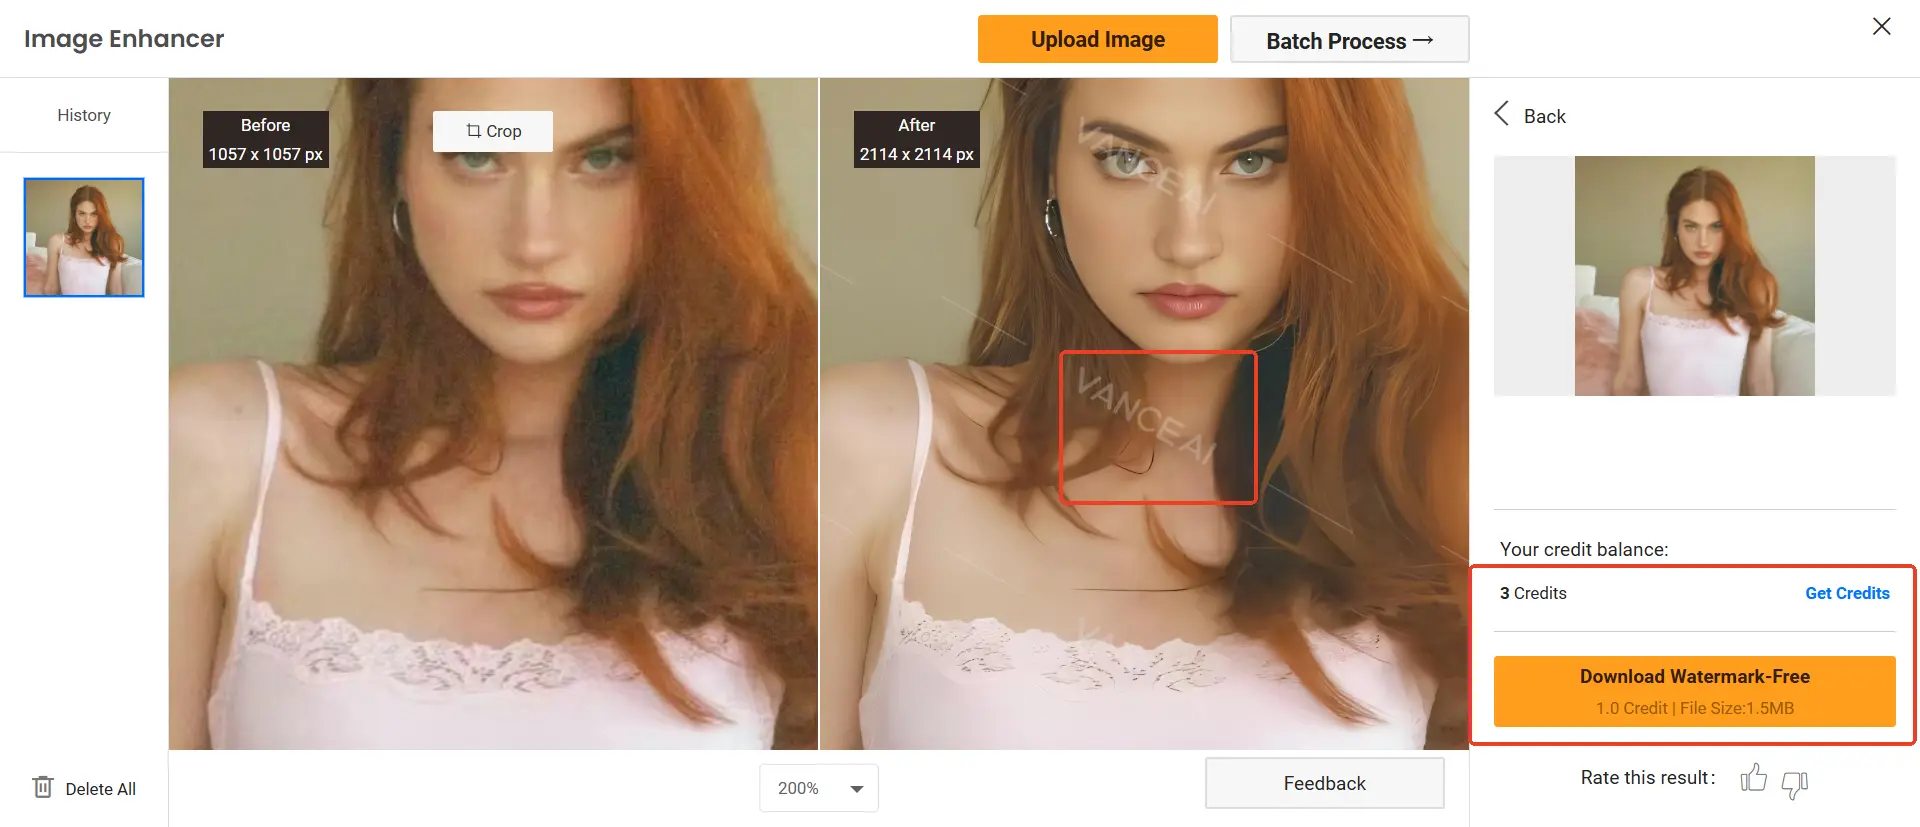
I tried the Photo Model on a portrait, opting for the AI auto-adjustment for noise suppression and blur removal. The result? A crisp, high-resolution image with enhanced facial details, thanks to the "Enhance Faces" option under advanced settings. This feature truly shines for portraits, maintaining natural skin tones without that overly airbrushed look.
- Anime Model: Perfect for fans of digital art, this model supports 2x, 4x, 6x, and 8x scaling, along with customizable sizes. I tested it on a fan art piece, and the upscaled version preserved the fine lines and vibrant colors, almost as if it were redrawn in higher resolution.
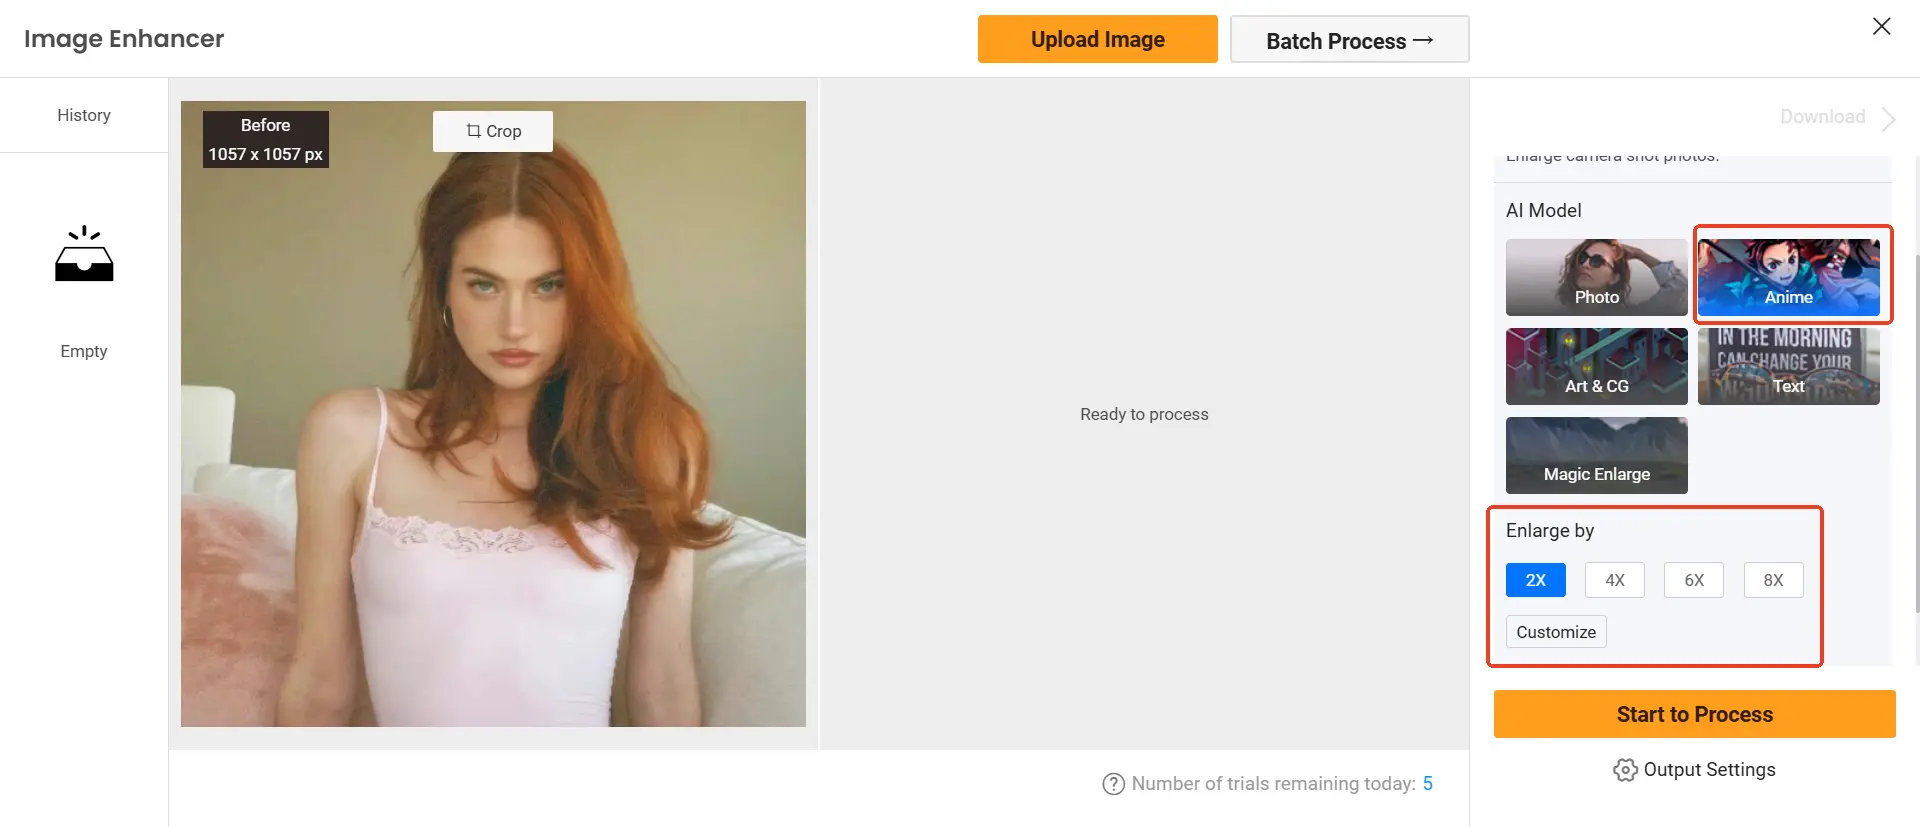
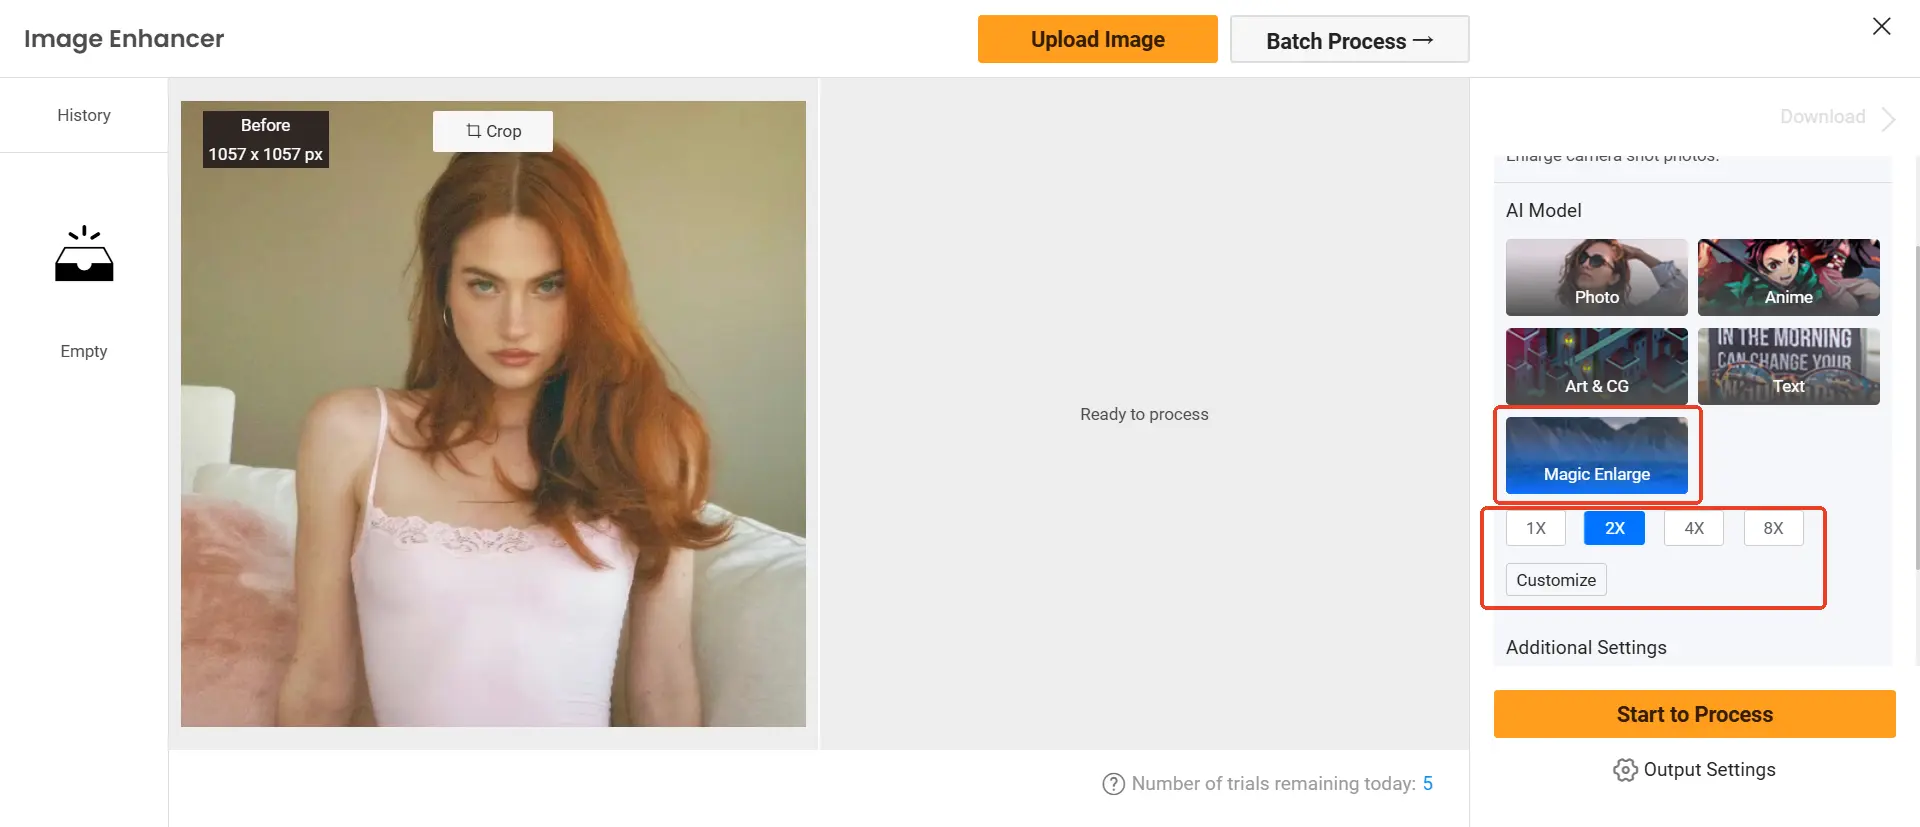
- Art & CG Model, Text Model, Magic Enlarge Model: All three support scaling up to 8x with custom dimensions. The Magic Enlarge Model stands out by allowing adjustments to denoising strength. It's ideal for complex digital artwork or graphics with intricate details.

I tried the enlargement of the text image and it worked great, I'm happy with it, it just changed the color temperature and tone of the image from a warm yellow to a cool white.
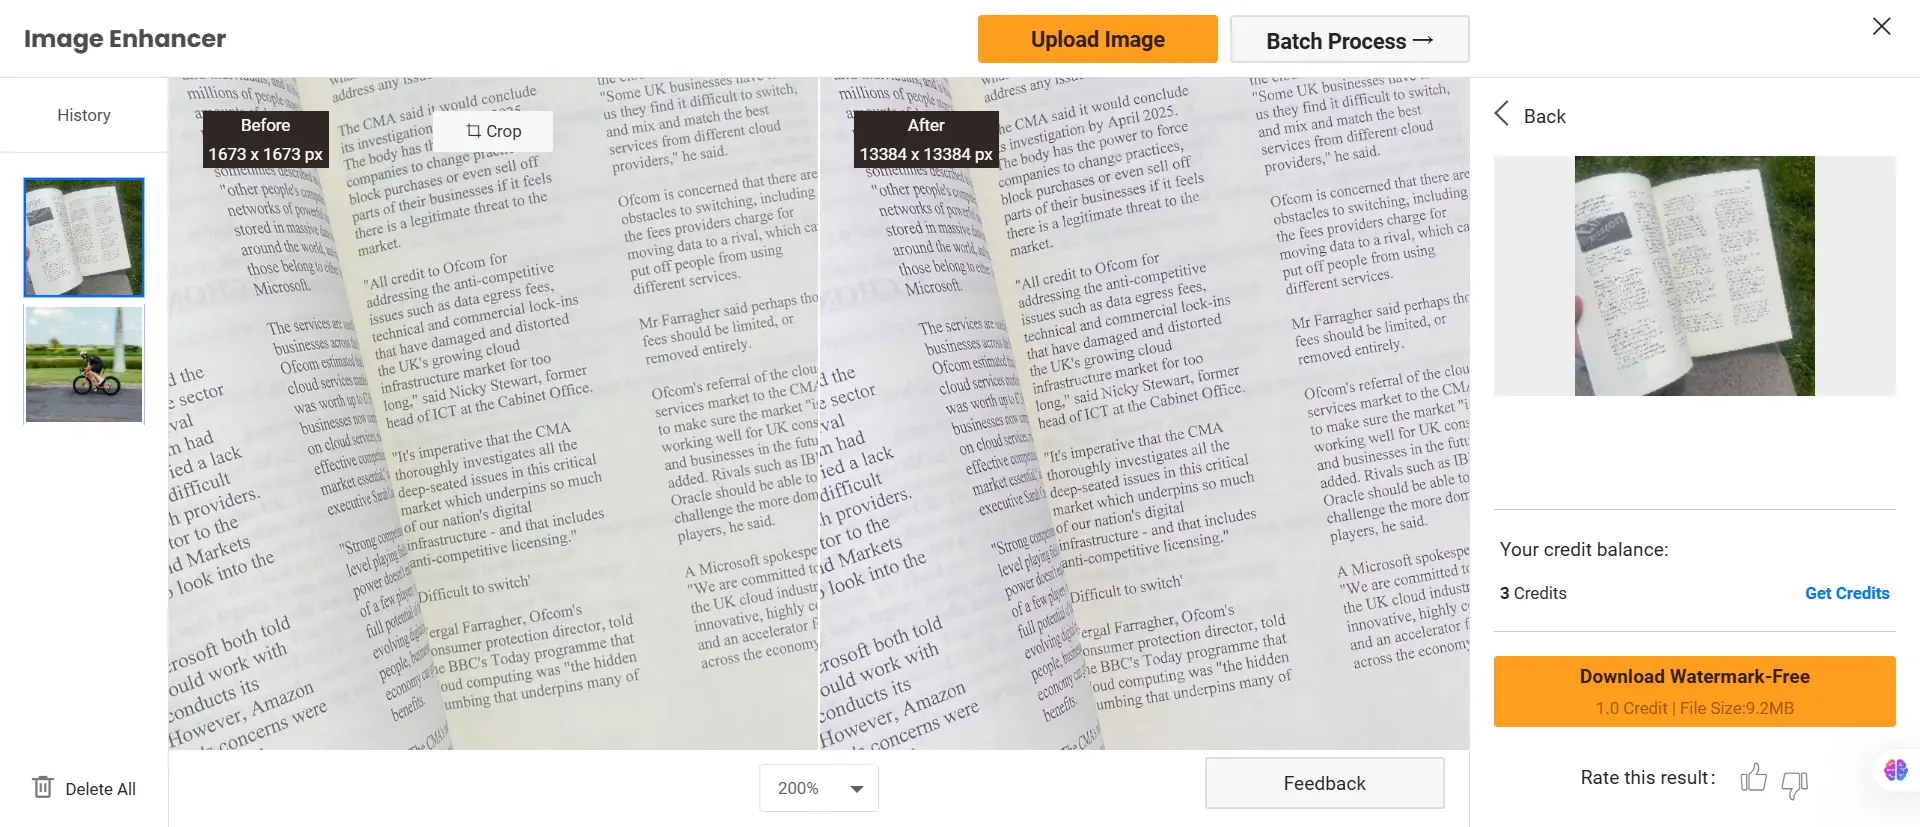
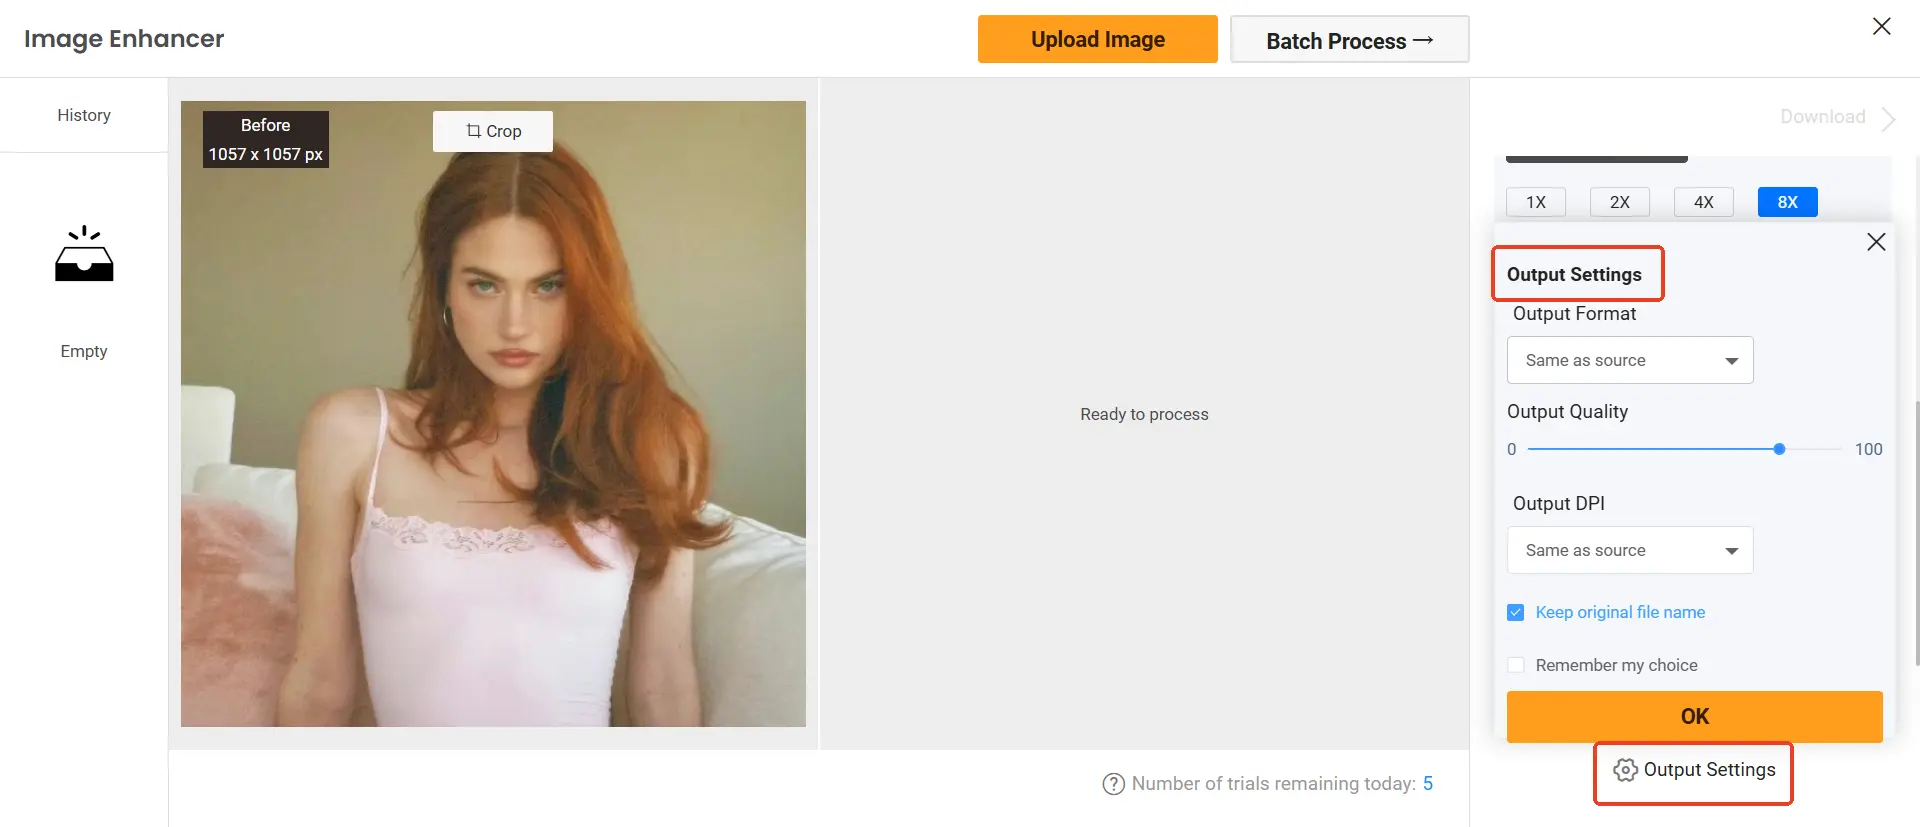
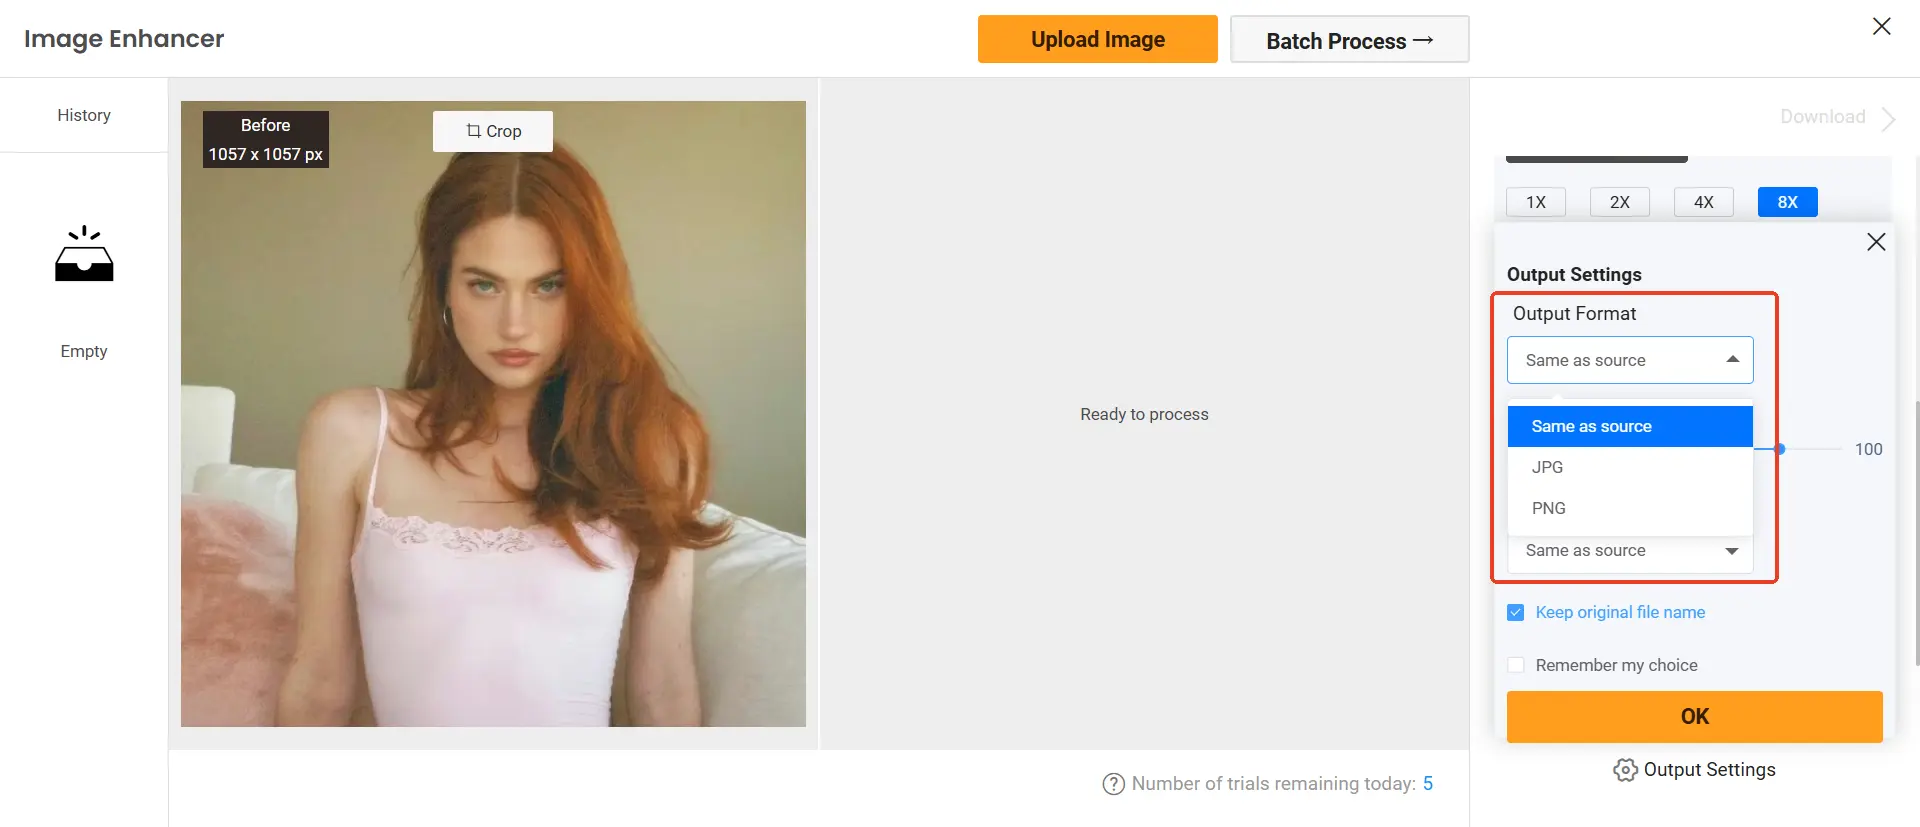
The flexibility in output settings—like choosing the format (JPG or PNG), quality, and even DPI—gives you complete control over the final result.
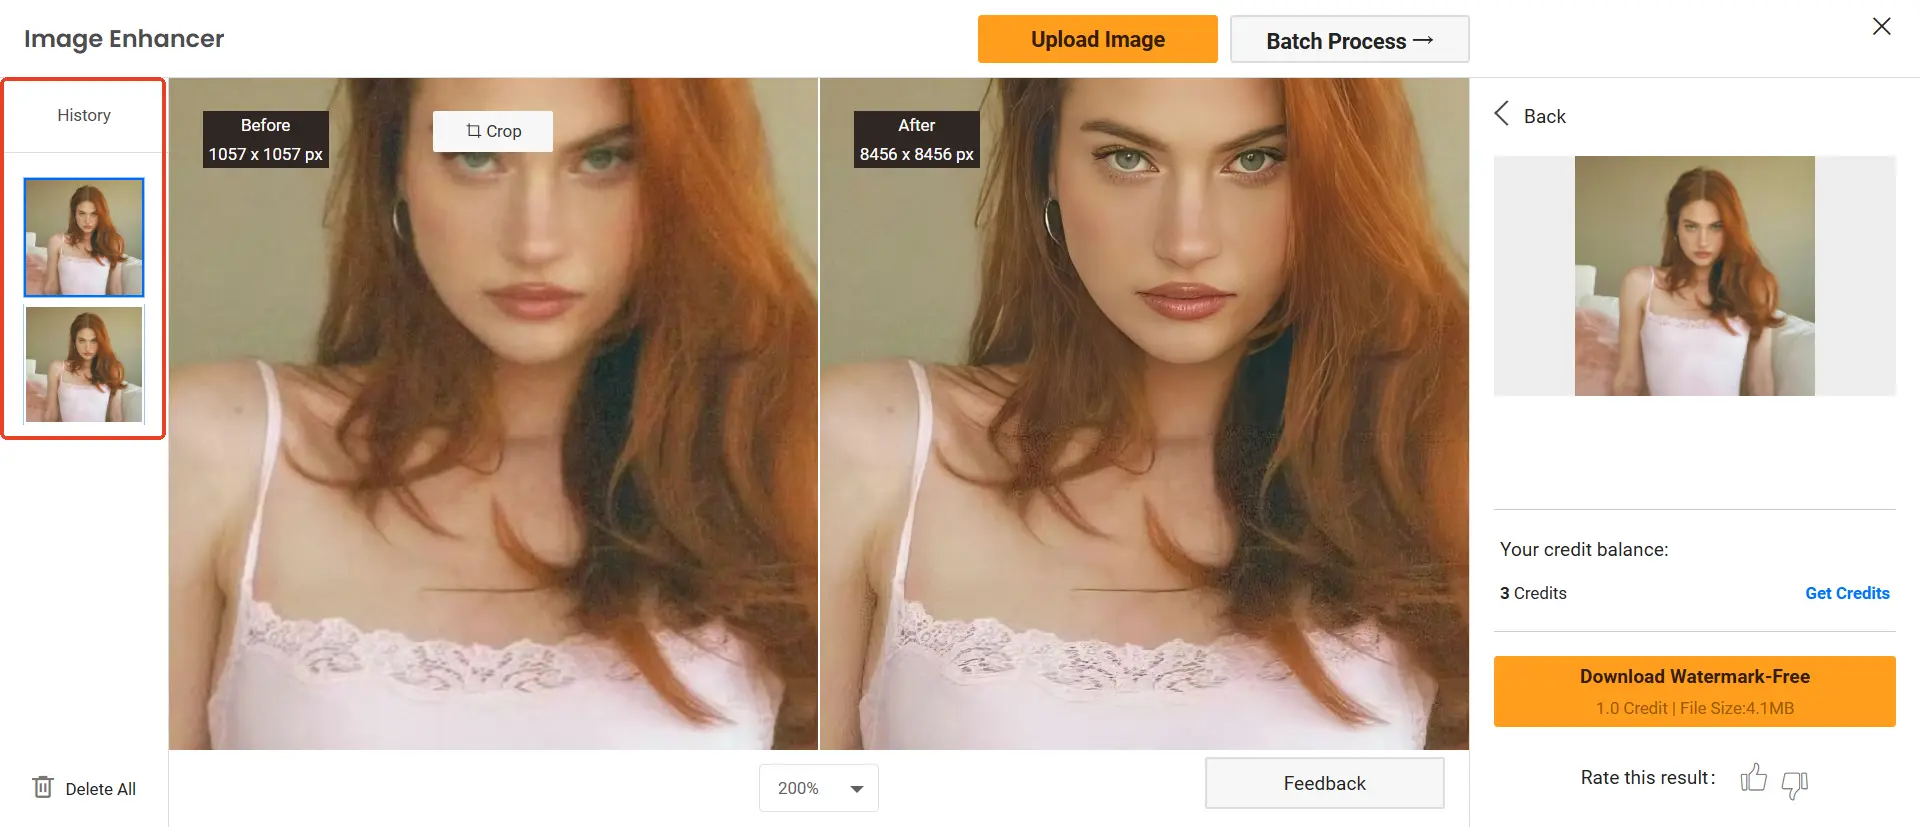
You can not only crop the size of the picture in the operation area, but also re-select the enlarged size of the picture after the picture is processed,You can also view your previously processed images in History on the left hand side which is full-featured and very user-friendly.

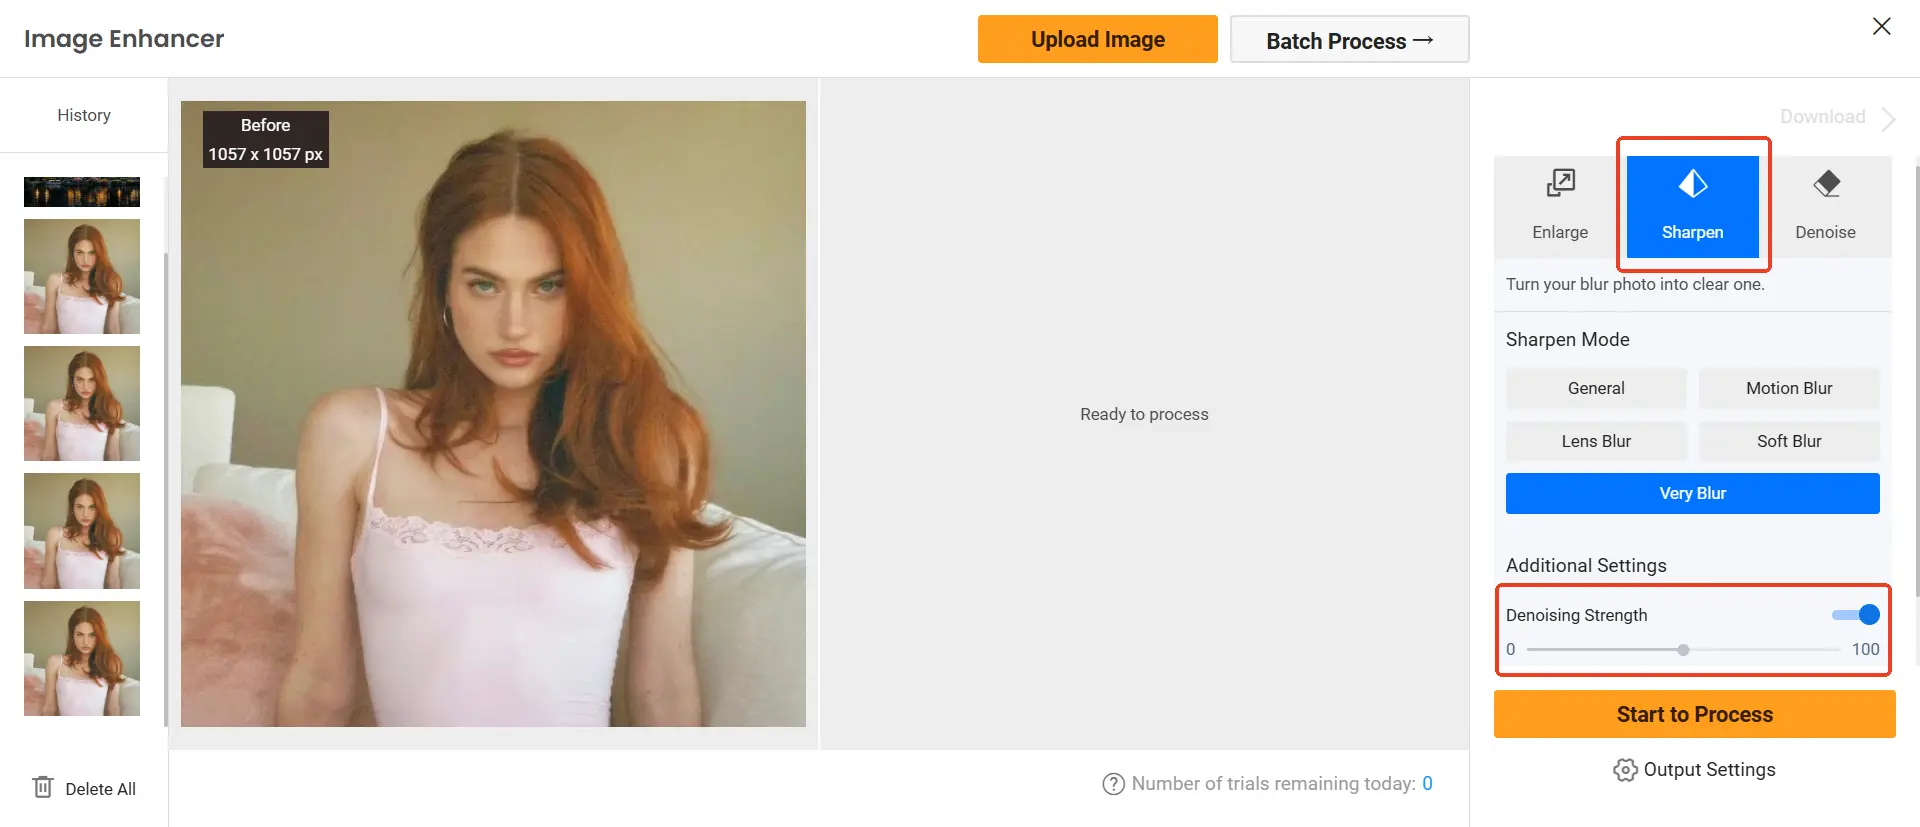
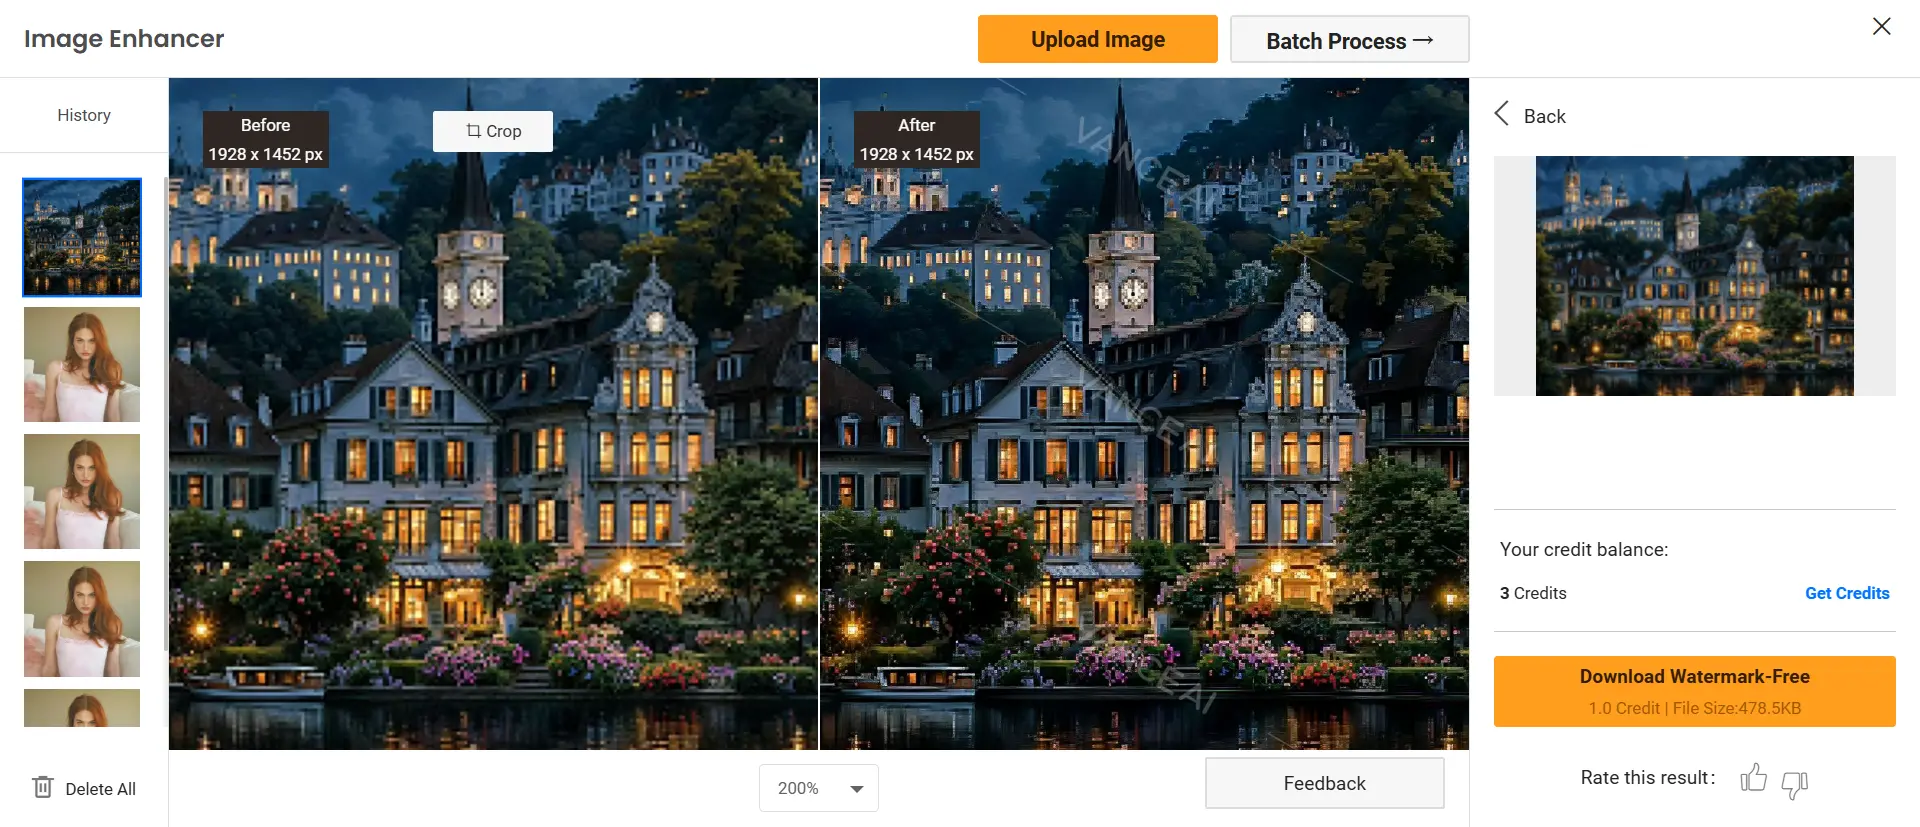
Sharpen Mode
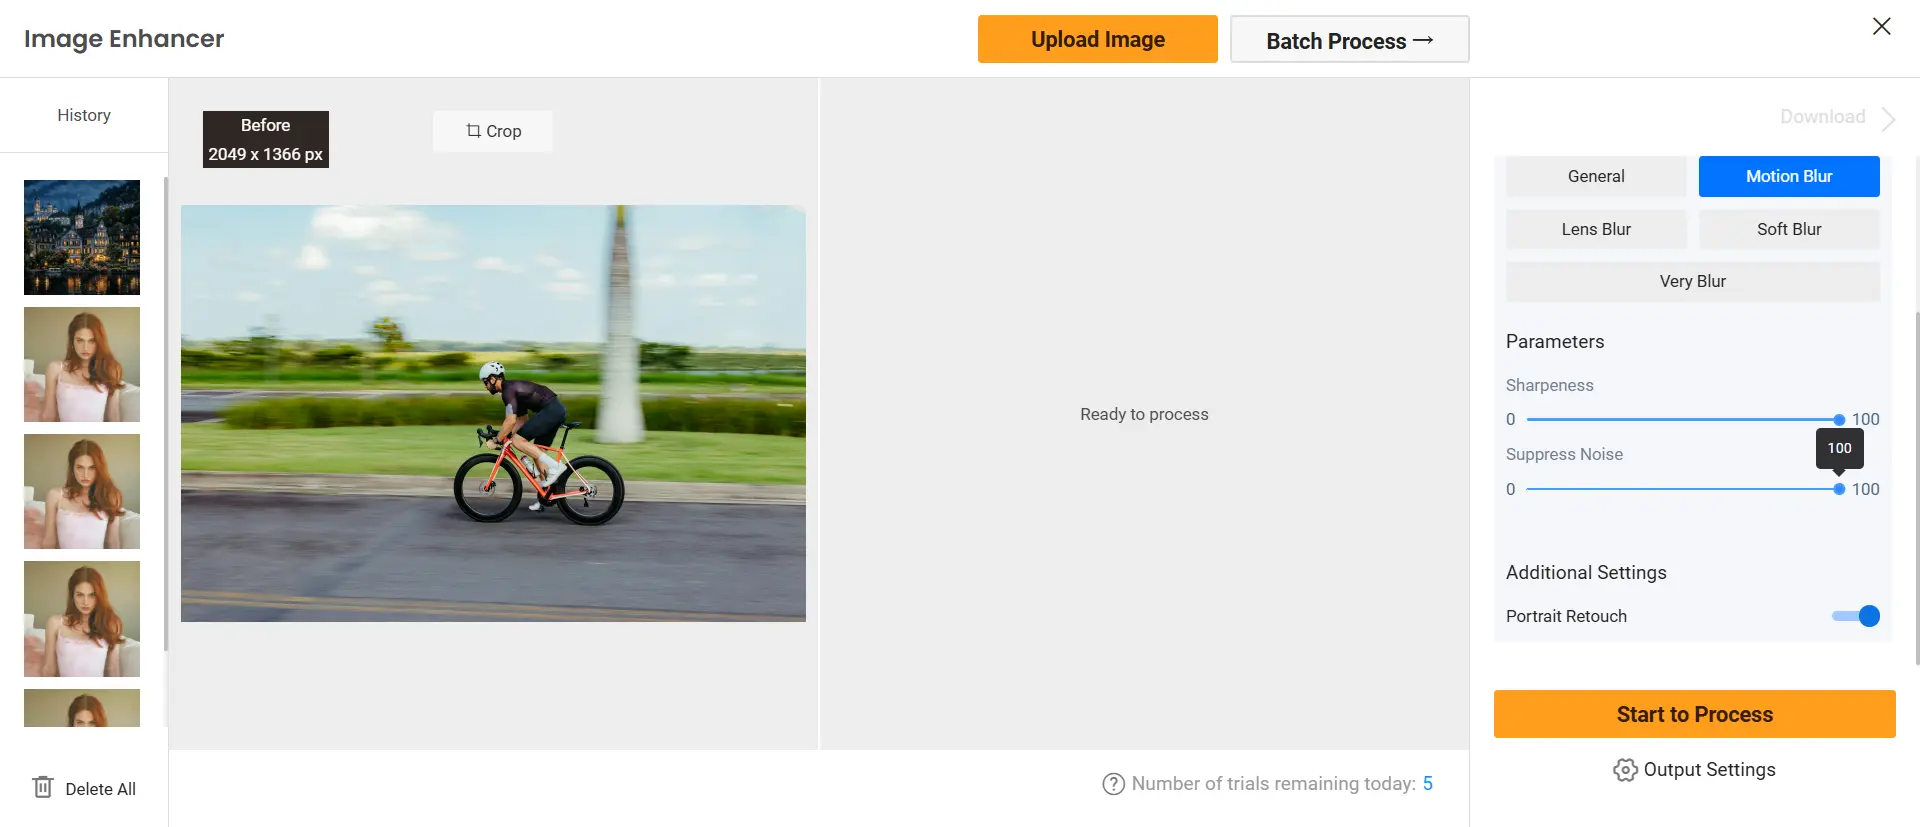
This mode tackles various types of blur with five options: General, Motion Blur, Lens Blur, Soft Blur, and Very Blur.
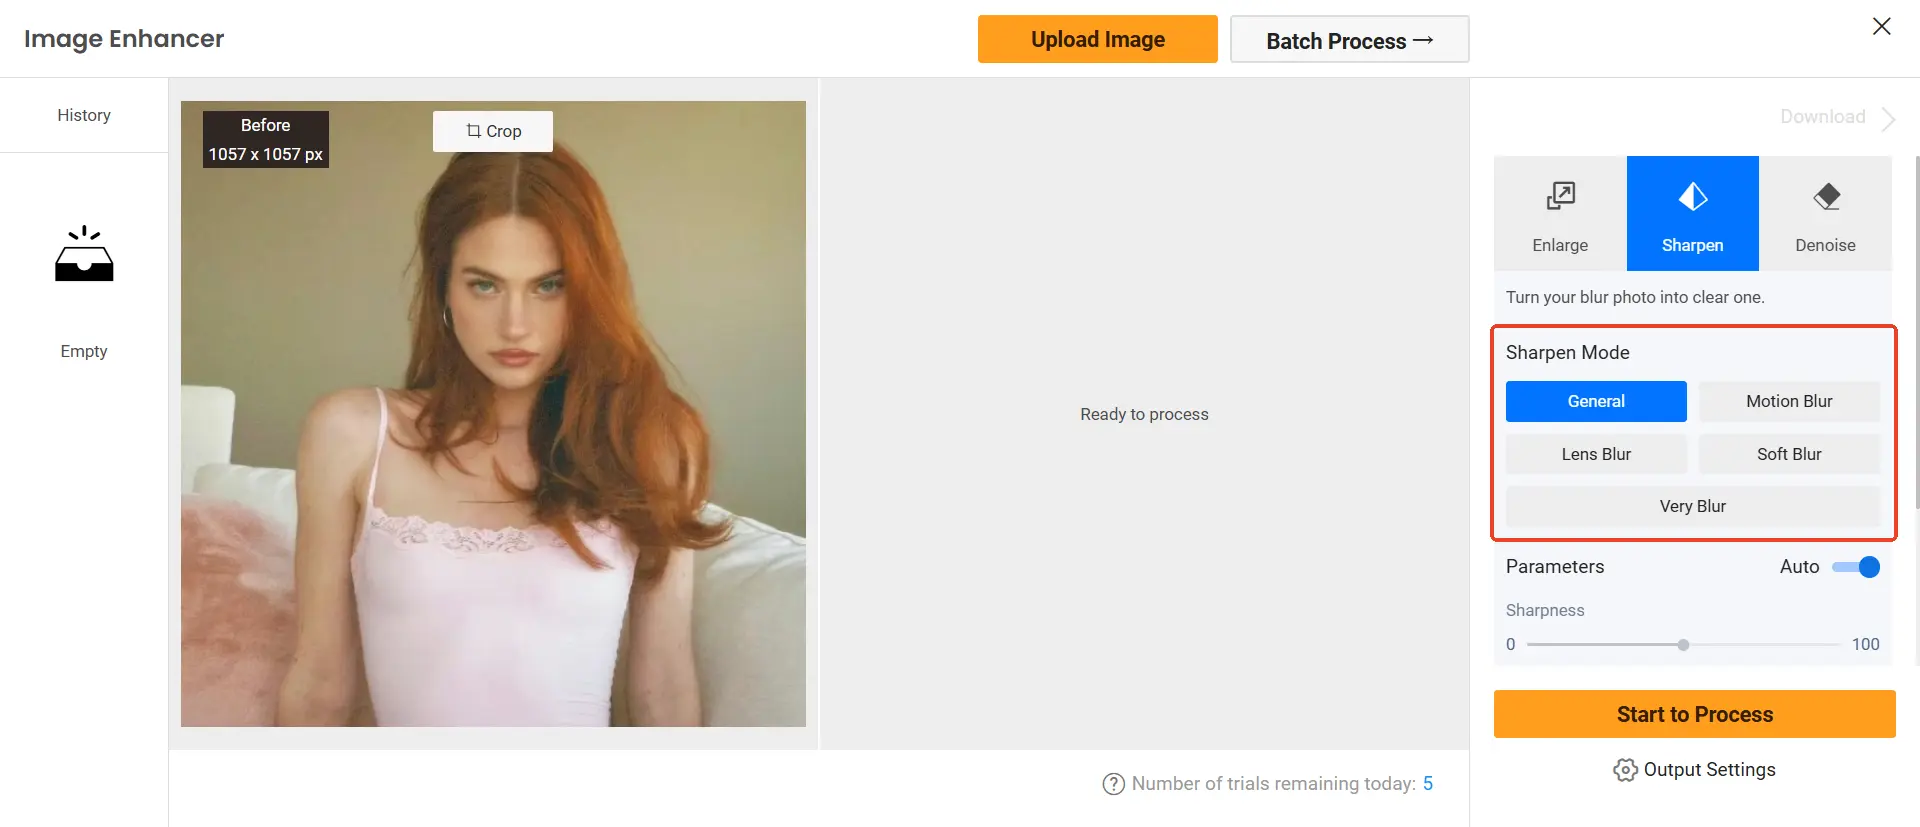
- For slightly out-of-focus shots, General works wonders, sharpening details without introducing noise. You can manually adjust the sharpness level and noise suppression, allowing for subtle enhancements.
- Motion Blur and Lens Blur are lifesavers for action shots or images with depth-of-field effects. I found Motion Blur particularly effective on a photo of a moving subject, restoring definition to what was once a blurry mess.

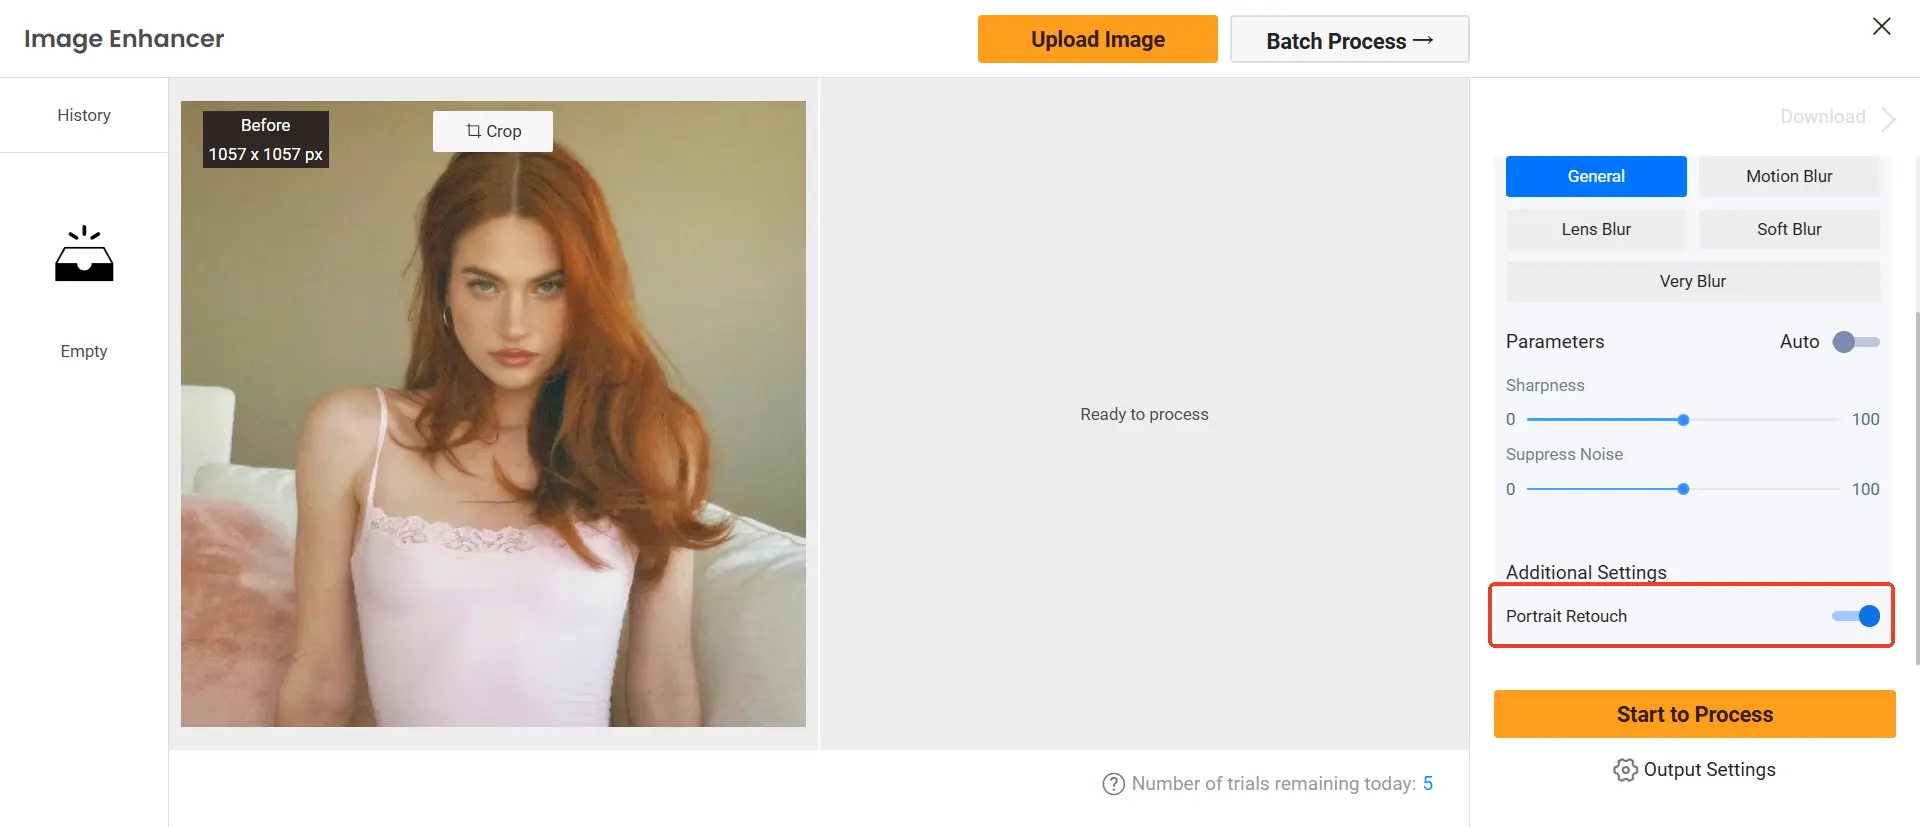
- Very Blur deserves a special mention. It can resurrect heavily blurred images, offering a Denoising Strength adjustment and even a Portrait Retouch option, perfect for refining facial details.
Denoise Mode
This is your go-to tool for cleaning up noisy, grainy images. You can fine-tune the Remove Noise and Sharpness settings to strike the right balance between clarity and texture.
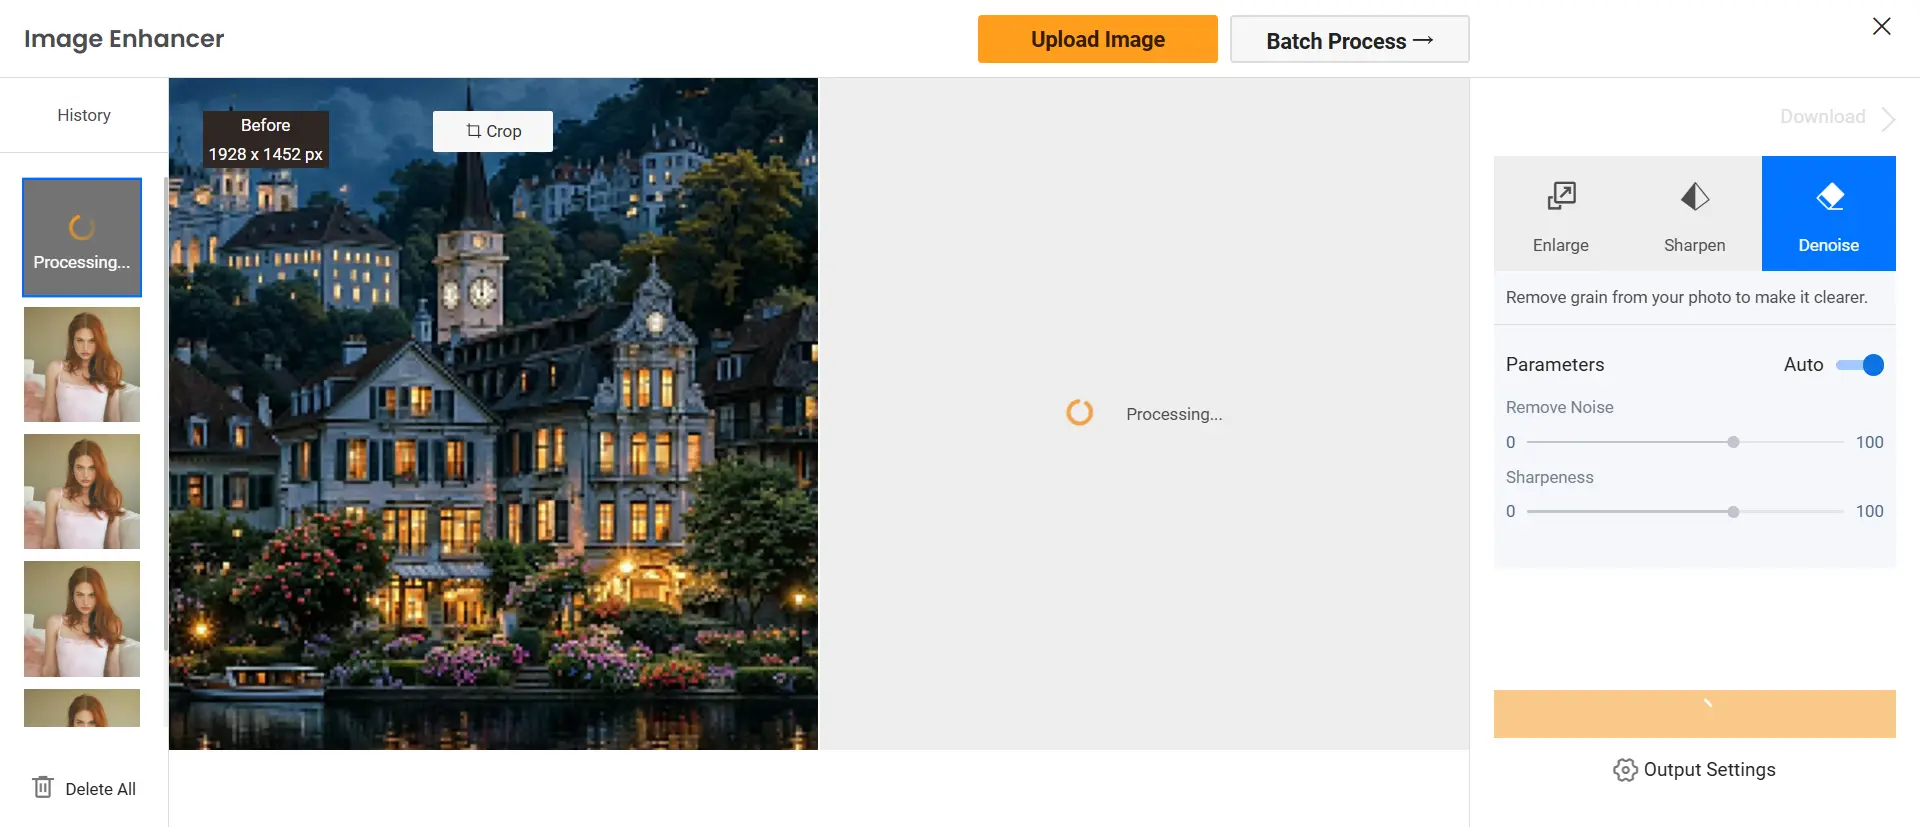
I tested this mode on a low-light photo, and the difference was night and day. The noise was effectively reduced without compromising detail, maintaining a natural look. However, it would be great if they offered more AI models tailored to different noise types, such as color noise or banding.
Pricing and Limitations
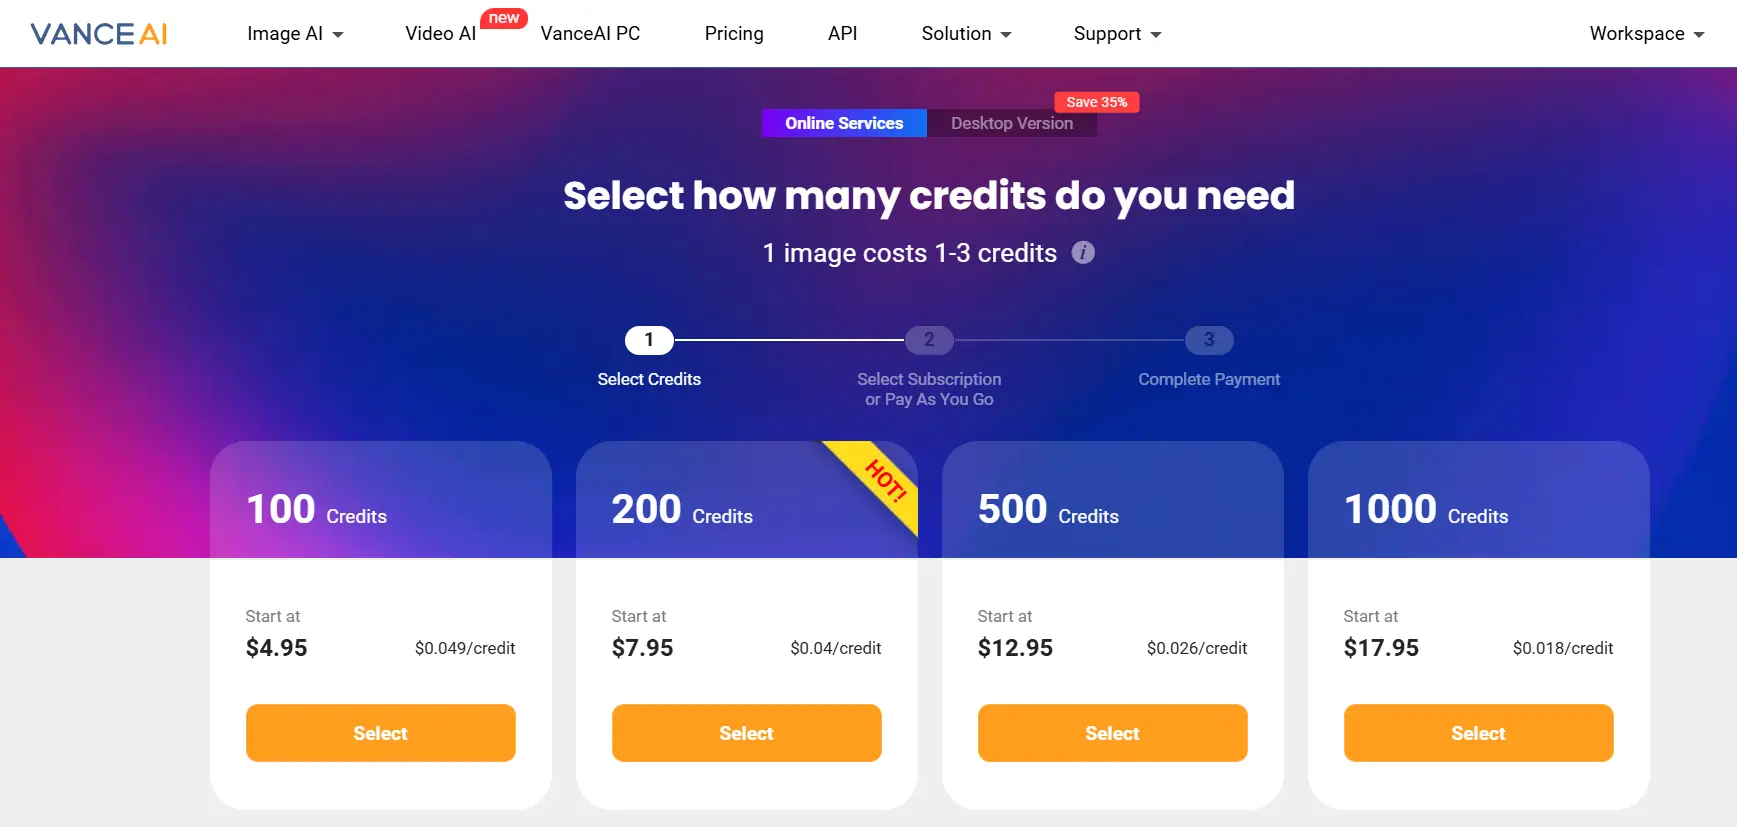
Vance AI Photo Editor offers 5 free image edits per day. However, these images are branded with a Vance AI watermark, which is quite intrusive. To download watermark-free images, you need to spend credits—1 credit per download.
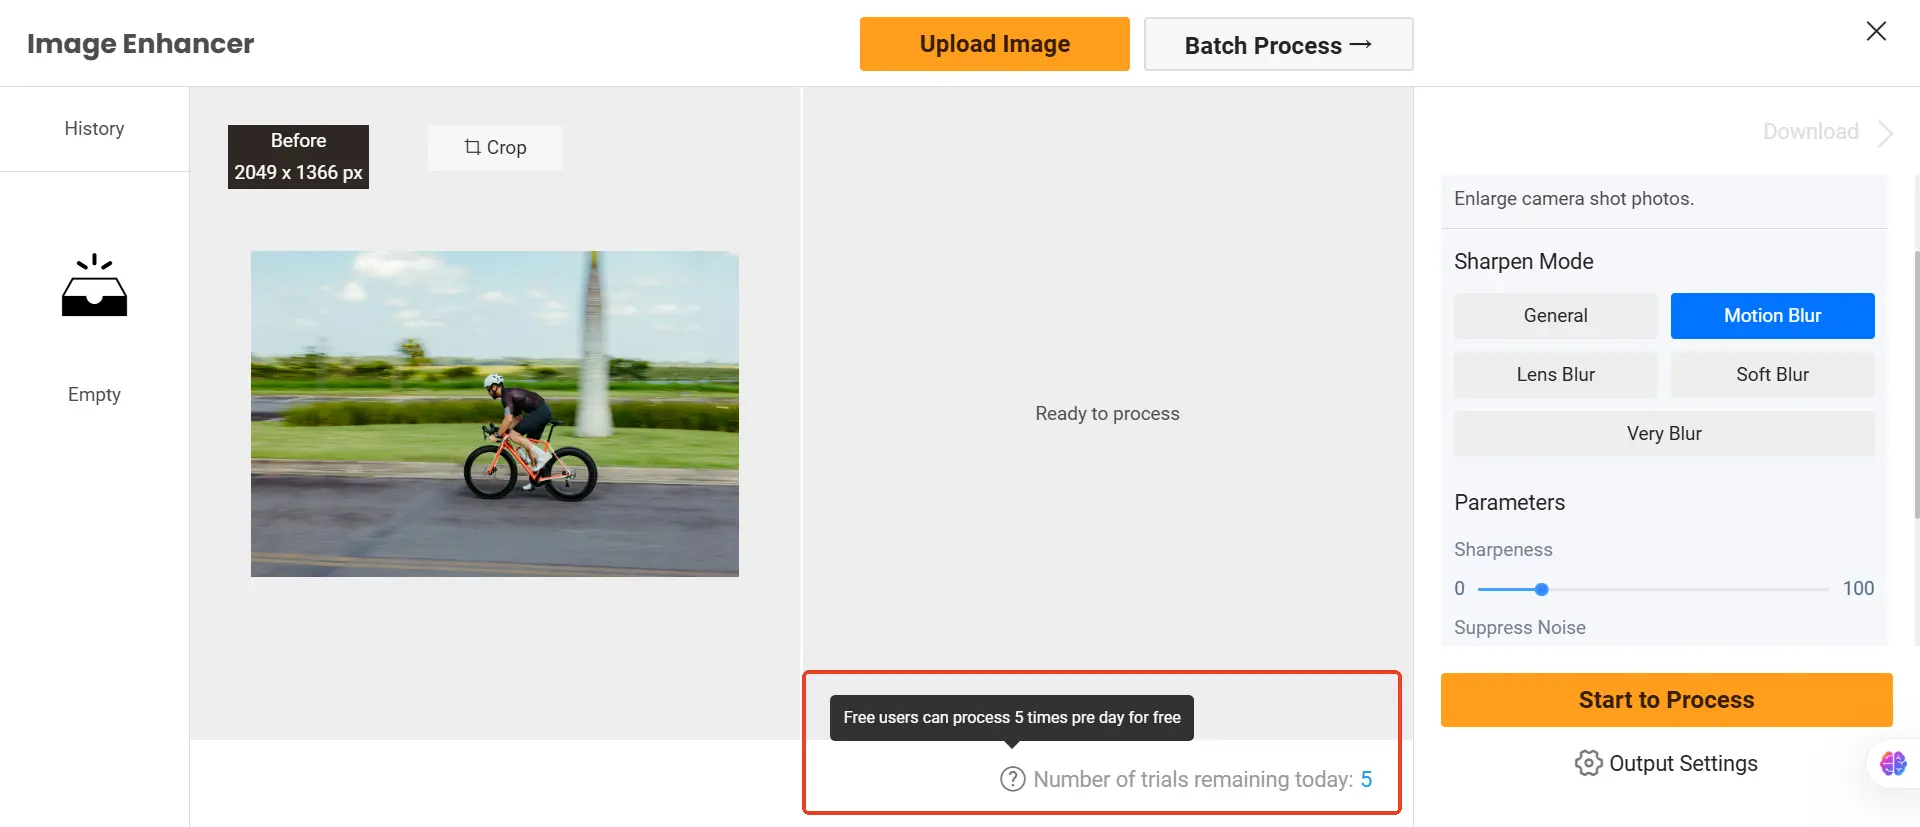
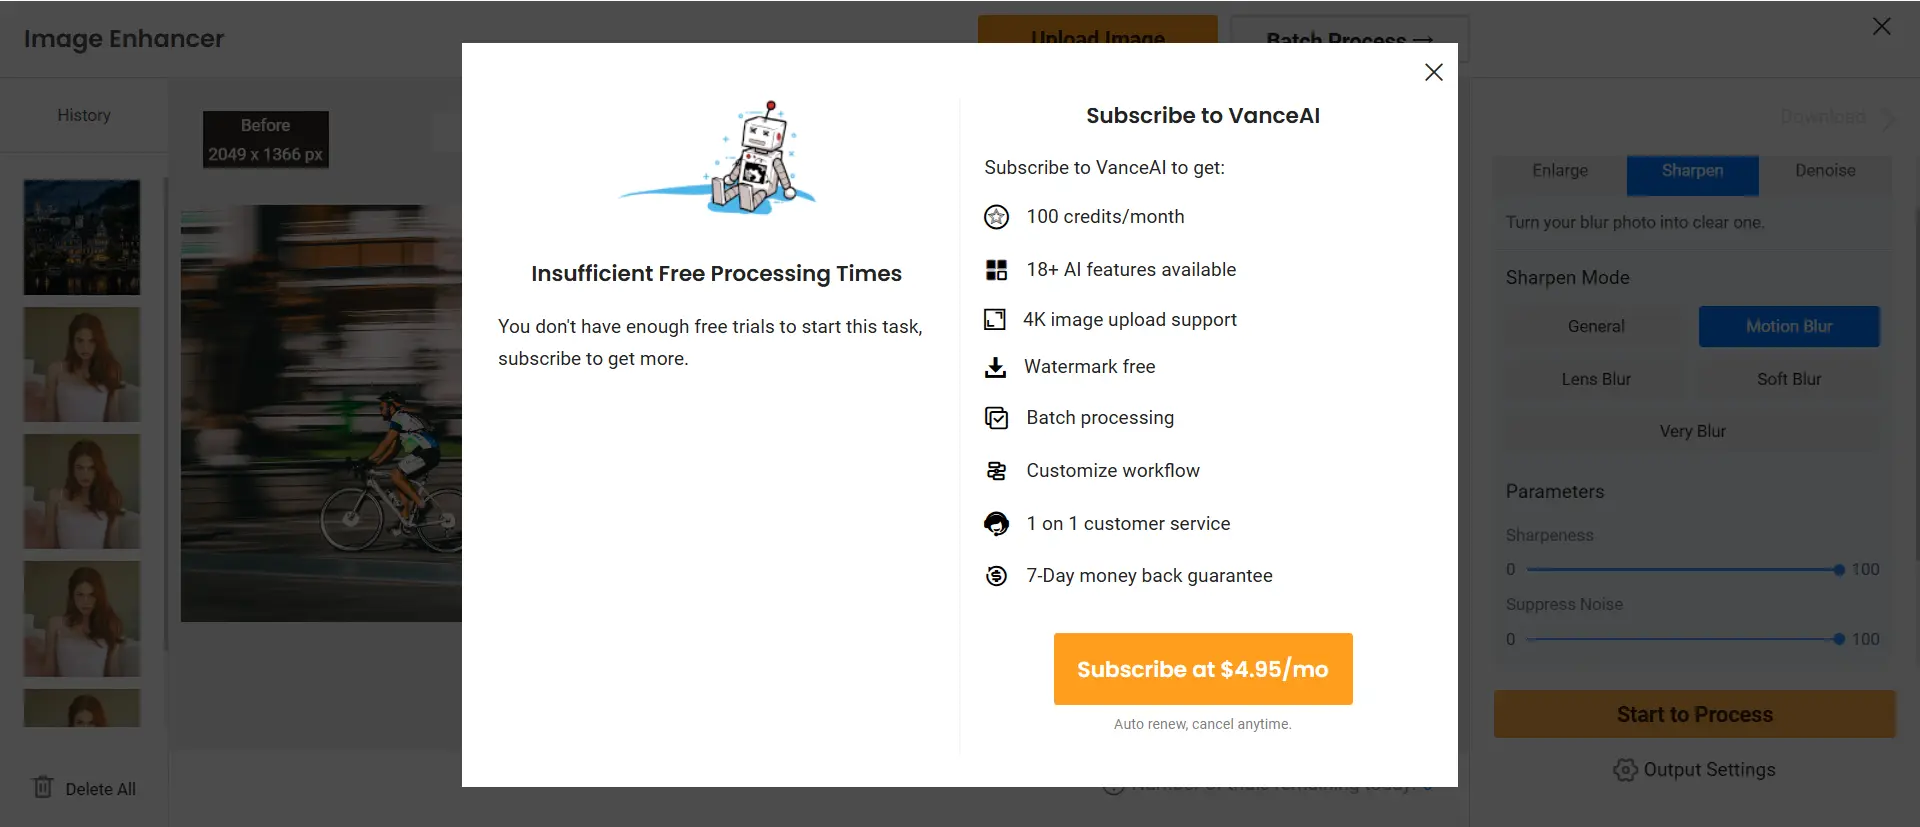
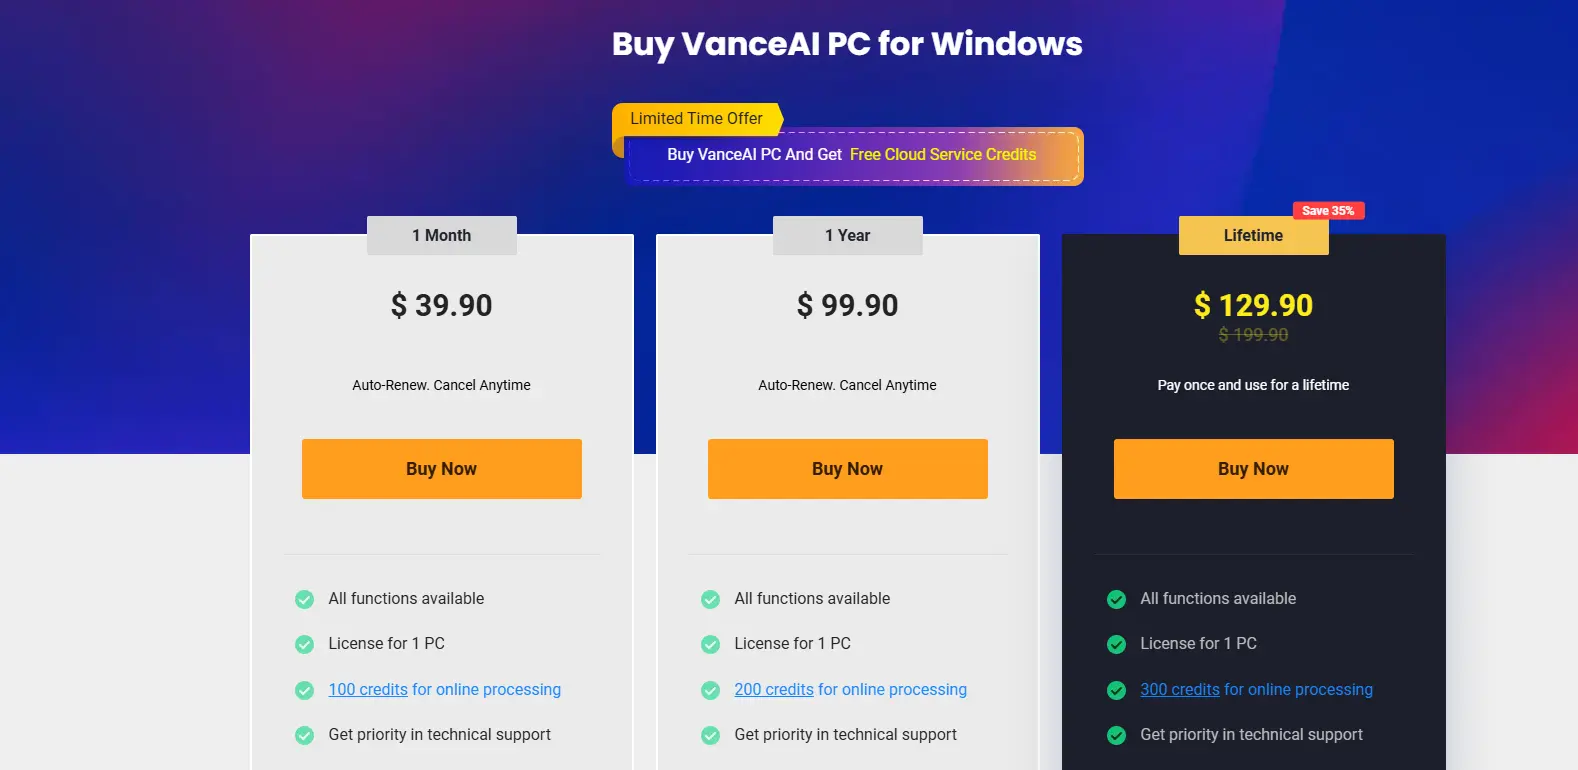
New users receive 3 free credits upon registration, but after that, you’ll need to purchase a package.
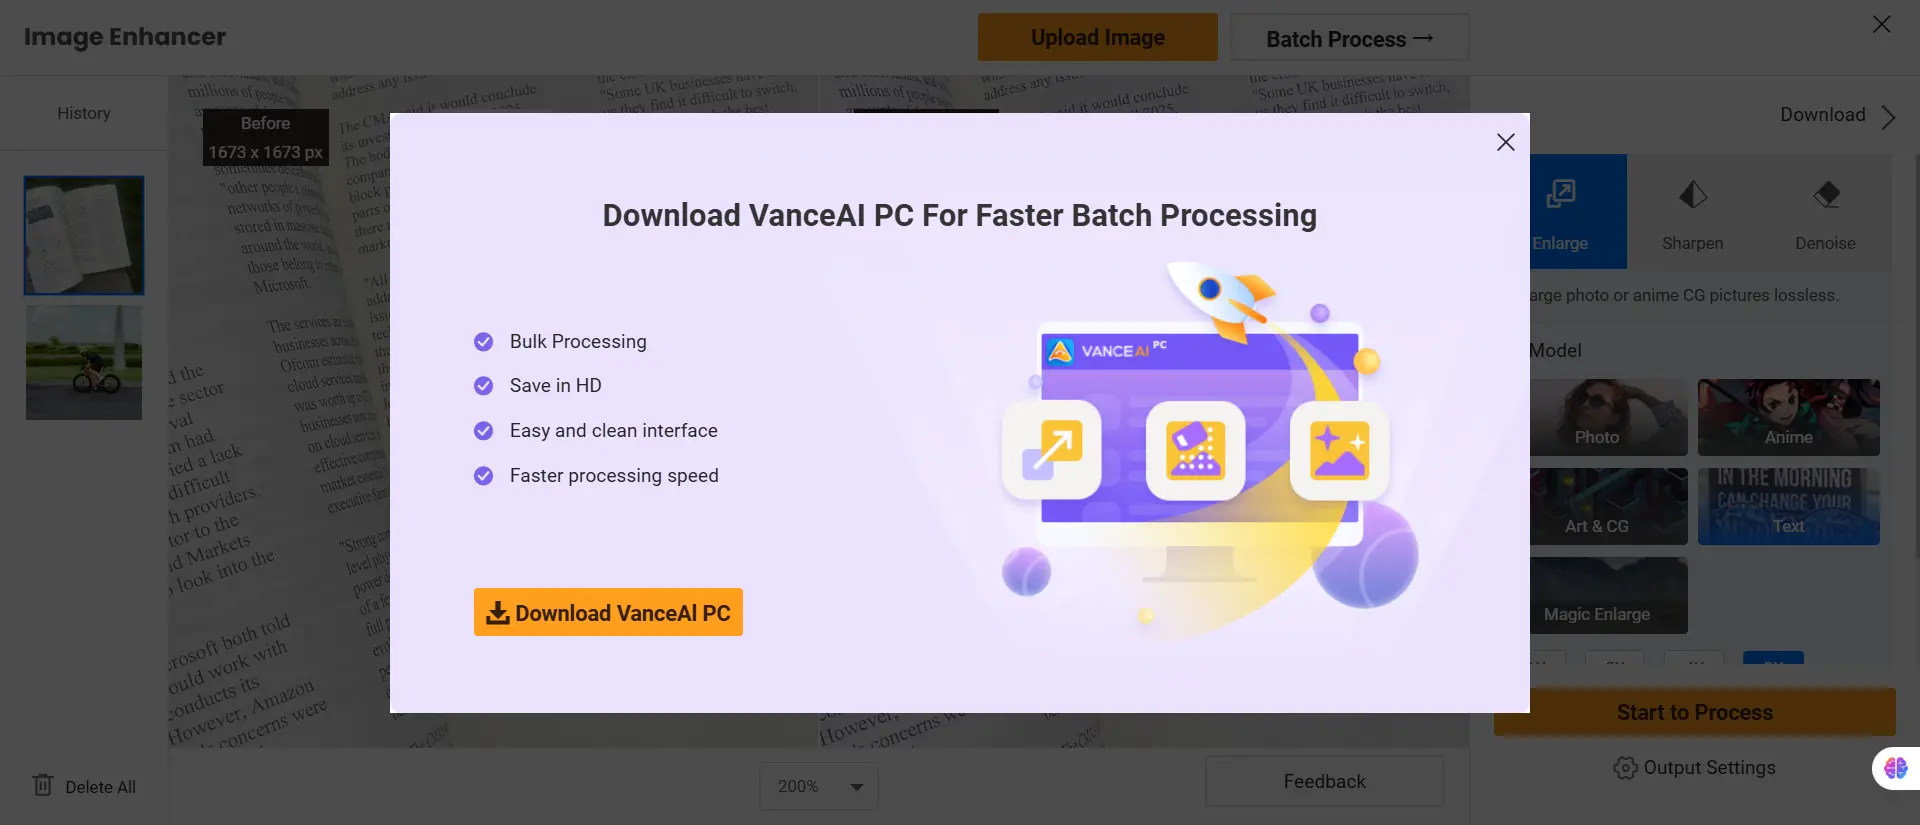
While the online service and desktop version offer different credit packages, it's a bit frustrating that the Batch Process feature is exclusive to the desktop version. It would be much more convenient if this functionality were available online as well.
Drawbacks
While Vance AI Photo Editor boasts impressive AI models and customization options, it does come with a few downsides:
- Watermark Issue: Free outputs carry a noticeable watermark, which limits their usability.
- Credit System: The free credits run out quickly, and non-subscribers are limited to 5 edits per day, which feels restrictive.
- Limited File Support: Only supports JPG and PNG formats, which might be a drawback if you're working with RAW or other high-quality file types.
- Batch Processing: Only available in the desktop version, making it less convenient for users who prefer online editing.
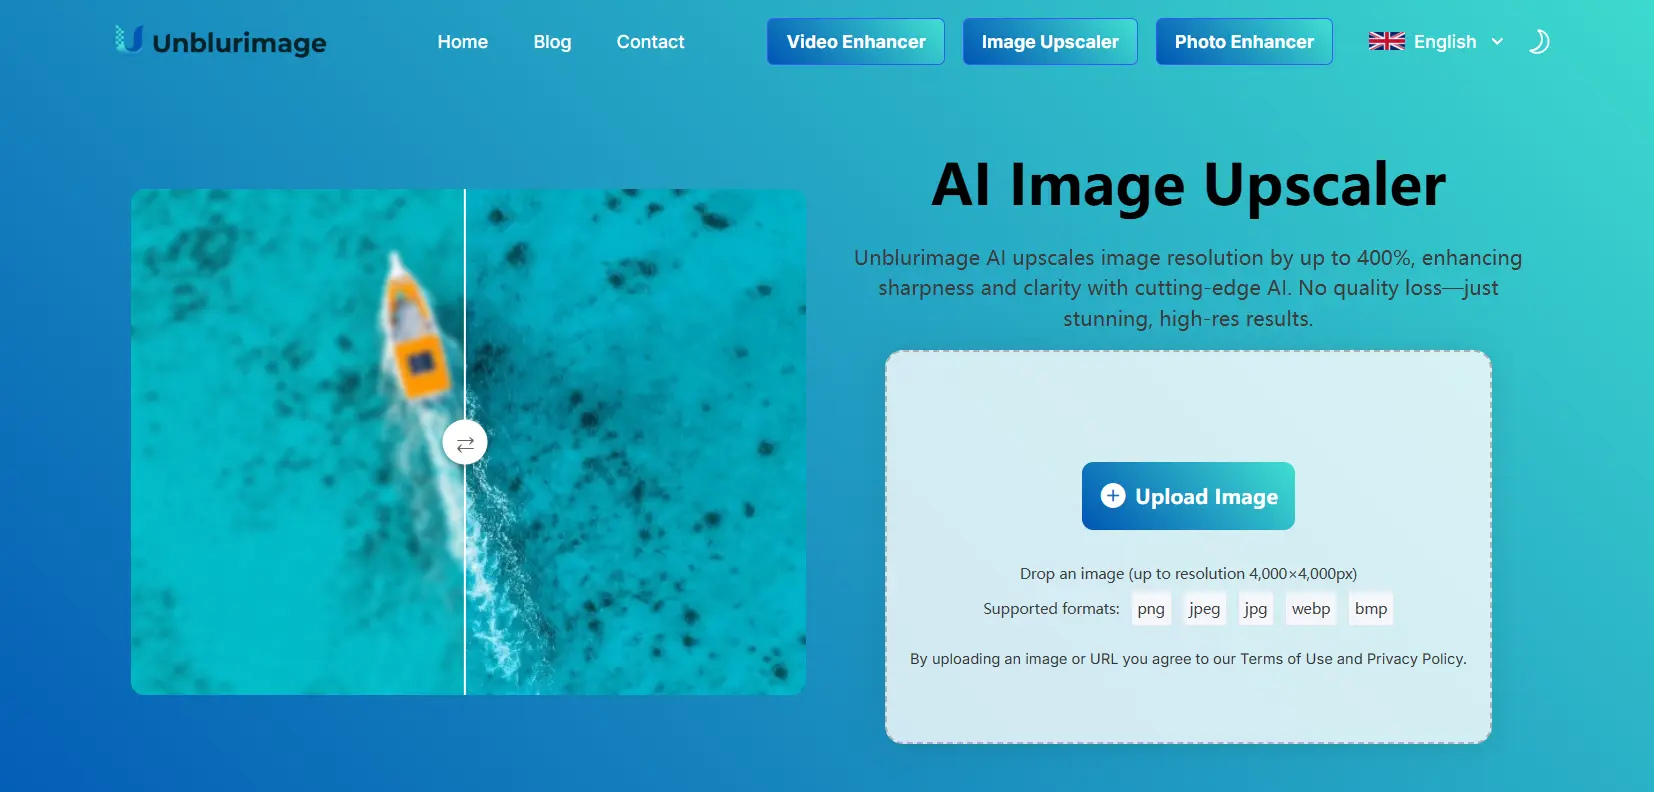
A Better Alternative? Unblurimage AI
If you’re looking for a cost-effective and watermark-free alternative, Unblurimage AI might be just the solution.
What is Unblurimage AI?
Unblurimage AI is a free image upscaler and enhancer. It allows you to upscale images up to 4x without losing quality while also enhancing image clarity and details. Unlike Vance AI, Unblurimage AI is completely free and supports up to 30 images per day, all without branding your images with a watermark.
Key Advantages of Unblurimage AI:
- Completely Free: No credit system, no hidden fees.
- Watermark-Free Output: All enhanced images are clean and ready to use.
- User-Friendly Interface: Simple and intuitive, suitable for beginners and pros alike.
- High-Quality Upscaling: Maintains details and sharpness, even at 4x scaling.
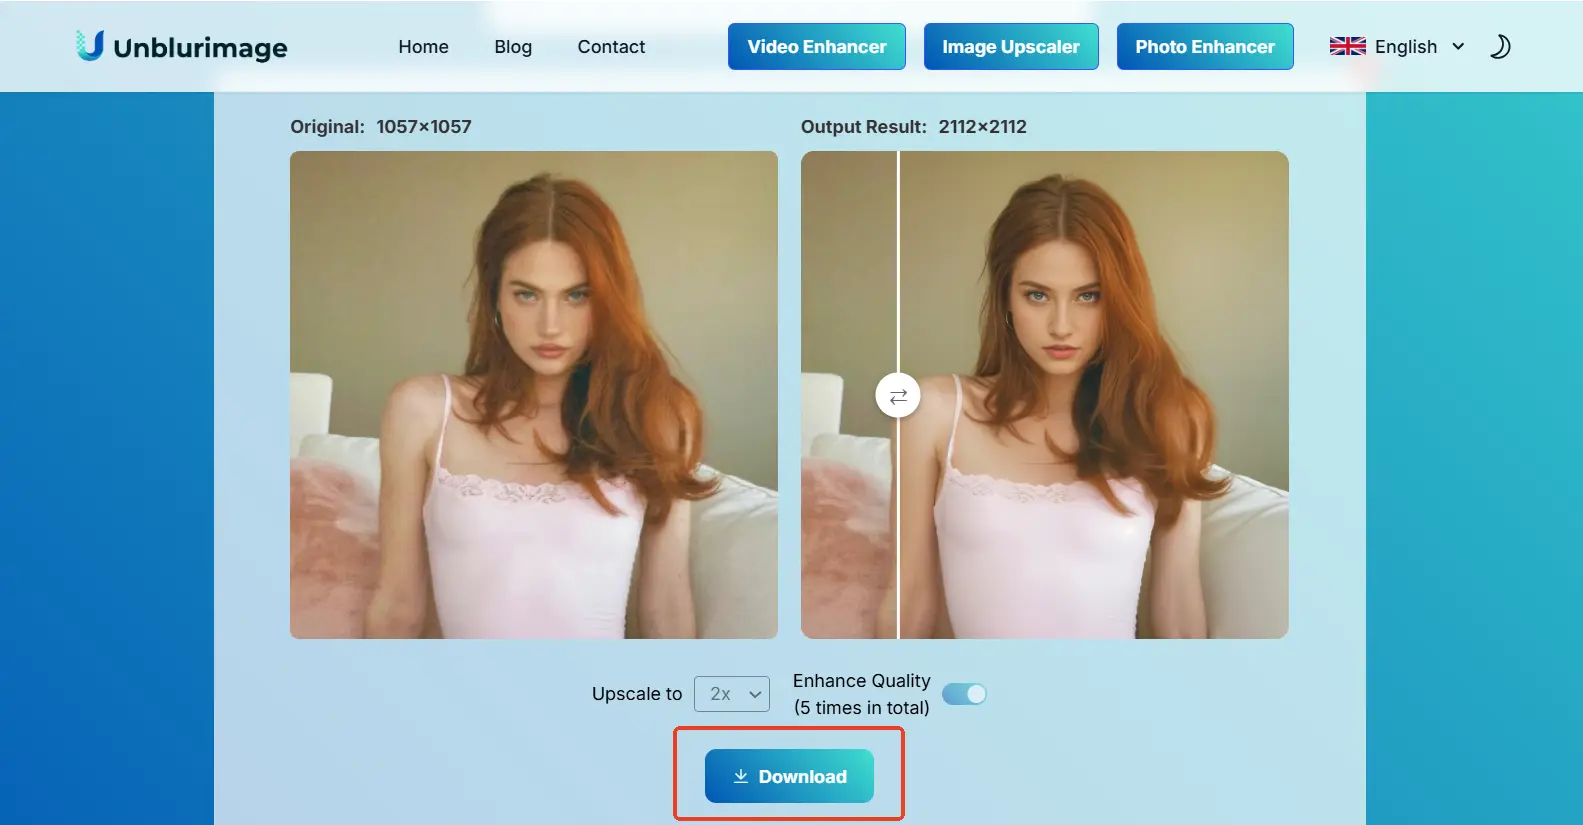
How to Upscale and Enhance with Unblurimage AI:
- Upload Your Image: Visit the Unblurimage AI website and upload your image in JPG, PNG, or WebP format.
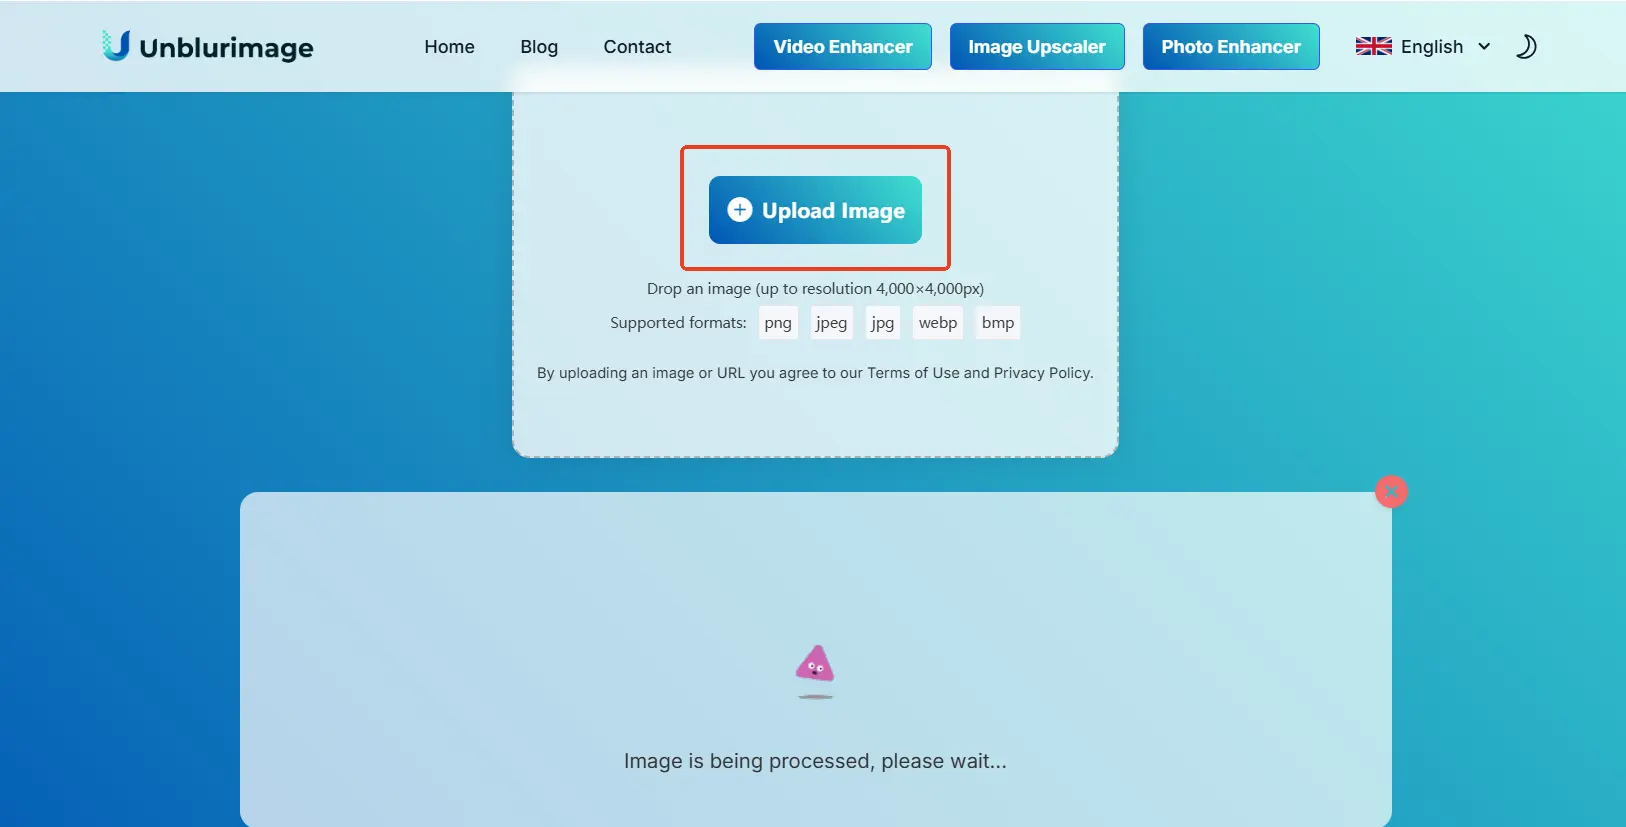
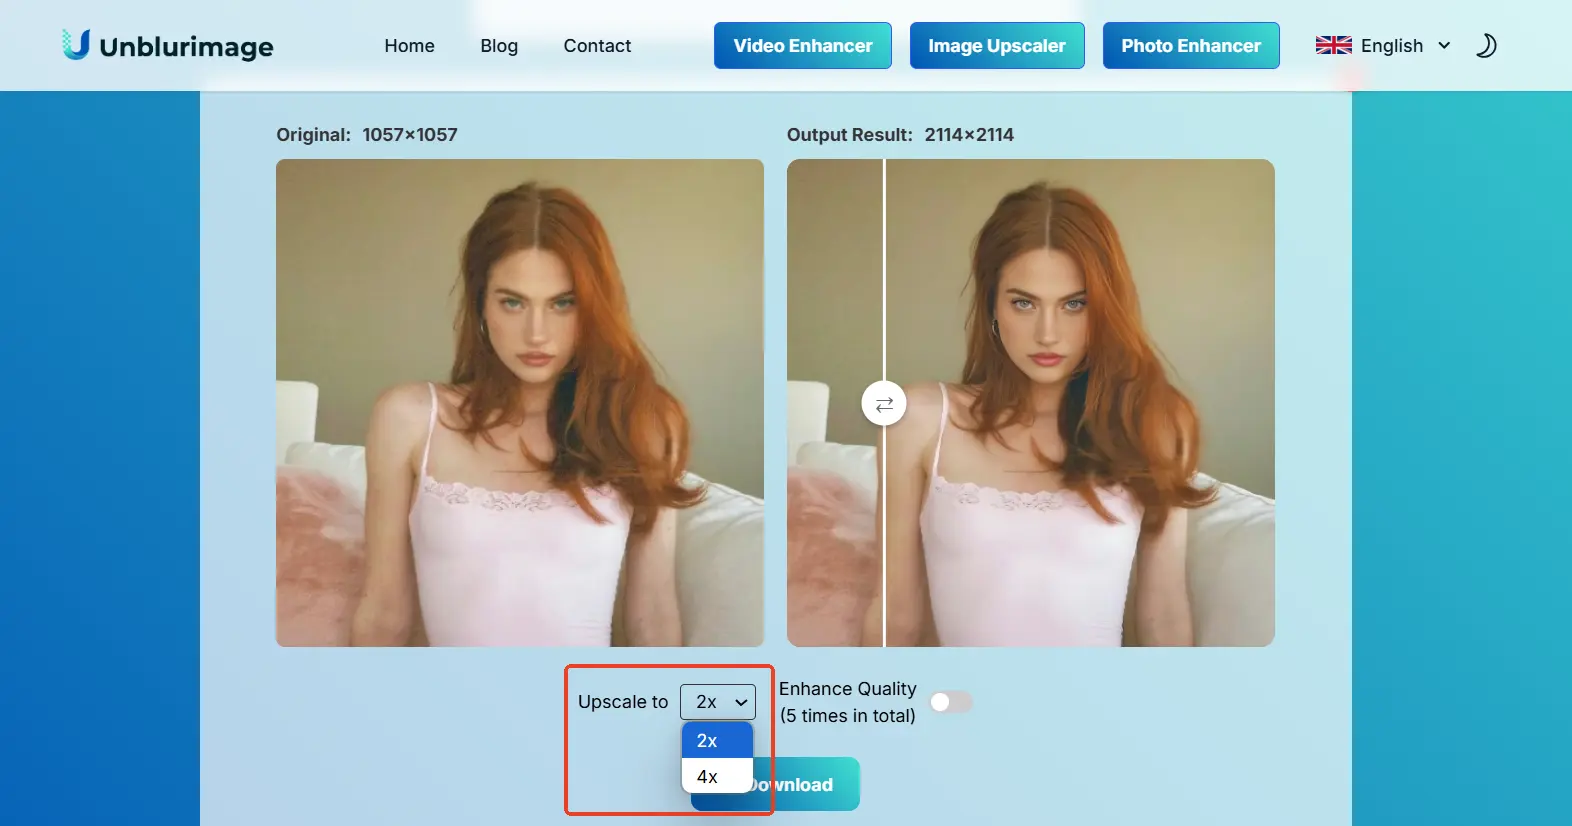
- AI automatically upscale the image to 2x: Once the image is uploaded, the AI intelligently analyzes the image and automatically upscales it to 2x of the original image.
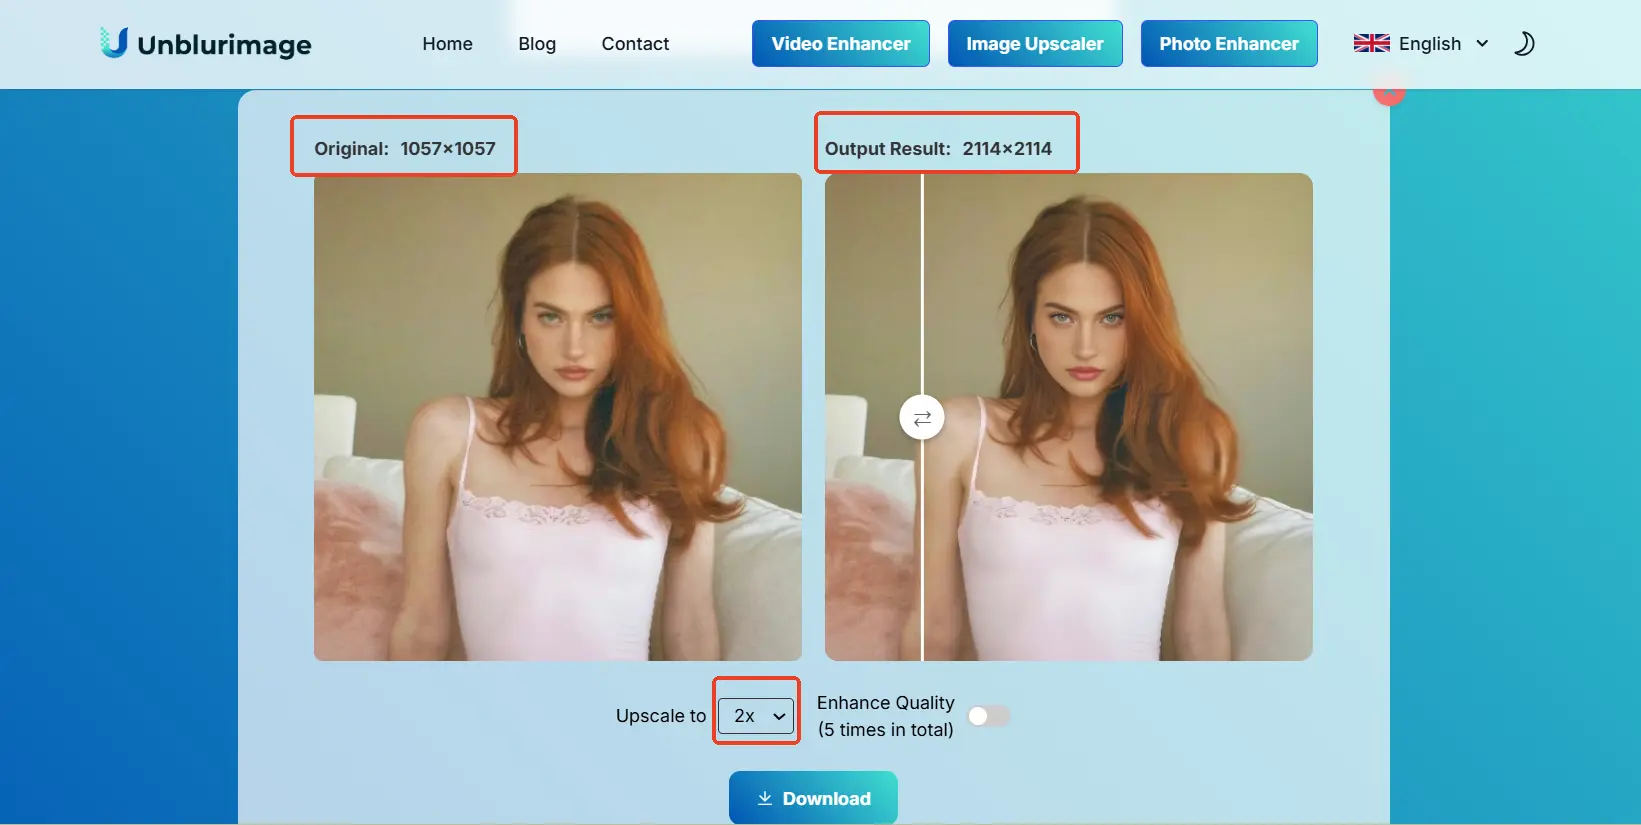
You also have the option of upscaling the image to 4x of the original if you have higher needs.
- Enhance Quality: Click “Enhance Quality”, the AI will enlarge the details of the image, optimize the face of the portrait, reduce the noise of the image, and enhance the image quality.

- Process and Download: Click “Download”, download the high-quality, watermark-free image.
Vance AI vs. Unblurimage AI: A Comparison
| Feature | Vance AI | Unblurimage AI |
|---|---|---|
| Pricing | Limited free use, credit system | Completely free |
| Watermark | Yes, on free outputs | No watermark |
| Upscaling Options | Up to 8x, customizable | Up to 4x |
| Enhancement Modes | Multiple AI models | High-quality auto-enhancement |
| Batch Processing | Desktop-only | Online, no limitations |
| User Experience | Feature-rich but restrictive | Simple and efficient |
Conclusion
Vance AI Photo Editor is a powerful tool for advanced image editing, offering a plethora of AI models and customizable settings. Its strengths lie in its detailed enhancement modes and upscale flexibility. However, the restrictive credit system and watermark limitation might be off-putting for some users.
On the other hand, Unblurimage AI offers a simpler, more accessible alternative with its entirely free, watermark-free platform. It’s ideal for users who need reliable image upscaling without any hidden costs or restrictions.
Ultimately, your choice depends on your specific needs: If you require detailed AI models and extensive customization, Vance AI is worth a try. But if you want a free, hassle-free solution, Unblurimage AI is the way to go.
Happy editing!