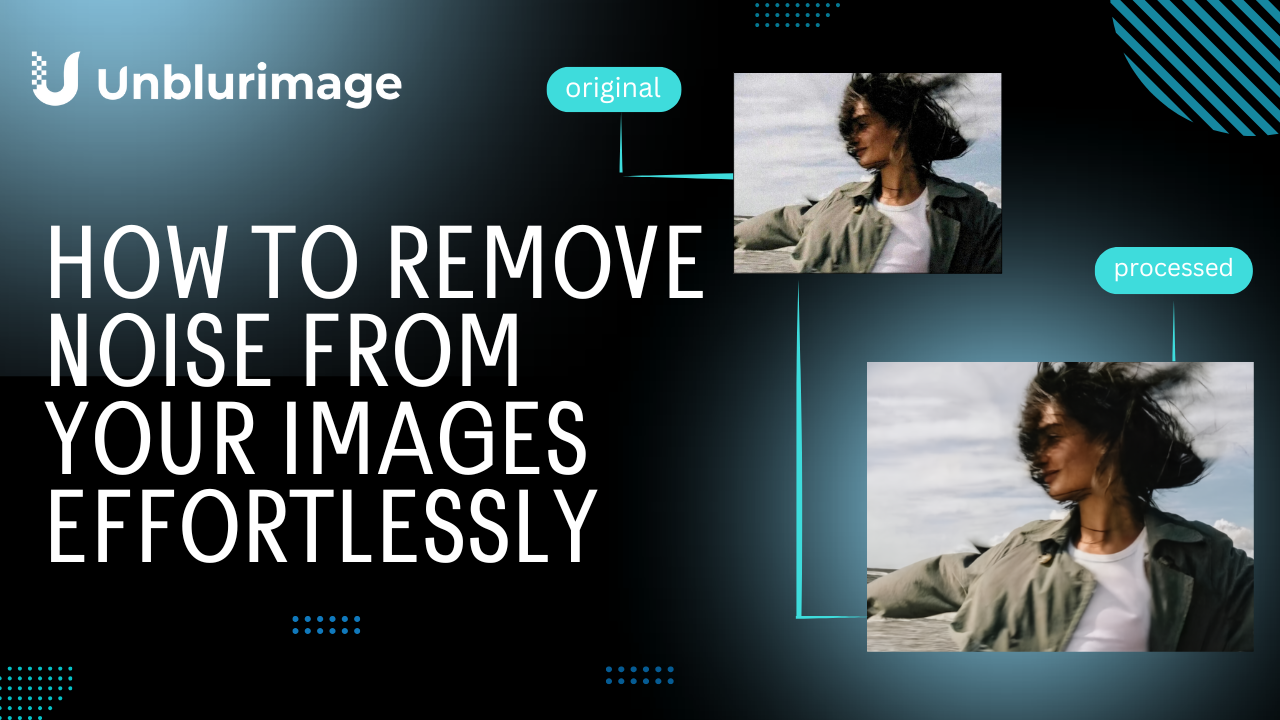

Unleash the Magic: Effortlessly Remove Noise from Your Images
In the digital age, we're constantly surrounded by images. From the stunning landscapes we capture on our travels to the precious family moments frozen in time, photos have become an integral part of our lives. However, there's an unwelcome guest that often shows up in our pictures - image noise.
Think about the last time you tried to take a beautiful photo of a city skyline at night. You were excited to capture the twinkling lights and the magical atmosphere, but when you looked at the result, the image was marred by tiny, grainy dots. These are what we call "noise." Or perhaps you were at a dimly - lit concert, trying to snap a picture of your favorite band. The resulting photo might have had a strange, speckled appearance that made the band members look less than clear. This is the annoying presence of image noise.
Image noise is essentially the random variation of brightness or color information in an image. It can make a high - quality image look grainy, blurred, or just plain unattractive. In a world where we strive for picture - perfect visuals, whether it's for our personal photo albums, social media posts, or professional work, removing this noise has become a crucial task. It can transform a mediocre image into a masterpiece, allowing us to fully appreciate the beauty and details that were originally captured.
Unblurimage.ai: Your Noise - Removing Ally
Enter Unblurimage.ai, your one - stop solution for all image-noise-related woes. This remarkable online platform is a game - changer in the world of image processing.
Unblurimage.ai harnesses the power of advanced artificial intelligence algorithms to not only remove noise from images but also enhance their overall quality. What sets it apart from other tools is its simplicity and efficiency. With just a few clicks, you can upload your noisy image, and Unblurimage.ai will work its magic.
The AI - driven technology on Unblurimage.ai is designed to analyze the patterns of noise in your image. Whether it's the random speckles caused by low - light photography or the more structured noise that might come from a faulty sensor, the platform can identify and eliminate it. It doesn't stop at just removing the noise; it also restores the details that might have been lost due to the noise, bringing back the sharpness and clarity of the original image.
Another great advantage of Unblurimage.ai is that it's accessible to everyone. You don't need to be a professional photographer or a tech - savvy expert to use it. The user - friendly interface makes the process of removing noise from your images as easy as pie. So, whether you're a hobbyist who loves to take pictures in your spare time or a professional who needs to ensure top - notch image quality for your clients, Unblurimage.ai has got you covered. In the following sections, we'll dive deeper into how Unblurimage.ai works, the different types of noise it can handle, and step-by-step guides on using it to its fullest potential.
Understanding Image Noise
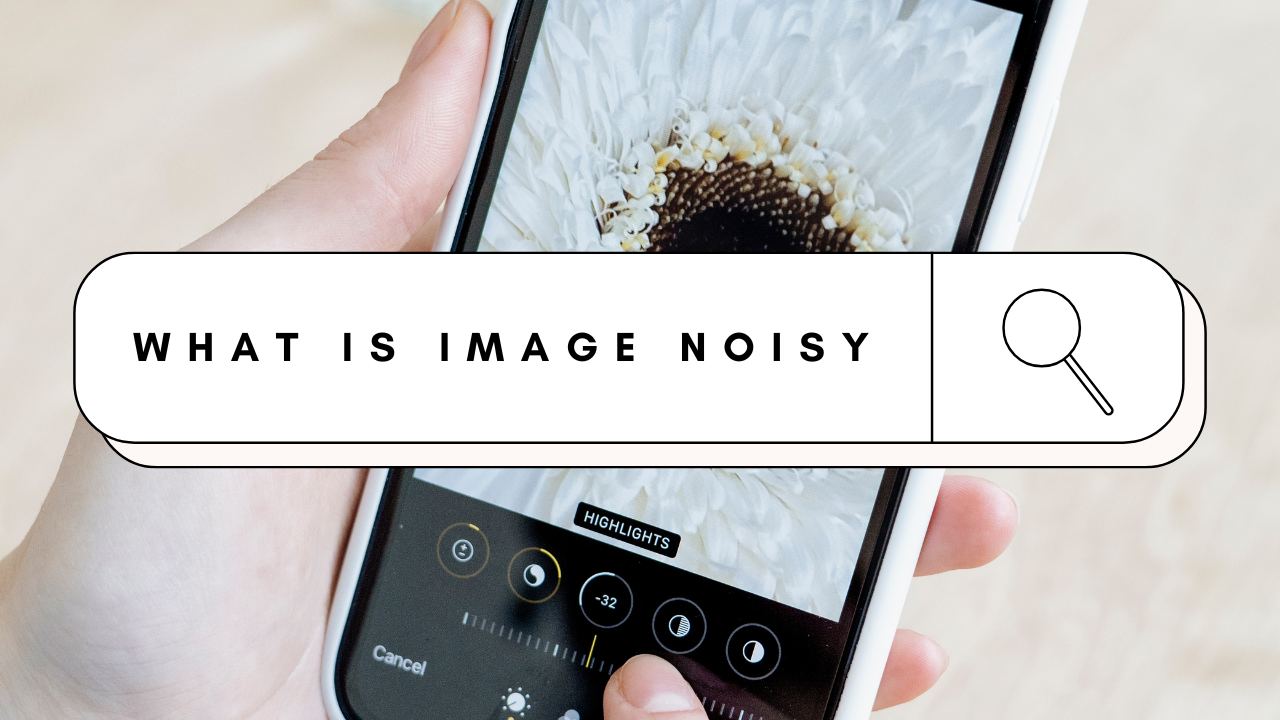
What is Image Noise?
Image noise is an unwanted and often frustrating element in digital images. In simple terms, it's the random variation in brightness or color values within an image. Imagine you're looking at a beautiful, clear blue sky in a photo, but instead of a smooth, even color, you notice tiny, random specks or dots. These are signs of image noise. It's like the static you might see on an old - fashioned television screen when the signal is weak, but in the context of your digital photos.
This noise isn't part of the actual scene you captured. It's an artifact introduced during the image - capture or processing stages. For example, when you take a picture with a digital camera, the camera's sensor converts light into electrical signals, which are then processed into a digital image. During this complex process, various factors can cause fluctuations in the signal, resulting in noise. Image noise can significantly degrade the quality of an image. It can make a sharp and detailed photograph look grainy, soft, or blurry. In extreme cases, it can even obscure important details in the image, making it difficult to distinguish objects or features clearly. Whether you're a professional photographer trying to create high - end visuals or an amateur sharing memories on social media, dealing with image noise is an essential part of achieving the best - looking images.
Types of Image Noise
There are several types of image noise, each with its own characteristics and causes. Understanding these different types can help you better diagnose the problems in your images and choose the most appropriate methods for removal.
Gaussian Noise
Gaussian noise is one of the most common types of image noise. It gets its name from the Gaussian distribution (also known as the normal distribution) that describes the random values of the noise. This type of noise appears as random, small - scale fluctuations in the brightness or color of an image, similar to a fine layer of grain.
Think of it as if someone sprinkled tiny, randomly - sized grains all over your image. In a photograph, Gaussian noise can make the image look as if it has a very fine texture, almost like a low - quality reproduction of a high - resolution image. For instance, if you take a photo in a low - light environment with a relatively low ISO setting (but still not ideal for the lighting conditions), you might notice Gaussian noise. The camera's sensor struggles to capture enough light, and the resulting signal processing leads to these random variations in pixel values. In a landscape photo taken at dusk with a slightly underexposed setting, the sky might have a faint, grainy appearance due to Gaussian noise. This noise is often a result of the electronic components in the camera, such as the sensor and the amplifier circuits, introducing small, random errors during the signal - processing stage.
Salt-and-Pepper Noise
Salt-and-pepper noise is another prevalent type of noise that gets its vivid name from its appearance. This noise manifests as small, randomly - distributed white (salt) and black (pepper) dots in the image. It's as if someone has randomly splattered white and black paint dots on your photograph.
Salt-and-pepper noise usually occurs during the image - acquisition, transmission, or storage processes. For example, if there are errors in the data transfer between the camera's sensor and its internal memory, or when an image is being transferred from a storage device to a computer, salt - and - pepper noise can be introduced. In the case of an old, damaged memory card, images stored on it might develop this type of noise over time. When you view a photo that has salt - and - pepper noise, these sudden, sharp changes in pixel values can be quite distracting. They can disrupt the smoothness of the image and make it difficult to focus on the actual subject matter. In a portrait, salt - and - pepper noise might create random white and black spots on the person's face, detracting from the overall quality of the image.
Shot Noise
Shot noise is closely related to the physical process of light and how it interacts with the camera's sensor. Light is made up of tiny particles called photons, and when a camera captures an image, it's essentially counting these photons. Shot noise occurs because the arrival of photons at the sensor is a random process.
Think of it like trying to catch a certain number of balls being randomly thrown at you. Sometimes, you might catch a few more or a few less than you expect. In the context of photography, especially in low - light conditions, the number of photons reaching the sensor is relatively small. This small number leads to a higher degree of randomness in the signal received by the sensor, resulting in shot noise. It's like the camera sensor is having a harder time accurately "counting" the photons, and this uncertainty shows up as noise in the image. For example, when you're taking a photo of a dimly - lit starry sky, the long exposure time is needed to capture the faint starlight. But because the amount of light from the stars is so low, shot noise becomes more prominent. The image might have a speckled appearance, with random variations in brightness that are not due to the actual stars but rather the random nature of photon capture by the sensor.
Causes of Image Noise
Image noise doesn't just appear out of nowhere; it's caused by several factors related to the image - capture process, the equipment used, and the environmental conditions. Understanding these causes can help you take preventive measures to reduce noise in your photos.
Low - Light Conditions
One of the most common causes of image noise is shooting in low-light conditions. When there isn't enough light available, your camera has to work harder to capture a proper exposure. To compensate for the lack of light, the camera increases the sensitivity of its sensor, which is measured by the ISO setting.
For example, imagine you're at a concert in a dimly - lit venue. You want to take a picture of the band on stage, but the lights are focused on the performers, leaving the rest of the area relatively dark. As you try to take a photo, your camera automatically increases the ISO to make the sensor more sensitive to the limited light. However, this increase in sensitivity also amplifies the noise in the image. The sensor is trying to detect very faint signals (the incoming light), and in the process, it picks up on small, random fluctuations in the electrical signals within the camera. These fluctuations are then translated into noise in the final image. So, the next time you're in a low-light situation, be aware that the lower the light level, the more likely you are to encounter image noise.
High ISO Settings
ISO is a crucial setting on your camera that determines how sensitive the sensor is to light. While increasing the ISO can be a useful way to get a well-exposed image in low-light conditions, it comes with a trade-off: more noise.
When you set a high ISO value, the camera sensor amplifies the incoming light signal. This amplification not only boosts the desired image signal but also any unwanted noise present in the sensor. It's like turning up the volume on a radio with a weak signal; you'll hear the music louder, but you'll also hear more static. In a high - ISO photo, the noise can become quite noticeable, especially in the darker areas of the image. The fine details in the shadows might be replaced by a grainy texture, and the overall image quality can be severely degraded. For instance, if you set your camera to ISO 3200 in a moderately lit room, the resulting photo might have a significant amount of noise, making it look less sharp and more grainy compared to a photo taken at a lower ISO setting like ISO 100. So, it's important to find a balance between getting a proper exposure and keeping the ISO as low as possible to minimize noise.
Long Exposure Times
Long exposure times can also contribute to image noise. When you keep the camera's shutter open for an extended period, the sensor is continuously exposed to light. During this time, the sensor accumulates charge, which is used to create the image.
However, as the sensor heats up due to the continuous operation, it can introduce thermal noise. This thermal noise is similar to the static you might see on a screen when an electronic device gets too hot. In a long - exposure landscape photo, for example, if you're using a shutter speed of several seconds to capture a flowing river or a starry sky, the sensor's temperature can rise. This increase in temperature causes the electrons in the sensor to move more randomly, leading to the formation of noise in the image. You might notice small, random dots or a general graininess in the final photo. To combat this, some cameras have built - in cooling mechanisms or long - exposure noise - reduction features. These features work by taking a second, blank exposure (a "dark frame") and subtracting it from the main exposure to remove the thermal noise. But even with these features, long exposure times can still introduce some level of noise, so it's something to consider when planning your shots.
The Impact of Image Noise
Aesthetically Unpleasing
The presence of image noise can have a significant and often detrimental impact on the aesthetic appeal of an image. To truly understand this, let's take a look at a side-by- side comparison of two images: one with noise and one without.
Imagine a beautiful beach scene. In the noise-free image, the sand appears smooth and golden, the ocean is a clear, deep blue, and the white - capped waves crashing on the shore are crisp and defined. The sky is a perfect, even shade of blue, and the seagulls soaring overhead have sharp, detailed feathers. This image is a pleasure to look at; it captures the essence of a peaceful and idyllic beach day.
Now, contrast this with the same beach scene but with image noise. The sand is covered in tiny, grainy dots, making it look rough and uneven. The ocean's color is no longer a smooth blue but is instead marred by random specks, giving it a murky appearance. The waves seem less distinct, as the noise blurs their edges. The sky has a grainy texture, and the seagulls' feathers are no longer sharp; they blend into the noisy background. This noisy image lacks the clarity and smoothness that made the noise - free version so appealing. It's as if a layer of grime has been smeared over the photograph, making it look unappealing and of lower quality. Whether it's a landscape, a portrait, or a still - life, image noise can quickly transform a potentially stunning image into one that is visually unappealing and disappointing.
Loss of Detail
Image noise has a particularly damaging effect when it comes to the loss of detail in an image. Consider a detailed landscape photograph of a forest. In an ideal, noise - free situation, you can clearly see the individual leaves on the trees, each with its own unique shape, texture, and color. The bark of the trees shows the fine grooves and patterns that have developed over time. The small wildflowers on the forest floor are in focus, and you can make out the delicate veins in their petals.
However, when image noise is present, all of these beautiful details start to fade away. The leaves become a blur of color, with the noise making it difficult to distinguish one from another. The texture of the tree bark is replaced by a grainy mess, and the details of the wildflowers are lost. The noise masks the subtle differences in color and contrast that are essential for seeing these fine details.
Another example could be a close - up photograph of a historical building. In a noise - free image, you can admire the intricate carvings on the facade, the fine details of the window frames, and the unique patterns of the bricks. But with image noise, these details are obscured. The carvings become less distinct, the window frames seem less sharp, and the brick patterns are muddled. This loss of detail not only reduces the visual interest of the image but also makes it less valuable for those who want to study or appreciate the subject matter. Whether you're a nature photographer trying to capture the beauty of the outdoors or a historian documenting historical sites, image noise can be a major obstacle to preserving the important details of your images.
Reduced Usability
In many professional fields, the presence of image noise can have far - reaching consequences, reducing the usability of images and potentially leading to incorrect analyses or decisions.
In the medical field, for example, accurate image analysis is crucial for diagnosing diseases and planning treatments. Medical images such as X - rays, MRIs, and CT scans are used to detect tumors, fractures, and other medical conditions. However, if these images are affected by noise, it can be extremely difficult for doctors to accurately identify the problem. A small tumor might be hidden in the noise, leading to a misdiagnosis or a delay in treatment. In the case of an X - ray of a broken bone, noise could make it hard to determine the exact location and severity of the fracture, which could impact the treatment plan.
Satellite imagery is another area where image noise can cause significant problems. Scientists use satellite images to study weather patterns, monitor environmental changes, and map the Earth's surface. Noise in these images can interfere with the analysis of cloud formations, making it difficult to predict weather accurately. In environmental monitoring, noise can obscure changes in vegetation cover or the presence of pollutants. When mapping the Earth's surface, noise can lead to inaccurate measurements and misinterpretations of geographical features. For example, in a satellite image used to study deforestation in a rainforest, noise could make it seem like there is more or less forest cover than there actually is, leading to incorrect conclusions about the state of the ecosystem. So, in these and other professional applications, removing image noise is not just a matter of aesthetics but a necessity for accurate analysis and decision - making.
Manual Methods for Removing Noise
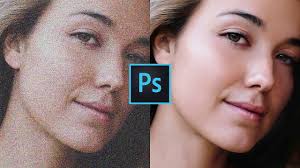
Using Photoshop
Photoshop is a powerhouse when it comes to image editing, and it offers several effective ways to remove noise from images.
Despeckle Filter
The Despeckle filter in Photoshop is a relatively simple yet useful tool for reducing noise. Here's how you can use it:
Open your noisy image in Photoshop. You can do this by going to "File" > "Open" and selecting the image file.
Once the image is open, it's a good practice to duplicate the layer. You can do this by right - clicking on the background layer in the Layers panel and selecting "Duplicate Layer." This ensures that you have the original image intact in case you need to start over.
Now, go to the "Filter" menu. In the dropdown list, find "Noise" and then select "Despeckle." When you apply the Despeckle filter, Photoshop analyzes the image and reduces the appearance of noise by blurring the areas where the noise is present, while trying to maintain the edges and details as much as possible.
Let's take a look at an example. Suppose you have a photo of a city street at night that has a fair amount of Gaussian noise, making the buildings and the street look grainy. Before applying the Despeckle filter, the noise is clearly visible, and the image has a rough, unappealing texture. After applying the filter, the graininess is significantly reduced. The overall appearance of the image becomes smoother, and the details of the buildings, like the windows and the architectural features, are still distinguishable, although there might be a slight softening effect. However, one drawback of the Despeckle filter is that it doesn't offer much control over the blurring amount. It applies a preset algorithm, and in some cases, it might not be sufficient for more severe noise or might over - blur certain areas.
Gaussian Blur and Layer Masks
Combining Gaussian Blur with layer masks is a more advanced and precise method for removing noise while preserving important details. Here's a step-by-step guide:
**Open your image in Photoshop and duplicate the background layer as befor
Select the duplicated layer and go to "Filter" > "Blur" > "Gaussian Blur." A dialog box will appear. The Gaussian Blur filter allows you to adjust the radius of the blur. Start with a small radius value, say around 1 - 3 pixels. As you increase the radius, the image will become more blurred, which helps in reducing the noise. But be careful not to over - blur, as this will cause you to lose important details.
After applying the Gaussian Blur, you'll notice that the noise has been reduced, but so have some of the details. This is where layer masks come in. Add a layer mask to the blurred layer. You can do this by clicking on the "Add layer mask" button at the bottom of the Layers panel. The layer mask appears as a white rectangle next to the layer thumbnail.
Now, select the Brush tool. Set the foreground color to black. With the layer mask selected, start painting over the areas where you want to reveal the original, un- lurred details. For example, if you have a portrait and you've blurred the entire face to remove noise, you can use the brush to carefully paint over the eyes, nose, and mouth.
Since black on a layer mask hides the layer content, it will show the sharp, original details from the underlying layer, while the areas where you haven't painted (kept white on the mask) will remain blurred, effectively removing the noise in those areas. You can adjust the brush size, hardness, and opacity according to the specific needs of your image. For more delicate areas, a soft - edged brush with a lower opacity can be used to create a smooth transition between the blurred and sharp areas.
Other Image Editing Software
Photoshop isn't the only game in town when it comes to removing noise from images. There are other software options that offer useful noise - reduction features.
Illustrator
Adobe Illustrator is mainly known for vector - based design, but it also has some capabilities for handling raster images and reducing noise. When you import a noisy raster image into Illustrator, you can use the "Effect" menu.
Under "Effect," there are options like "Texture" > "Grain" that can be adjusted in a reverse-way to reduce the appearance of existing noise. Although it's not as dedicated to noise reduction as some other software, it can be handy if you're already working in Illustrator and need to quickly clean up a simple image.
For example, if you have a logo or a simple graphic with a bit of noise, you can use these effects to smooth it out. The advantage of using Illustrator for this is that it integrates well with vector - based elements. You can easily combine the noise - reduced raster part with vector graphics, and the overall file size can be relatively small, especially if you plan to use the image for web or print in a vector - friendly format.
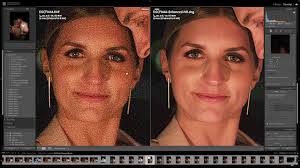
Lightroom
Adobe Lightroom is a popular choice among photographers for its non - destructive editing capabilities and powerful set of tools for enhancing photos, including noise reduction. When you import an image into Lightroom, you can access the noise - reduction settings in the "Develop" module.
In the "Detail" panel, there are two main sliders for noise reduction: "Luminance" and "Color."
The "Luminance" slider is used to reduce grayscale noise, which affects the brightness values in the image. Adjusting this slider can make the image smoother, reducing the grainy appearance.
The "Color" slider, on the other hand, is for reducing color noise. This is useful when the noise is causing color fringing or random color shifts in the image.
For example, if you have a landscape photo with some color noise in the sky or in the foliage, adjusting the "Color" slider can correct these issues. Lightroom also allows you to preview the changes in real - time, so you can see exactly how the adjustments are affecting the image. Additionally, it has presets that can be a good starting point for common noise - reduction scenarios, and you can further fine - tune the settings according to your specific image requirements.
AI - Powered Solutions: Unblurimage.ai
How Unblurimage.ai Works
Unblurimage.ai is a remarkable online platform that has revolutionized the way we deal with image noise, thanks to its cutting - edge artificial intelligence technology. At its core, Unblurimage.ai uses deep - learning algorithms, specifically convolutional neural networks (CNNs), which are designed to process and analyze images in a highly efficient and intelligent manner.
When you upload an image to Unblurimage.ai, the first step in the process is that the AI algorithms break down the image into its individual pixel. Each pixel contains information about color and brightness, and the AI carefully examines the patterns and relationships between these pixels. For example, in a noisy image with Gaussian noise, the AI can detect the random fluctuations in pixel values that are characteristic of this type of noise. It has been trained on a vast dataset of both noisy and clean images, allowing it to recognize the normal patterns of an image and identify the abnormal, noisy patterns.
Once the noise patterns are identified, the AI goes to work on removing them. It does this by using a process called denoising. The denoising process involves the AI making intelligent predictions about what the pixel values should be without the noise. It draws on the knowledge it has gained from the training dataset to fill in the gaps and correct the noisy pixels. For instance, if a pixel has a value that is much different from its neighboring pixels due to noise, the AI will adjust the value to be more in line with the surrounding pixels, while still preserving the important details of the image.
In the case of more complex noise, like salt-and-pepper noise, the AI uses its understanding of the image's structure to distinguish between the noise (the random white and black dots) and the actual content of the image. It can then selectively remove the noise pixels while leaving the real image features intact. This ability to analyze and manipulate individual pixels with such precision is what makes Unblurimage.ai so effective in removing different types of image noise.

Features of Unblurimage.ai
High - Quality Denoising
One of the standout features of Unblurimage.ai is its ability to perform high-quality denoising. When it comes to removing noise from images, this platform doesn't just do a mediocre job; it excels at delivering results that are truly impressive.
Take, for example, a landscape photo that has been marred by a significant amount of noise due to a high ISO setting. Before using Unblurimage.ai, the image might look grainy, with the details of the mountains, trees, and sky being obscured by the random noise. But after processing the image on Unblurimage.ai, the difference is astonishing. The noise is almost completely eliminated, and the original details of the landscape are restored. The sharp edges of the mountains, the individual leaves on the trees, and the smoothness of the sky are all brought back to life. The colors also appear more vibrant and true - to - life, as the noise that was distorting them has been removed. This high - quality denoising ensures that your images look their best, whether you're using them for personal enjoyment, sharing on social media, or for professional purposes.
User-Friendly Interface
Unblurimage.ai is designed with the user in mind, and its user-friendly interface is a testament to that. Even if you have no prior experience with image editing or advanced technical knowledge, you'll find it incredibly easy to use.
When you first visit the Unblurimage.ai website, you're greeted with a clean and intuitive interface. The main page clearly shows you where to upload your image. There are no complicated menus or hidden settings to navigate. Once you've uploaded your noisy image, the available options for noise removal are presented in a simple and straightforward manner. You don't need to be a professional to understand which option is best for your particular image. And when the processing is complete, downloading the denoised image is just a click away. It's as easy as 1-2-3, making it accessible to everyone from young hobbyist photographers to busy professionals who need a quick and easy solution for their image - noise problems.
Fast Processing Speed
In today's fast-paced world, time is of the essence, and Unblurimage.ai understands that. That's why it offers a remarkably fast processing speed.
Imagine you have a large number of images that need to have the noise removed. With some traditional image-editing methods, this could take hours or even days, depending on the complexity of the images and the processing power of your computer. But with Unblurimage.ai, the process is lightning-fast. Thanks to its optimized algorithms and powerful server infrastructure, it can process most images in just a matter of seconds. Whether you're in a hurry to get a photo ready for a social media post or you need to quickly clean up a batch of images for a work project, Unblurimage.ai has you covered. You won't have to spend hours waiting for your images to be processed; you can get the job done in no time and move on to the next task.
Step-by-Step Guide on Unblurimage.ai
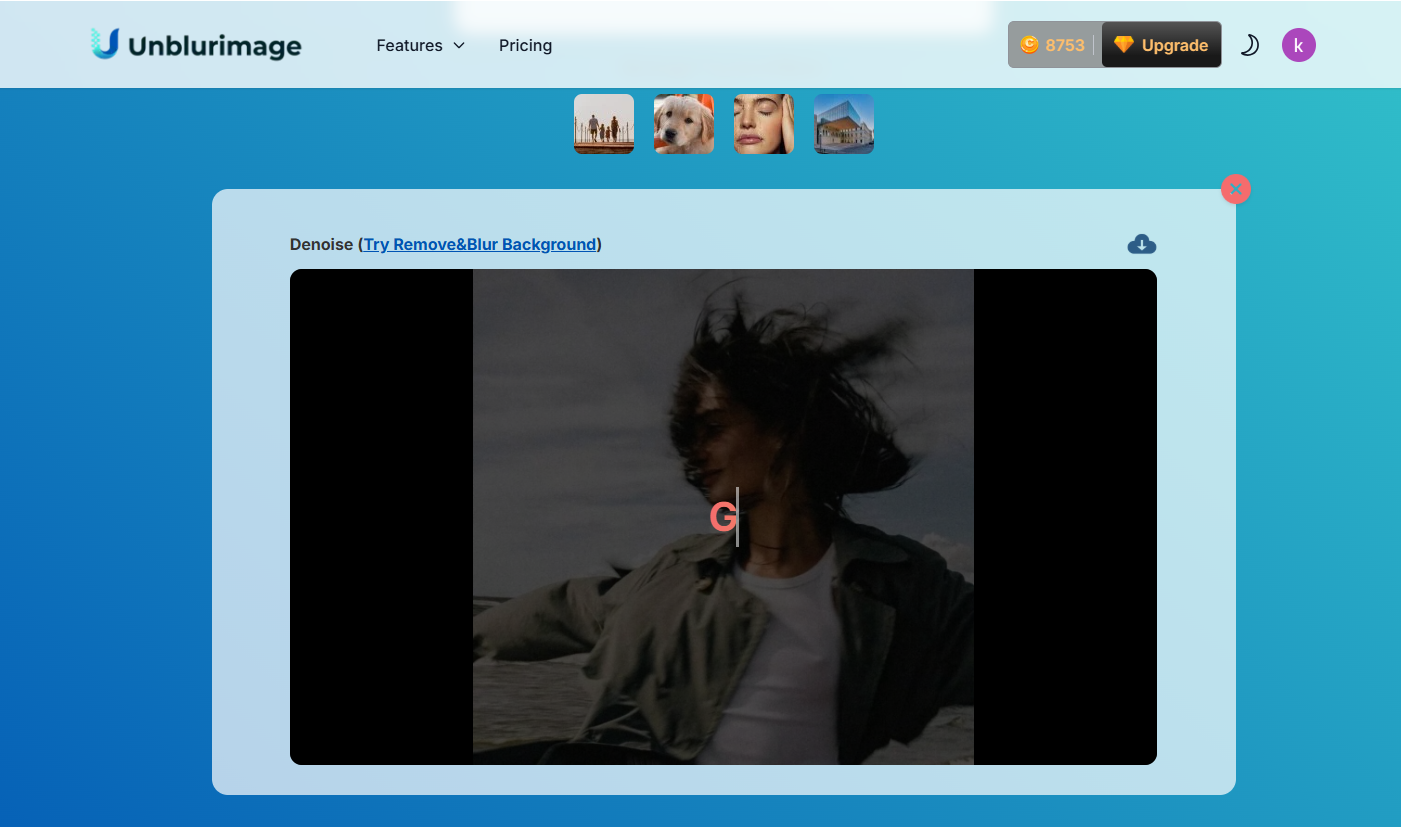
Step 1: Upload Your Image:
First, open your browser, enter the URL of Unblurimage.ai in the address bar, and enter the official website homepage. Click the eye-catching "Upload Image" button in the center of the page. In the pop-up file selection window, find and select the image file you need to denoise. The supported formats include common ones like JPEG and PNG, as well as TIFF commonly used in professional photography, meeting the needs of different users.

Step 2: Process the Image:
AI-Powered Noise Removal: Once uploaded, the AI algorithms get to work. They analyze your image pixel by pixel, identifying noise patterns and distinguishing them from actual image details. This smart approach ensures that while noise is removed, the essential elements of your image – like textures, lines, and colors – remain intact.
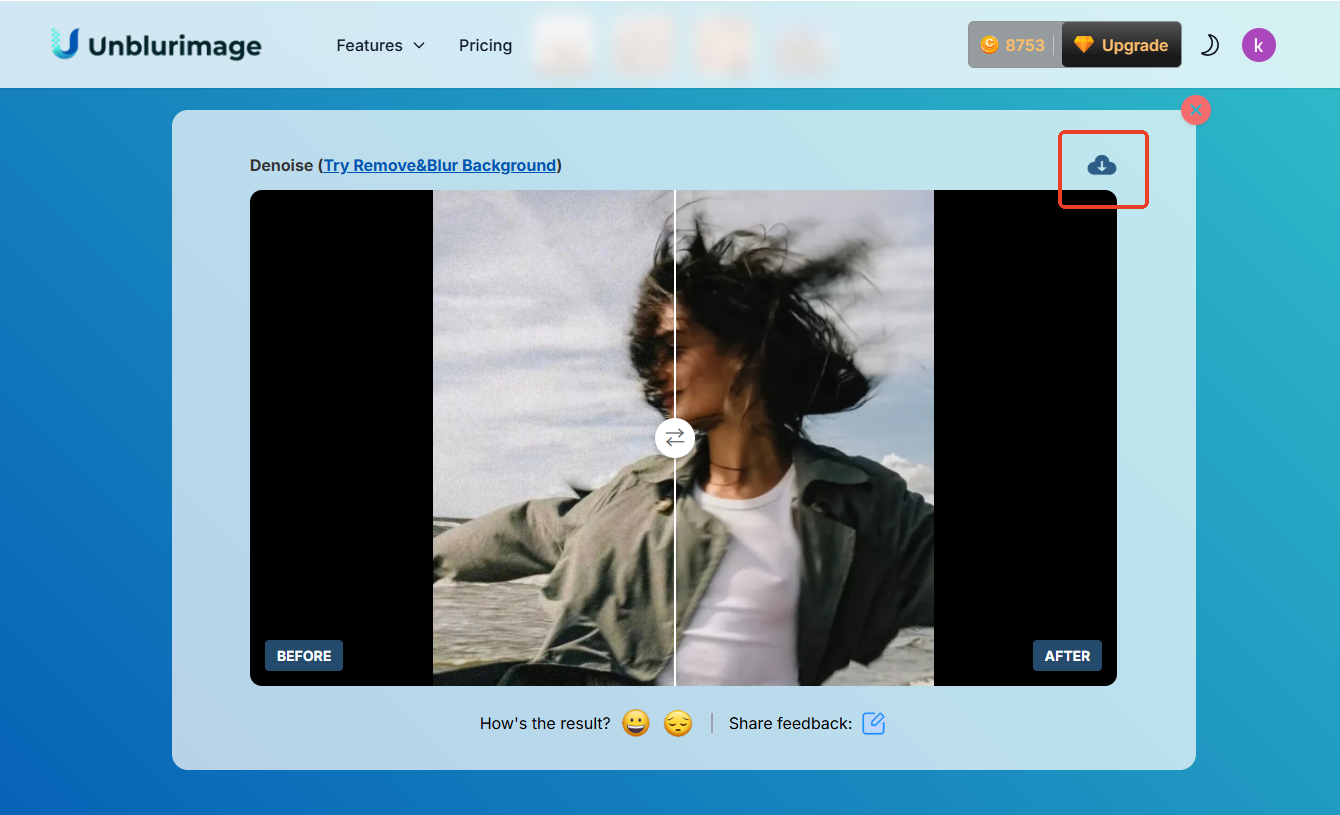
Step 3: Download the Processed Image:
After the processing is completed, a prompt message will pop up on the page. Click the "Download" button, and the processed image will be downloaded to the specified folder in the original format or the format you choose (if there are relevant settings). You can view and use this brand-new image at any time.
Comparing Manual and AI - Powered Methods
Efficiency
Manual noise-removal methods, such as using software like Photoshop, are cumbersome and time-consuming. For example, when processing a complex landscape photo, manual noise removal may require first using the Despeckle Filter for preliminary processing, and then combining Gaussian Blur and Layer Masks for fine-tuning. Each step requires manual parameter setting and effect observation, and the entire process may take 10-15 minutes or even longer. In contrast, for the same photo, using Unblurimage.ai only requires uploading, selecting options, and clicking the processing button, and you can get the result in just a few seconds. The processing efficiency is increased by dozens of times. If you need to process a large number of images, the batch processing function of Unblurimage.ai can save a significant amount of time and effort.
Quality of Results
Although manual noise - removal methods have certain effects, they often struggle to balance noise removal and detail retention. For example, when using Gaussian Blur to remove noise, it is easy to cause the edges of the image to blur and details to be lost, making the processed image look "soft" and lacking sharpness. Unblurimage.ai, with its advanced AI algorithms, can intelligently identify noise and image details. While removing the noise, it maximally preserves the texture, color, and edge information of the image. From the comparison of actual processing effects, the images processed by Unblurimage.ai are significantly superior to those processed manually in terms of clarity, color restoration, and detail richness.
Complexity
Manual noise removal requires users to have certain image-processing knowledge and software operation skills. Users not only need to be familiar with the functions and usage methods of various filters and tools but also master advanced operation techniques such as layers, masks, and channels. The learning cost is relatively high, and beginners often need to spend a lot of time and effort to master them. In contrast, the operation process of Unblurimage.ai is extremely simple. Without the need for any professional knowledge, you can easily achieve image noise removal just by following the steps of uploading, selecting, processing, and downloading, truly achieving "zero - threshold" use.
Tips for Preventing Image Noise in the First Place
Proper Lighting
Sufficient lighting is the key to avoiding noise in images. When shooting, give priority to well - lit environments. If shooting portraits, you can choose to shoot outdoors on a sunny day and use natural light to create a soft and even lighting effect. If shooting indoors, you can increase the lighting equipment, such as using ring lights, photography lights, etc., to provide enough light for the shooting subject. In addition, the reasonable use of auxiliary tools such as reflectors can also effectively improve the light distribution and reduce the noise problem caused by increasing the ISO due to insufficient light.
Optimal ISO Settings
Correctly setting the ISO value is an important means of controlling noise. Generally, in well - lit conditions, setting the ISO to 100 or 200 can obtain images with extremely low noise and clear image quality. As the light gradually dims, you can appropriately increase the ISO value, but operate with caution. For example, when shooting at dusk, you can first try setting the ISO to 400 - 800 and observe the shooting effect. If the noise is not obvious and the exposure is appropriate, there is no need to further increase the ISO. If the exposure is insufficient, gradually increase the ISO value, but try not to exceed the "native ISO" range of the camera to avoid a significant increase in noise.
Image Sensor Maintenance
Regular maintenance of the camera's image sensor can effectively reduce noise and spots caused by dust and impurities. In daily use, avoid changing lenses in a dusty environment to prevent dust from entering the camera. Clean the sensor with professional cleaning tools at regular intervals. First, use an air blower to gently blow away the dust on the surface of the sensor. If there are still stubborn stains, you can use special cleaning fluid and cleaning rods and wipe them according to the correct operation method. If you are not confident in cleaning the sensor yourself, it is recommended to send the camera to a professional maintenance agency for cleaning and maintenance.
Case Studies
Before-and-After Examples
Portrait Photography: A user took a photo at an indoor birthday party. Due to the dim lighting at the scene, the subject's face and the background in the photo were covered with a large amount of noise, and the colors also appeared dull. After uploading it to Unblurimage.ai for processing, a miracle happened. The noise completely disappeared, the subject's skin became smooth and delicate, the details of the makeup on the face were clearly visible, and the colors became bright and vivid. The entire picture was filled with a warm and joyful atmosphere, and the originally ordinary birthday photo was instantly transformed into a beautiful portrait worth treasuring.
Landscape Photography: A long - exposure night - scene photo taken in the mountains showed obvious noise around the stars in the sky, and the vegetation and rocks on the ground also appeared blurred due to the noise. After being processed by Unblurimage.ai, the starry sky became pure and bright, and each star was clearly visible. The details on the ground were also perfectly presented, with the texture of the trees and the texture of the rocks vividly displayed, just like a beautiful work of art, fully demonstrating the magnificent beauty of nature.
User Testimonials
"I'm a travel blogger and often need to take photos in various environments. In the past, photos taken in places with poor lighting were always full of noise, and post - processing was very troublesome. Since I discovered Unblurimage.ai, everything has become much easier! It can quickly and efficiently remove noise, and the quality of the processed photos is extremely high. My followers all praise that my photos are becoming more and more professional!" - Lily, travel blogger
"As an e - commerce seller, the quality of product images directly affects sales. In the past, I needed to spend a lot of time on Photoshop to deal with noisy product images, and the results were not always satisfactory. Now, using Unblurimage.ai, I can handle a batch of images in just a few minutes, which has greatly improved my work efficiency, and product sales have also increased significantly!"-Tom, e-commerce store owner
Conclusion
In this blog post, we have comprehensively and deeply explored the relevant knowledge of image noise. We have elaborated in detail on the definition and types of image noise (including Gaussian noise, salt-and-pepper noise, and shot noise), the causes (such as low-light environments, high ISO settings, long exposure times, etc.), and the impact of noise on the aesthetics, details, and practicality of images. At the same time, we have compared traditional manual noise-removal methods with the AI-based Unblurimage.ai noise-removal solution, analyzing the differences in efficiency, processing quality, and operation complexity. In addition, we have shared practical tips for preventing image noise and intuitively demonstrated the powerful functions and excellent effects of Unblurimage.ai through actual cases and user reviews.
Whether you are a photography enthusiast, a professional photographer, or someone engaged in image-related work, image noise may be a frequent disturb you face. Unblurimage.ai, with its advanced AI technology, simple and easy- to-use operation process, fast and efficient processing speed, and excellent processing quality, provides us with a perfect solution. Don't let noise affect the quality of your images any longer. Upload your photos now and experience the magical effects brought by Unblurimage.ai! If you have any experiences, suggestions, or encounter problems during the use, feel free to leave a comment and communicate. Let's explore more possibilities of image noise removal together!