How to Increase the Resolution of Images

By unblurimage.ai
2026/6/12
How to Increase the Resolution of Images
Pixelated Problems? Time to Increase Image Resolution!You’ve probably been there – you take a photo, and when you zoom in, it turns into a pixelated mess. It's like trying to read a map with blurry roads! Whether you're a photographer, a content creator, or just someone who likes to share high-quality images on social media, the resolution of your images is everything. But what happens when you’ve taken a photo that’s less “high-definition” and more “low-res nightmare”? Fret not – you don’t need to call in a pro to fix this.
In this blog, we’ll explore how to increase image resolution and transform your fuzzy photos into crisp, sharp images. Whether you want to print a giant canvas, upload a sharper image to your website, or improve an old photo, this guide will help you bring those blurry pixels into focus. Ready to level up your photo game? Let’s get started!
Quick Answer: How Do You Increase Image Resolution?
The easiest way to increase image resolution without losing quality is to use an AI image upscaler. Instead of simply stretching pixels, AI upscaling enlarges the image while improving clarity, reducing pixelation, and preserving natural details.
Table of Contents
- Quick Answer: How Do You Increase Image Resolution?
- Why Image Resolution Matters
- What is Image Resolution?
- Understanding the Limits of Image Resolution
- How to Increase Image Resolution Without Losing Quality
- Use a Dedicated AI Image Upscaler for Low-Resolution Photos
- When Should You Use Linocut Image Upscaler?
- Common Mistakes to Avoid When Increasing Image Resolution
- Conclusion: Sharpen Your Image, Sharpen Your Content
- FAQs: Increasing Image Resolution
Why Image Resolution Matters
Let’s face it—today’s digital world thrives on visuals. Whether you're scrolling through Instagram, checking out the latest blog post, or browsing your portfolio, everything is about the picture. And what’s one thing all high-performing pictures have in common? Resolution. A crisp, clear image pulls the viewer in, engages them, and makes your content look professional. Conversely, a low-resolution image? It’s like inviting someone to a fancy dinner party and then serving them a plate of soggy fries. Not the vibe you want, right?
What is Image Resolution?
Resolution refers to the amount of detail an image holds. It’s the total number of pixels that make up the image. The higher the resolution, the sharper and clearer the image will appear. Resolution is usually measured in pixels per inch (PPI) or dots per inch (DPI) for print, and total pixel count for digital images. For example, a 1920x1080 image has a resolution of 1920 pixels horizontally and 1080 pixels vertically.
When an image is taken at a low resolution, it’s made up of fewer pixels. Zooming into such an image reveals those pixels, making the image appear pixelated and blurry. Increasing the resolution essentially adds more pixels, making the image sharper and clearer. But how do we do this without making the image look artificially stretched or blurry? Let’s dive in!
Understanding the Limits of Image Resolution
While it’s tempting to think that you can just “inflate” any image to a higher resolution, there are limits. If you try to increase the resolution of a very low-quality image too much, you may end up with an image that looks worse than when you started. The key is to strike a balance: increasing resolution while maintaining sharpness and quality.
Some tools—like Unblurimage AI—use advanced algorithms to increase the resolution of your image while enhancing details, reducing noise, and avoiding pixelation. But even the best tools can’t make a blurry image completely sharp if the original photo is too far gone. However, with the right techniques and tools, you can significantly enhance image quality.
How to Increase Image Resolution Without Losing Quality
Increasing image resolution without compromising the quality is a challenge that many face, especially when working with low-resolution images or blurry photos. While traditional resizing often results in pixelation or loss of detail, today, we have several advanced methods and tools to enhance image resolution while maintaining clarity. Whether you’re working with personal photos, social media images, or professional design work, it's crucial to choose the right method for optimal results.
1. Use a Dedicated AI Image Upscaler for Low-Resolution Photos
An AI image upscaler is the best choice when you need to enlarge a small or low-resolution image while keeping it clear, detailed, and natural-looking. Unlike basic resizing, which only stretches the existing pixels, AI upscaling analyzes the image and helps rebuild missing details so the enlarged result looks cleaner.
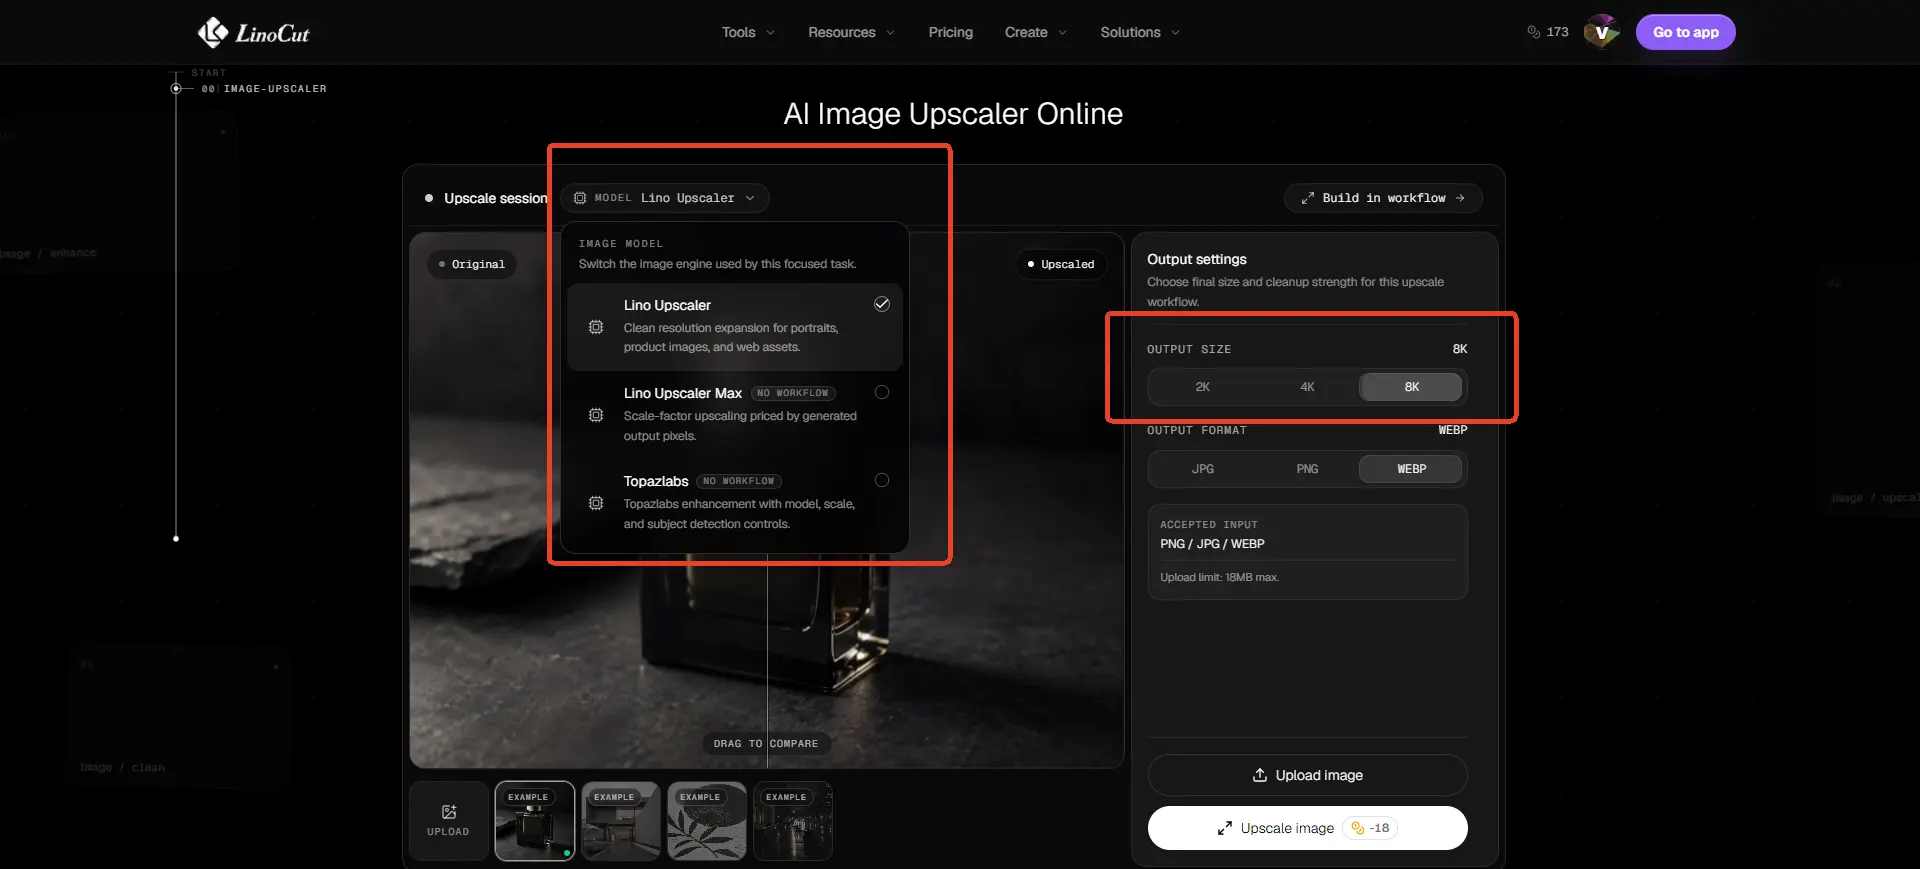
For this workflow, you can also try Linocut AI Image Upscaler. It helps upscale low-resolution images online and improve image clarity without the stretched or pixelated look that often happens with basic resizing tools.
Why Use Linocut AI Image Upscaler?
- AI-Powered Upscaling: Enlarges low-resolution images while improving clarity and detail.
- Cleaner Results: Helps reduce the stretched, soft, or pixelated look caused by basic resizing.
- Online Workflow: Upscale images directly in your browser without complex editing software.
- Useful for Multiple Scenarios: Works well for product photos, blog images, old pictures, AI-generated visuals, and social media graphics.
2. Use AI-Based Tools Like Unblurimage AI
When it comes to increasing image resolution, AI-powered tools are the future. Unblurimage AI is one of the leading solutions that leverages artificial intelligence to sharpen and enhance your images without losing quality. This tool uses deep learning algorithms to intelligently recognize details and restore image clarity, even when increasing resolution.
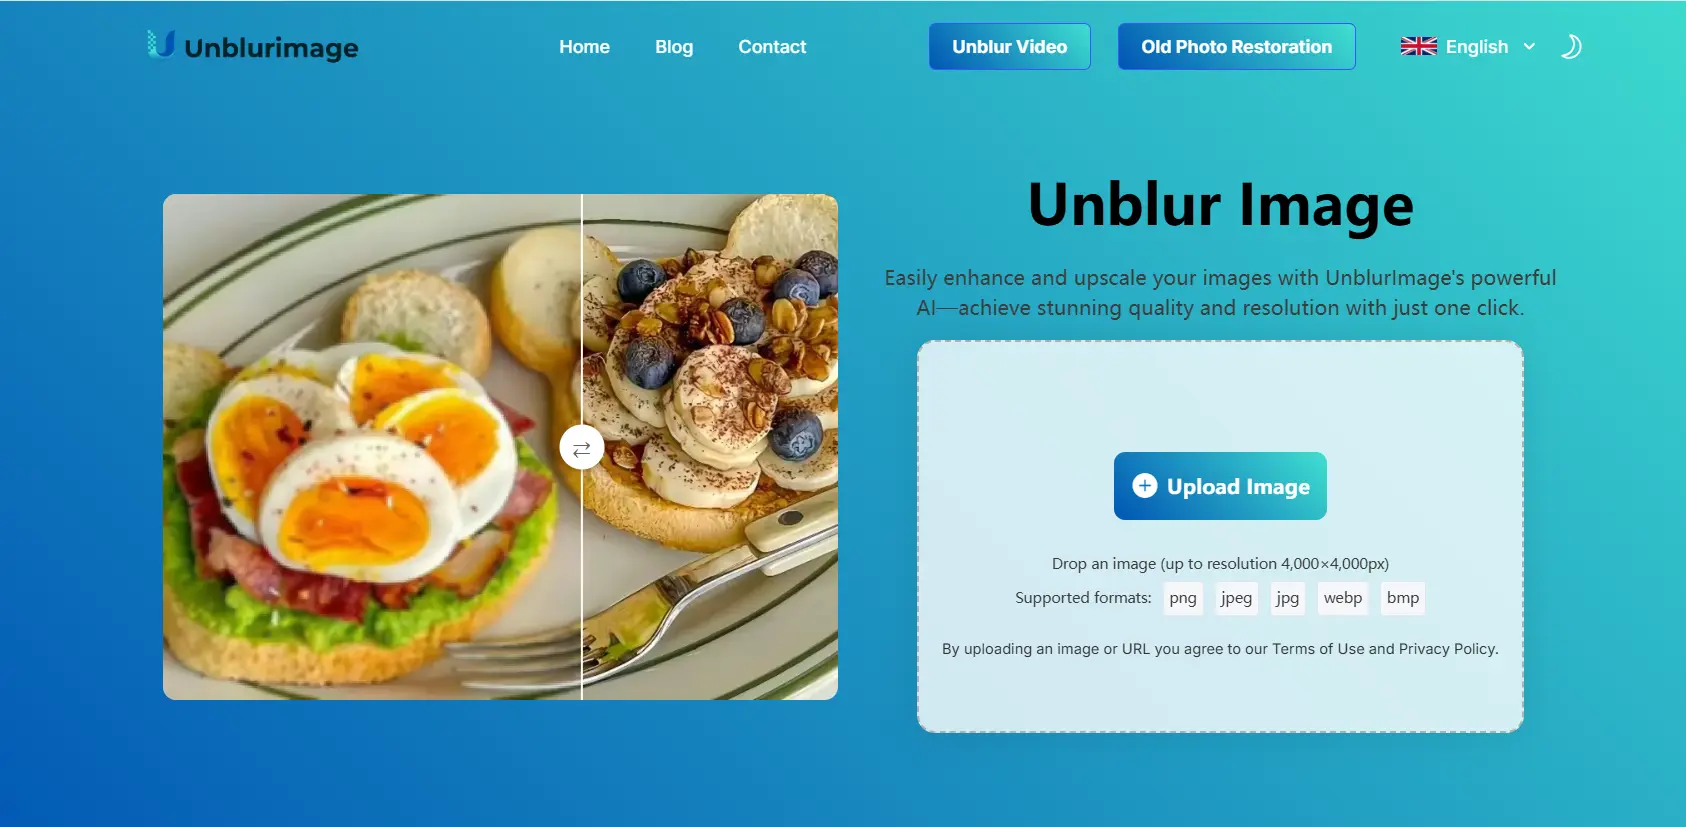
What is Unblurimage AI?
Unblurimage AI is an advanced image enhancement tool that uses artificial intelligence to increase image resolution while preserving its quality. The tool analyzes every pixel, identifies areas that need refinement, and intelligently reconstructs the image to create a high-resolution version with enhanced sharpness.
Features of Unblurimage AI
- AI-Powered Enhancement: Uses machine learning algorithms to improve image resolution while maintaining sharpness.
- Automatic Processing: No manual adjustments needed—simply upload the image and let the AI do the work.
- High-Quality Results: Increases resolution without pixelation or loss of detail, even for blurry or low-resolution images.
- User-Friendly: The interface is simple and easy to navigate, making it accessible for both beginners and professionals.
- Multi-format Support: Supports JPEG, PNG, TIFF, and other popular image formats.
How to Increase Image Resolution with Unblurimage AI
- Upload Your Image: Drag and drop or select the image you want to enhance. Unblurimage AI supports a variety of image formats.
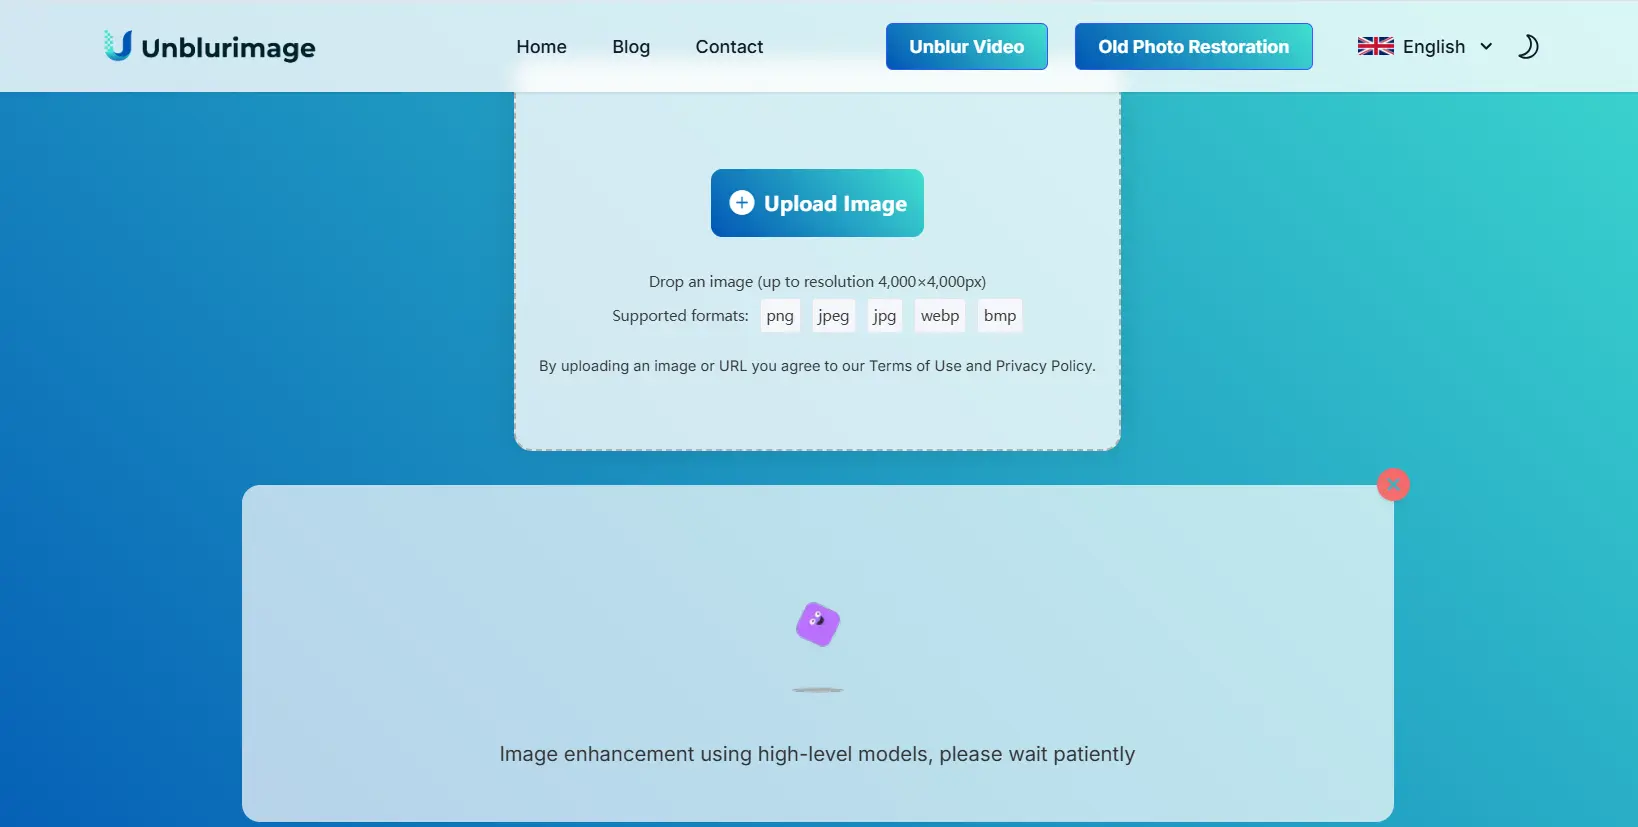
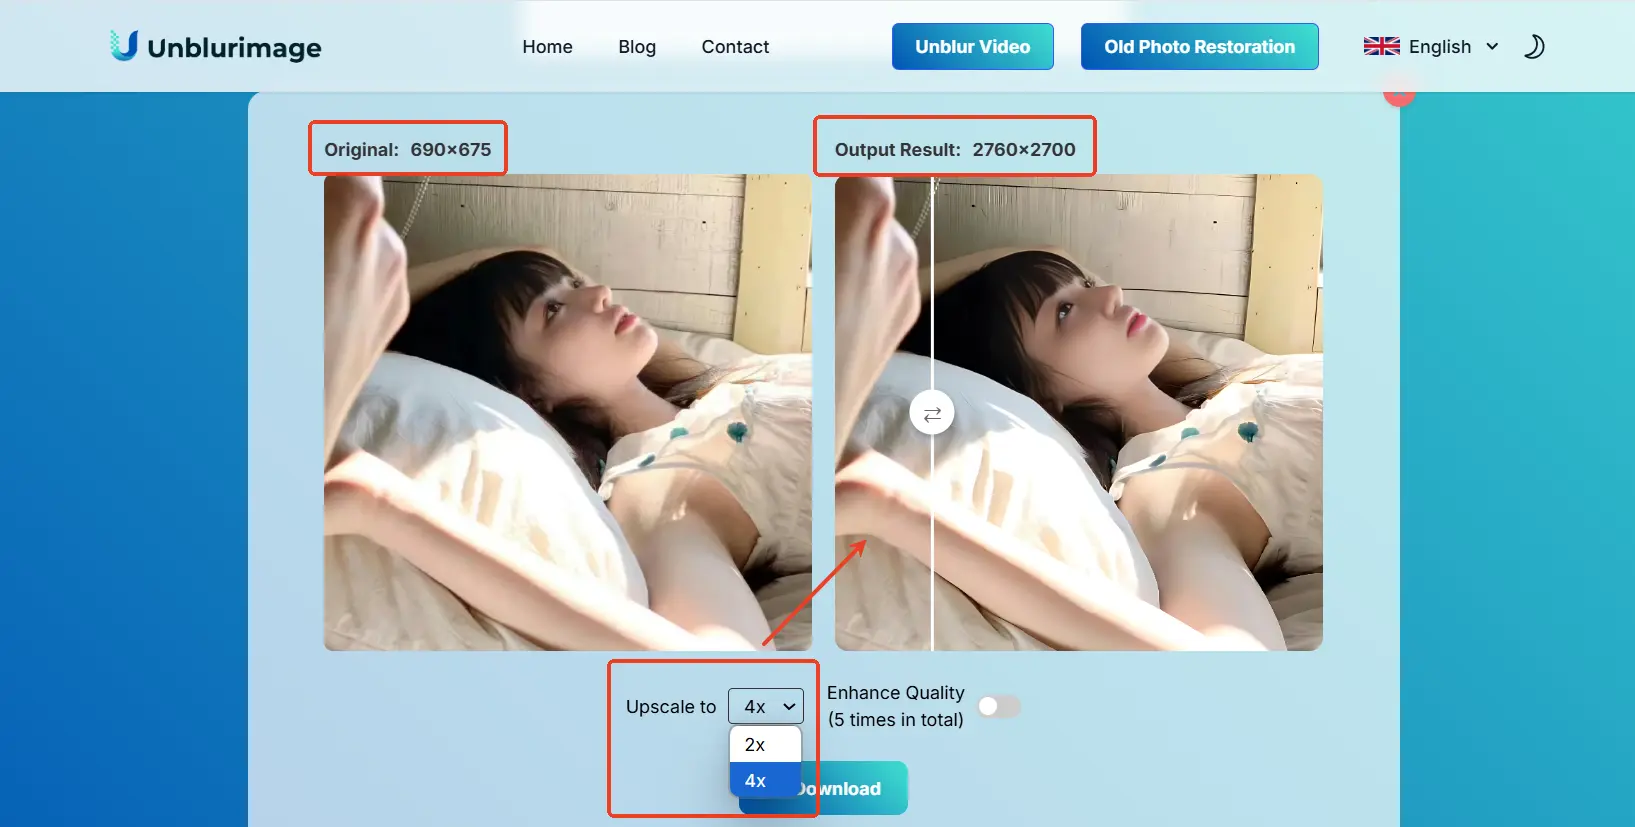
- Let AI Work Its Magic: The AI will Automatically enlarges the resolution of the image to 2 times that of the original. You’ll see improvements in sharpness, detail, and resolution.

- Choose the Desired Resolution: You can choose to adjust the magnification of the image, and Unblurimage AI supports magnifying the resolution of the image to the original 4x, giving you a high-definition visual experience.
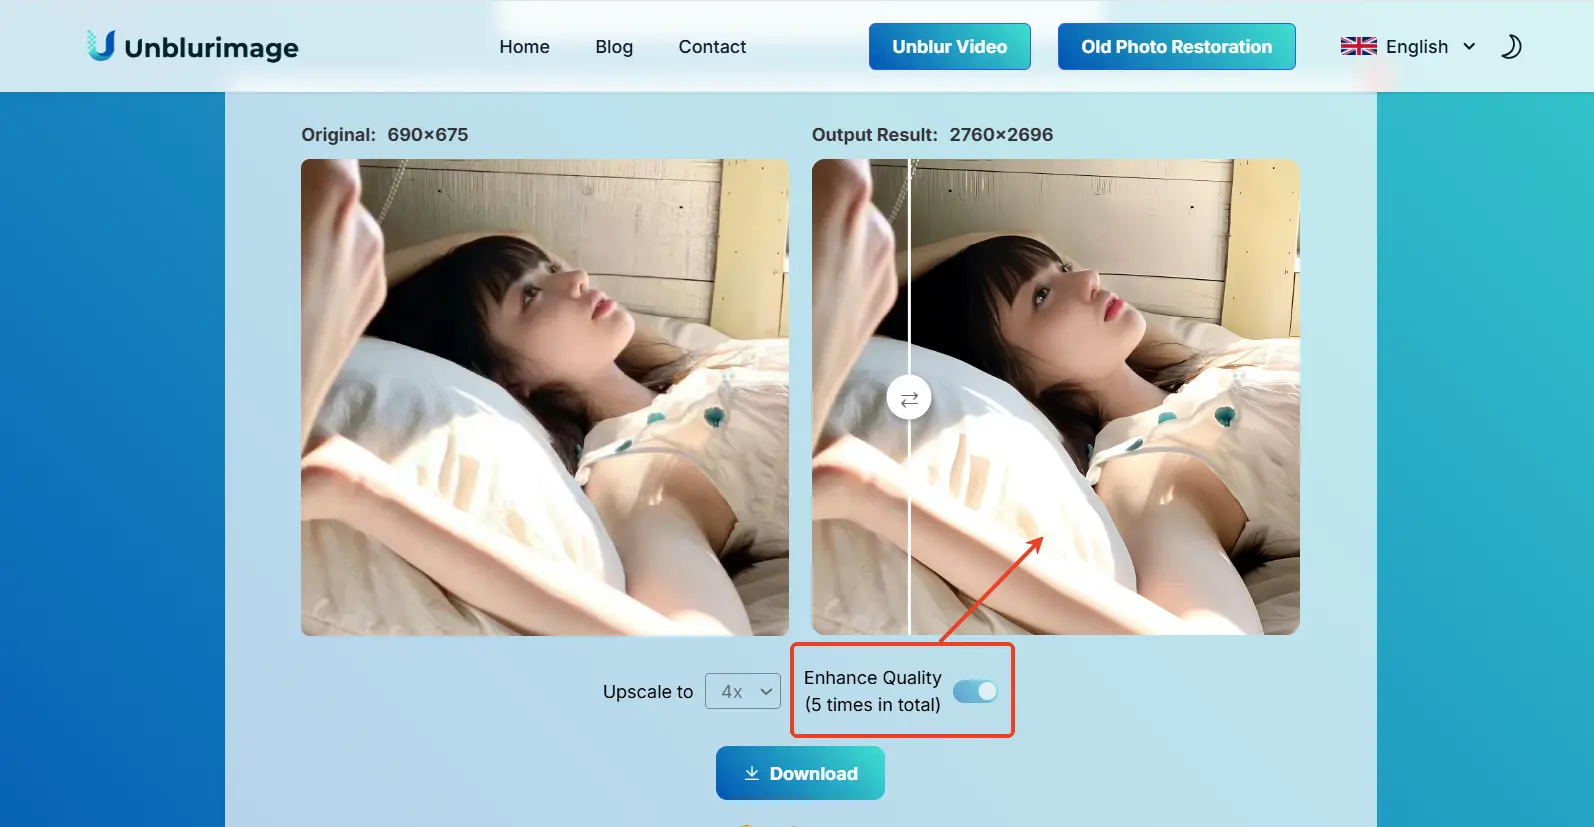
- Enhancement of image quality: Click “Enhance Quality” to enhance the face and details of the image using AI intelligence.
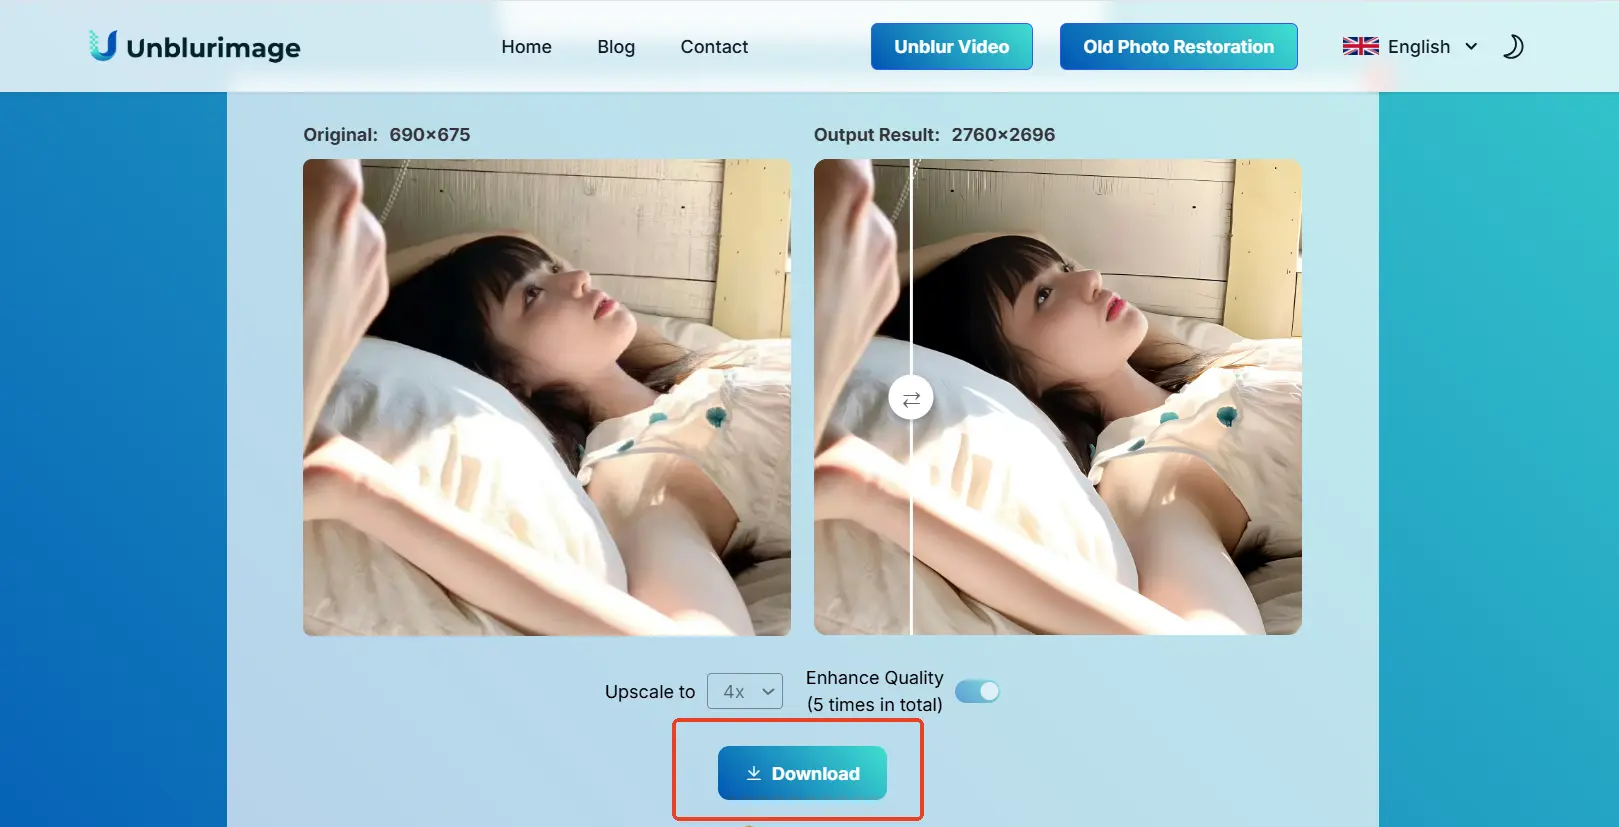
- Download the Enhanced Image: If satisfied, simply download the high-resolution version.
3. Traditional Image Editing Tools
If you prefer manual control over the image enhancement process, traditional image editing tools like Photoshop, GIMP, and Lightroom can also help sharpen and increase image resolution. Though these tools require more hands-on effort, they offer powerful functionalities for those familiar with image editing.
Manual Sharpening with Photoshop
Photoshop is a widely used and powerful tool for image editing, and it includes several ways to sharpen images and increase their resolution. Here's how you can manually sharpen and enhance an image using Photoshop:
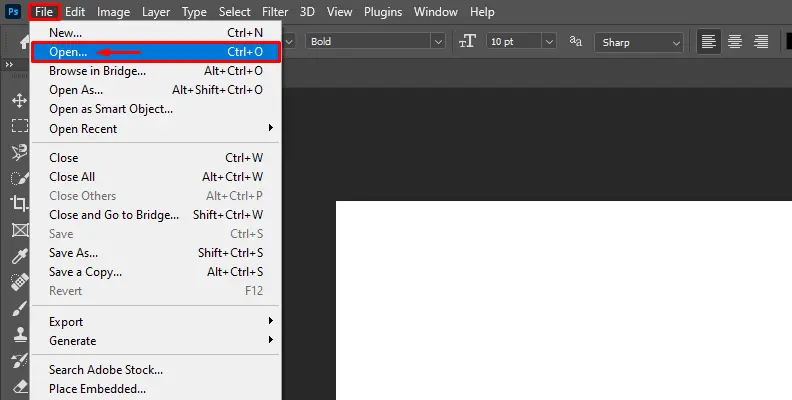
Step 1: Open the Image in Photoshop
- Open the Photoshop interface, click on the “File > Open” option and upload the image you need to increase the resolution, you can also use the “CTRL + O” shortcut on your keyboard to select the image and import it.
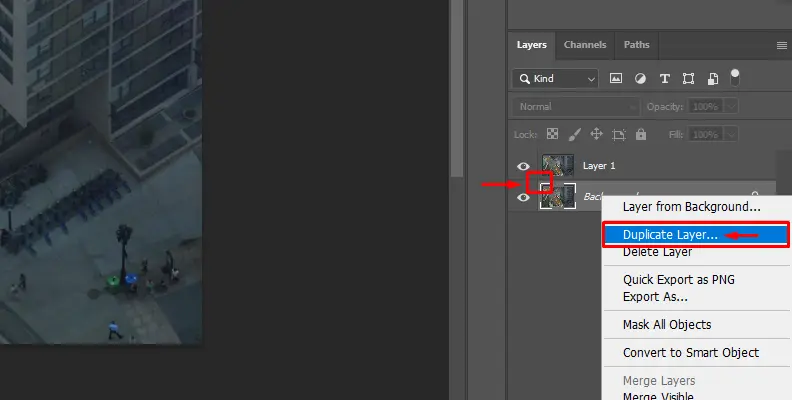
Step 2: Duplicate the Layer
- Click on your image on the right and use the "CTRL + J" shortcut to create a new layer. So that you don't work on the original.You can also right-click the original image and choose "Duplicate Layer" from the list of options.
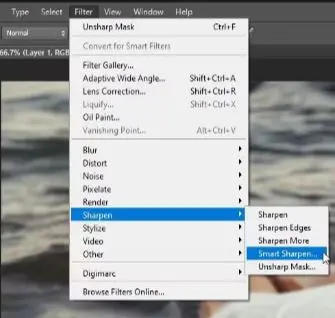
Step 3: Apply Smart Sharpen
- Click on “Magic Sharp” and you'll find a number of preset options that you can use to quickly shape the image in the direction you want.You can find a panel on the right side with various settings and parameters that you can change.
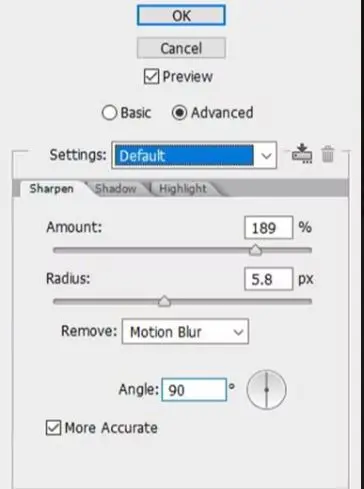
- There are Two key settings you can modify: Amount, Radius, and Threshold.
- Amount This controls the strength of the sharpening effect. Increasing the Amount will enhance the crispness of the image. However, setting it too high can introduce an artificial "halo" effect around objects.
- Radius This setting defines the scale of the details that are sharpened. A larger Radius will affect broader details, while a smaller Radius will focus on finer details.
Step 4: Save the Enhanced Image
- Click the File > Save As dialog box to download the processed image.
Using Lightroom for Clarity
Lightroom is another popular tool, especially for photographers who want to enhance sharpness and detail. It offers an intuitive way to adjust sharpness and improve image resolution.
Step 1: Import the Image into Lightroom
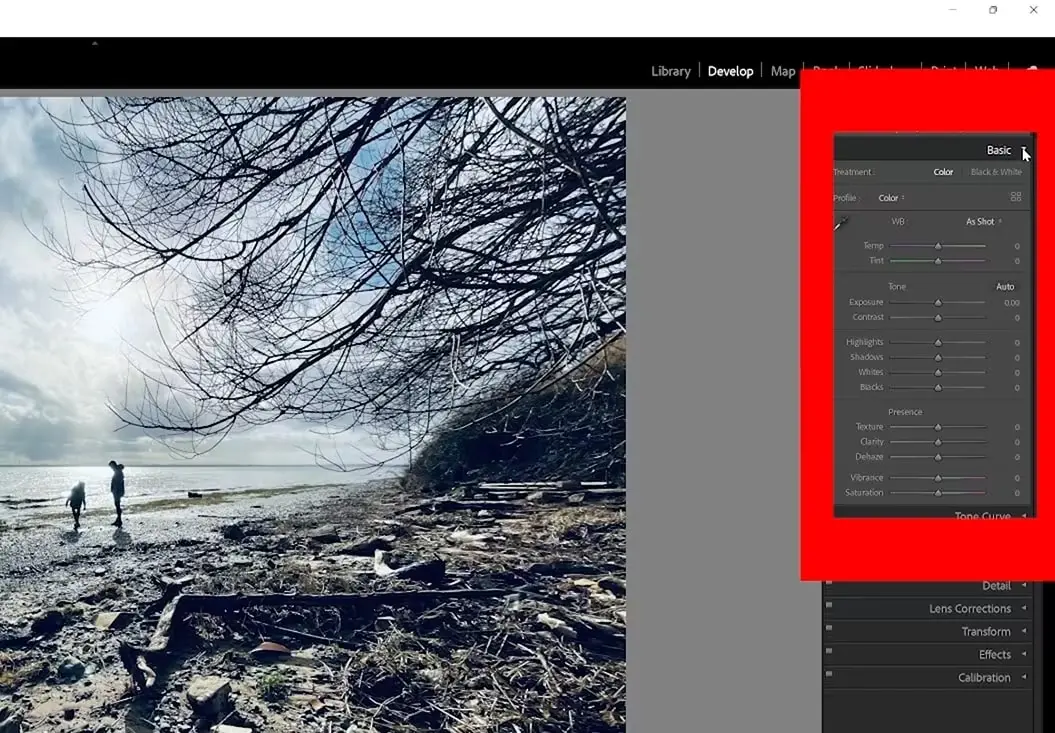
- You can use Lightroom's Basic and Detail panels to fix blurry images. Import an image in Lightroom and go to the right panel.
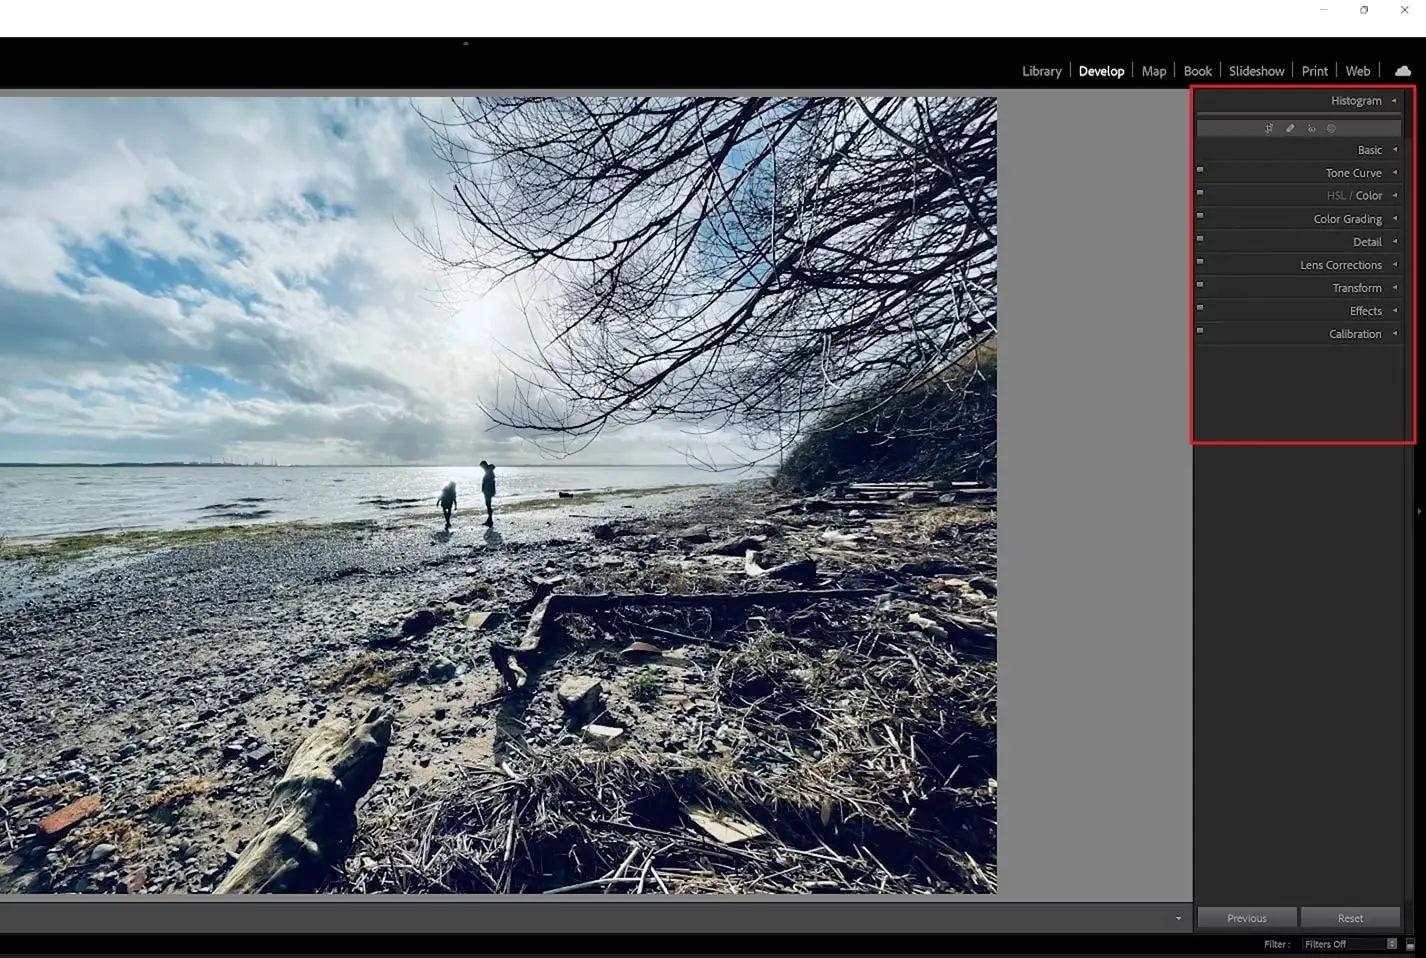
Step 2: Select the Image and Edit
- Click on the Basic tab and expand its options. Change image metrics (such as highlights and contrast) to make adjustments to your photo.
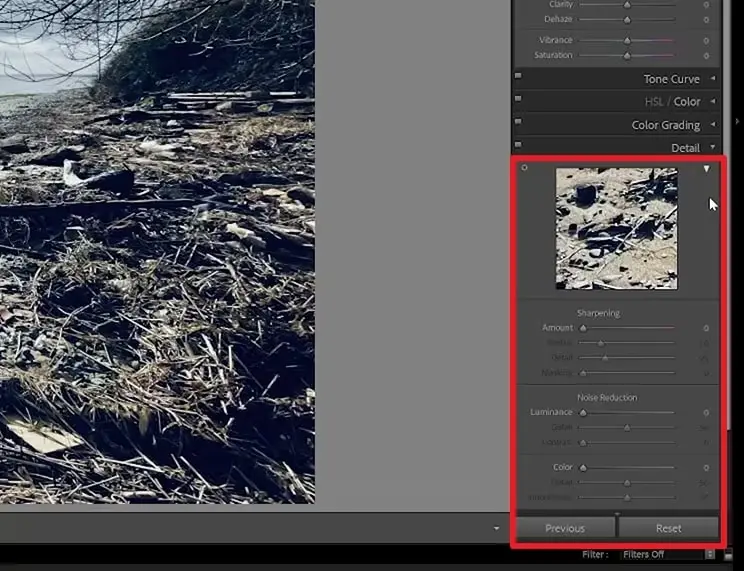
Step 3: Adjust the details
- You can adjust its opacity using the sliders. After that, click on the "Detail" panel, where you can fine-tune the "Sharpness" and "Noise Reduction" settings to enhance your image and remove blurriness.
Step 4: Review and Export
- If you are satisfied, click “File > Export” to export the image.
By using either AI-powered tools like Unblurimage AI or manual editing methods in Photoshop and Lightroom, you can successfully enhance your image resolution and make them suitable for any use—whether it’s for high-quality prints, social media, or professional presentations. While AI tools provide a quick and hassle-free solution, traditional tools offer greater manual control for those looking to fine-tune every detail.
When Should You Use Linocut AI Image Upscaler?
Traditional editing tools are helpful when you want manual control, but they can be time-consuming if you only need a fast resolution upgrade. Linocut Image Upscaler is a practical option when you want to upscale an image online without adjusting layers, sliders, or export settings manually.
You may want to use an AI image upscaler when the original image is too small, looks soft after cropping, or needs to be enlarged for a cleaner final result. Instead of simply stretching the image, AI upscaling analyzes the visual content and rebuilds details so the enlarged version looks sharper and more usable.
For example, if you have a small product photo, a compressed website image, an AI-generated image, or an old picture that looks pixelated when enlarged, Linocut Image Upscaler can help you upscale pixelated images online with a simpler workflow.
Common Mistakes to Avoid When Increasing Image Resolution
- Overstretching the Image: If you increase the resolution too much, it might make the image look unnatural. Stick to moderate adjustments.
- Ignoring Aspect Ratio: Be mindful of the image’s aspect ratio when resizing. If you stretch it too much, the image could become distorted.
- Using Low-Quality Originals: Starting with a low-quality image means you may still see pixelation, no matter how much you increase the resolution. Always aim for the highest quality original you can.
Conclusion: Sharpen Your Image, Sharpen Your Content
Increasing image resolution is one of the easiest and most effective ways to improve the quality of your photos and visuals. Whether you're creating content for social media, your website, or print materials, high-resolution images will make your content stand out. With tools like Unblurimage AI, you can easily enhance your images without losing quality, making them sharp, detailed, and visually engaging. Don’t let blurry or low-res images hold you back—boost your image resolution and take your visuals to the next level!
FAQs: Increasing Image Resolution
What is an AI image upscaler?
An AI image upscaler is a tool that increases image size and resolution while improving visual clarity. Instead of simply stretching pixels, it uses AI to enhance details and reduce the pixelated look that often appears in low-resolution images.
Can I use Linocut Image Upscaler to increase image resolution online?
Yes. You can use an AI image upscaler for low-resolution images to enlarge photos online and make them clearer for websites, social media, product photos, presentations, and other visual content.
Is image upscaling different from image sharpening?
Yes. Image sharpening improves edge contrast, while image upscaling increases the actual image size and resolution. For small, compressed, or pixelated images, an AI image upscaler is usually more suitable than a basic sharpening filter.
How can I increase the resolution of an image without Photoshop?
You can use online tools like Unblurimage AI, Fotor, or PineTools to increase image resolution quickly and easily without Photoshop.
Does increasing image resolution reduce quality?
If not done carefully, increasing image resolution can reduce quality by causing pixelation. However, AI-based tools like Unblurimage AI minimize this risk.
Can AI tools really improve image resolution?
Yes! AI tools like Unblurimage AI use advanced algorithms to increase image resolution while enhancing details and reducing pixelation.
How do I know if the resolution increase is enough?
Check your image at a larger size. If it looks crisp and detailed without pixelation, the resolution is good. If it looks blurry or stretched, it may need more adjustment.
Can I increase the resolution of any image?
It depends on the quality of the original image. While AI tools can improve most images, extremely low-resolution photos may still struggle to reach high levels of clarity.Unblurimage AI works with a wide range of image types, including photos, graphics, and illustrations. It supports various formats like JPEG, PNG, WEBP, and more.
What is the advantage of using Unblurimage AI over traditional tools like Photoshop or GIMP?
Unblurimage AI is a fully automated tool that requires no manual adjustments, making it faster and easier than traditional software. It also delivers high-quality resolution improvements without any pixelation or distortion.
How much resolution can I increase with Unblurimage AI?
Unblurimage AI allows you to significantly enhance image resolution. The extent of improvement depends on the original image, but it can usually increase resolution by up to 4000x4000px.
Is Unblurimage AI easy to use?
Absolutely! Unblurimage AI is designed to be simple and user-friendly. You just need to upload your image, select the resolution, and let the AI do the rest.
Can I use Unblurimage AI for free?
Yes,Unblurimage AI is completely free and you can use it as much as you want to enhance the resolution of your images!